
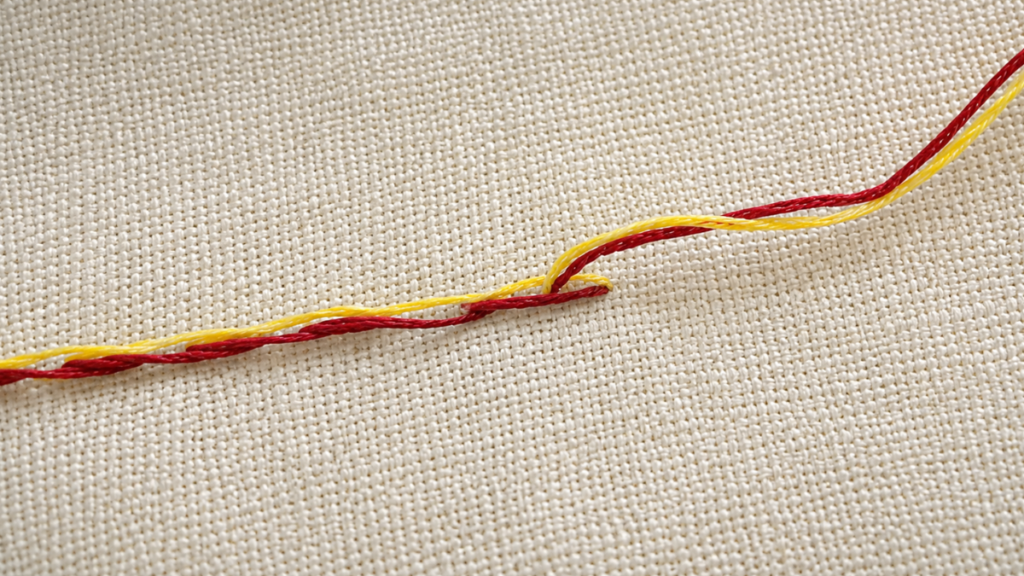
The split stitch is simple, yet it has a special magic that transforms any design. Let’s look at how it works, what sets it apart from other stitches, and how you can master it so your pieces move up to the next level. Get comfortable, grab your hoop, and let’s enjoy this process together.
This post contains affiliate links. If you buy through them you support my work, at no extra cost to you
What the split stitch really is and why you are going to love it
Technical names can make us second guess ourselves sometimes. At its core, though, the split stitch is pure logic. Picture yourself working a line of simple stitches. The key here is that instead of bringing the needle up beside the previous stitch, you pierce straight through the middle of that stitch.
It sounds more complicated than it is, I promise. When you bring the needle up through the strands, you are creating a little link. It is as if every stitch interlocks with the one before it.
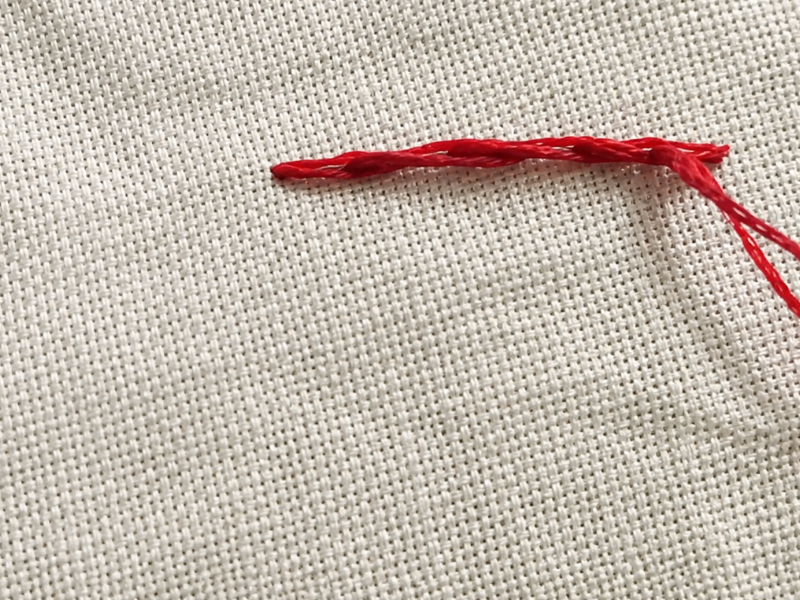
The result? A line that looks like a delicate chain, nice and compact, with a really beautiful texture.
What I love most about this stitch is how versatile it is. If you are just starting out, it will give you a lot of confidence because the finish looks so clean. If you have been embroidering for a while, you will find it is the ultimate tool for small details, the ones that make your work stand out.
What materials you need
Nothing fancy is required here, which is the beauty of embroidery. There are a couple of things, though, that will make your life a lot easier.
First, the floss
I always recommend stranded cotton floss. It is the most common and the most forgiving option for learning, plus the colors are gorgeous, like these pastel shades. Since it comes with six strands, you get to choose how many to use.
For the split stitch, an even number of strands works best, such as two or four. Why? Because it makes splitting the group exactly down the middle much easier when your needle comes up.
About the needle
Look for a sharp one so it slides through cleanly without you having to force it.
The fabric
Any cotton fabric that is not too stretchy will do the job. If you are a beginner, a cotton canvas or a basic linen are my go to favorites.
Step by step: learning the split stitch
Learn the split stitch from scratch, from choosing an even number of strands to working the first stitch, splitting the floss right down the center, and keeping your tension even so the finished line looks like a smooth, continuous chain.
Total Time: 10 minutes
Prepare your floss and needle
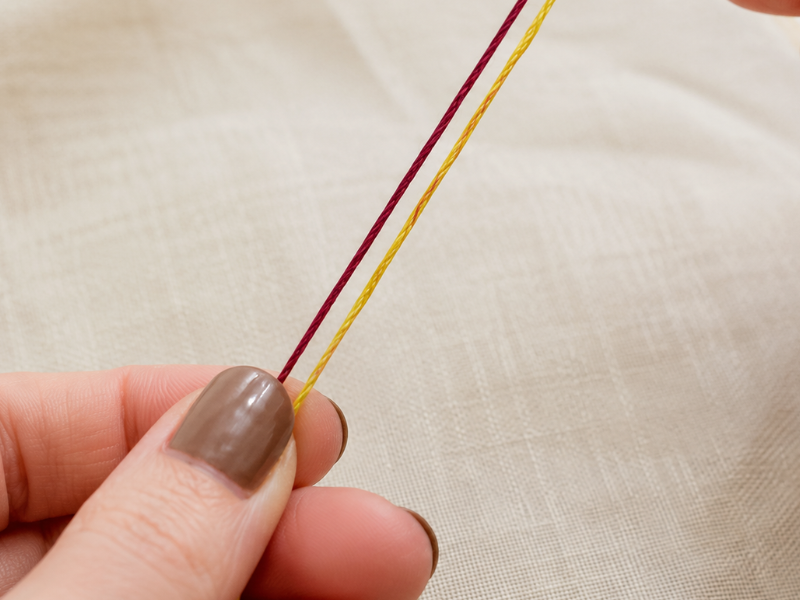
Pick a stranded cotton floss and use an even number of strands, ideally two or four. This matters because it lets you split the group of strands symmetrically with your needle, which is what gives you a flawless finish. Using two different colors is a great way to see what you are doing.
Work the first stitch
Bring the needle up from the back to the front of the fabric at your starting point. Take one straight stitch forward, as if you were marking a simple line. This first stitch is the foundation for every stitch that follows.
Come up through the center of the previous stitch
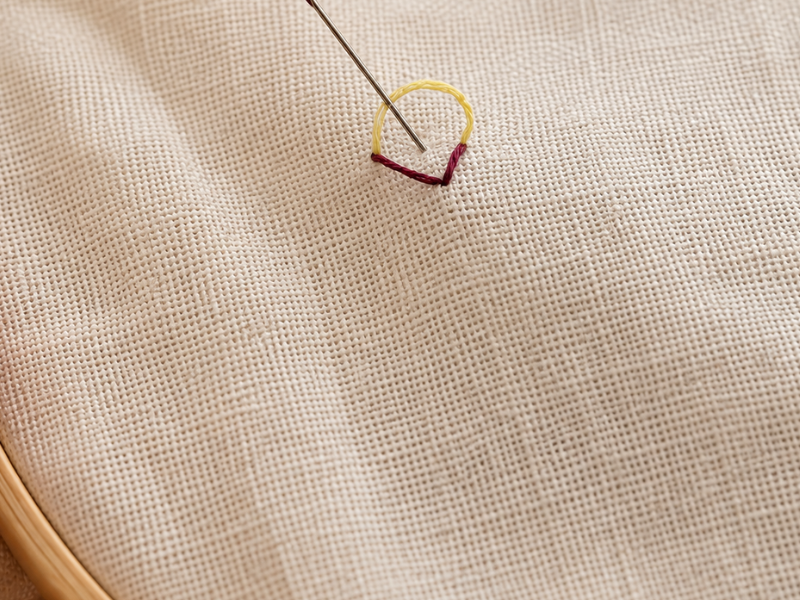
Bring the needle back up to the front of the fabric, following the direction of your line. The most important part here is bringing the tip of the needle up right through the center of the strands of the previous stitch, splitting them into two equal halves. Working with two colors makes this much easier to see.
Pull the thread gently
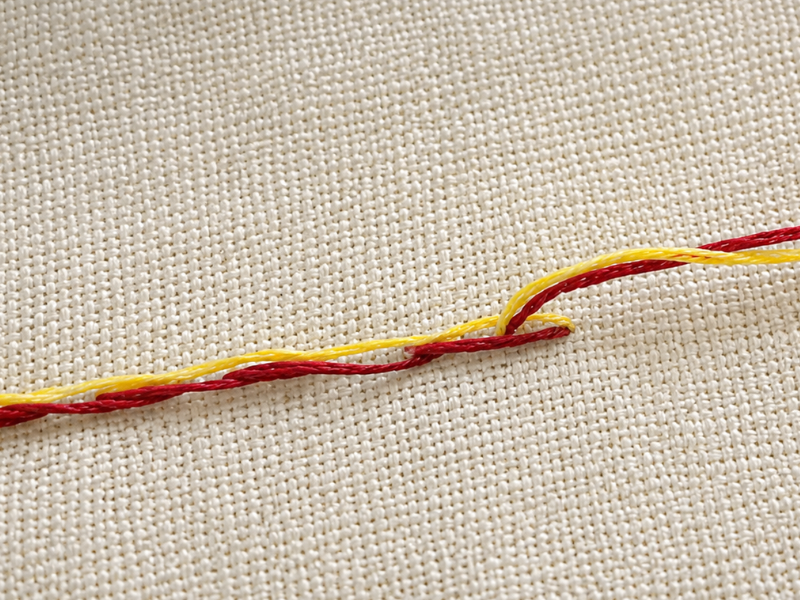
Draw the thread through carefully until the stitch lies flat on the fabric. Do not pull so hard that you distort the weave, or leave it so loose that the stitch loses its structure. You are looking for the sweet spot where the floss sits integrated but relaxed.
Repeat the process along the line
Keep moving forward the same way: bring the needle up ahead, pass it through the center of the stitch you just made, and pull gently. Keeping every stitch the same length is the ultimate trick for making your split stitch line look professional and even.
Tools:
- Embroidery hoop
- Sharp embroidery needle (with a pointed tip)
- Embroidery scissors
Materials: Cotton embroidery floss (stranded) Cotton or linen fabric (not stretchy)
You can watch the video version if you prefer
The art of curves: stitching shapes without fear
The split stitch is king when it comes to curves and lettering. Want to know why? Because it is a relatively short, very flexible stitch, so it handles changes of direction beautifully.
If you have a circle to stitch, for example, make your stitches a little shorter. That gives you more room to turn and keeps the thread from being forced into place. Long stitches on a tight curve will make the line look a bit polygonal, almost as if it had corners.
With the split stitch, as long as you keep the length under control, the curve comes out smooth and continuous, as though it had been drawn with a pencil.
I love using it for names and phrases. It gives them such a human quality, you can tell there was a hand behind it working calmly.
Paired with stem stitch or Pekinese stitch, you can create really lovely designs.
Can you use it as a filling? Exploring new possibilities
You probably assume this one is only good for outlines, but you are in for a surprise. The split stitch is fantastic for filling shapes. Imagine you want to fill in a leaf or a small petal.
Working rows of split stitch side by side gives you a texture that is a little reminiscent of crochet, only much flatter and more elegant. The fill is very firm and it holds up beautifully over time.
Splitting the floss with every stitch also blends the color in a really soft way. You could use two shades of green to fill a leaf, for instance.
It comes in especially handy when you want a color gradient. As you work row by row, you can shift the shade of your floss little by little, and because the split stitch is so compact, the transition between colors is nearly invisible.
This technique does take patience, no question about it, though the visual result is incredibly good.
Common mistakes
I have been there myself, so I know exactly what goes through your head when things do not turn out the way you hoped.
Mistake number one is inconsistency. Sometimes we make one stitch an eighth of an inch long and the next one a quarter inch. That is what makes the embroidery look uneven.
My advice: try to picture the size before you stitch. If it helps, you can make small marks on the fabric with an erasable pencil while you are getting started.
Another classic slip up is not splitting the floss properly. The needle comes up along one side of the strands instead of right through the center, which makes the stitch look misshapen. The key is to look carefully before you push the needle through.
If you see that you missed the mark, no big deal. Undo the last stitch and try again. Do not be afraid to unpick your work, it is all part of learning.
Tips for making your embroidery look professional
Small adjustments are often what separate embroidery that looks amateur from embroidery that looks like it came from a boutique.
To begin with, tension is vital. If you notice the fabric starting to pucker as you split stitch, you are pulling too tight. The stitching should sit relaxed on the fabric.
Another tip: take care of the back. Even though the split stitch looks great from the front, keeping your threads tidy behind the work prevents the knots and lumps that eventually show through on the right side.
Finally, thread quality. Do not force yourself to work with cheap floss that tangles constantly. Good cotton floss, well combed, makes passing the needle through the center so much easier.
Frequently asked questions about the split stitch
What happens if I use an odd number of strands, like three?
You can absolutely do it, the split just will not be symmetrical. Your needle will pass between one strand and the other two. That sometimes creates an interesting artistic effect, though if you want the classic, symmetrical finish, stick with even numbers.
How do I clean the embroidery if it gets a little dirty while I work?
Try to always stitch with clean hands. If it does pick up a small mark, you can use a little cold water with a mild soap, dabbing gently with a cotton swab. Never rub, since that can damage the threads.
How do I finish off the line?
When you reach the end of your design or curve, simply secure the thread on the back with a couple of small knots, or by running it under the stitches you have already worked. That is all there is to it!
Embroidery is a deeply personal process, and every one of us works at her own pace. There is no rush to finish. What matters is enjoying the thread moving through the fabric, the sound of the needle, and watching an image slowly appear where before there was nothing but empty cloth.
I would love to know what you think of this technique. Had you tried it before? Did it go well, or did it drive you a little crazy? Tell me in the comments. I love reading about your experiences, hearing what projects you have going, and finding out what gave you the most trouble.
If you have a photo of a piece where you used this stitch, or if reading this makes you want to give it a try, let me know. I would love to see your creations.

