Finishing fabric edges with decorative embroidery. I’ll guide you through the process step by step, so you can add a beautiful handmade touch to napkins, cushions, and other sewing projects.
Sometimes we complicate our lives by looking for the most difficult sewing technique in the world, the most intricate pattern, or that latest-generation sewing machine that promises to work miracles for us.
However, if there’s one thing I’ve learned over the years among threads, scraps, and needles, it’s that the true magic of handmade things lies in the little details. Those that are done slowly, enjoying the process and feeling the needle go in and out of the fabric.
Have you ever had a gorgeous piece of fabric at home, maybe an old linen, a rustic cotton, or a scrap leftover from another project, and you’re not quite sure how to finish it?
I see that frayed edge and I think that giving it a normal machine hem feels a bit bland, like it lacks soul. We want it to have personality, so that when someone picks up that napkin, that cushion, or that baby blanket, they can feel the love behind every stitch.
This post contains affiliate links, using them helps me out at no extra cost to you
Why finishing fabric edges by hand?
When we buy home textiles or accessories at big stores, everything usually comes with perfect but cold seams. A quick pass with a serger, and that’s it.
Finishing your fabrics by hand has a few benefits that go far beyond just aesthetics. Let me tell you why, for me, it’s almost therapeutic:
- It’s a completely relaxing process: you don’t have to press a pedal or worry about whether the sewing machine tension decides to play a trick on you. It’s just you, your needle, and the thread.
- You can make use of any scrap: you can turn a square piece of fabric that you had lying around into a wonderful cloth napkin, a neck scarf, or a small mat for your bedside table.
- You give old textiles a second life: if you have some sheets that have worn out in the middle but the edges are fine, you can cut those sides and create individual napkins finished with this stitch. It’s a beautiful way to recycle.
- You hardly need any materials: you can forget about complicated patterns, huge cutting tables, or super expensive tools. With what you have in your basic sewing kit, it’s more than enough to start today.
The essential materials to start embroidering without complications
To make this finishing touch, you don’t need to go to a specialty haberdashery or spend a fortune. In fact, my recommendation is to first look in that little metal cookie tin where you keep your threads (we all have one, admit it), and use what you already have at home.
Here’s the list of what we’re going to need to get started:
The fabric of your choice
To start practicing, I recommend a fabric with a moderately visible weave. Rustic linen, fine canvas, Panama cloth, or a slightly sturdy cotton work well.
At first, avoid very stretchy or extremely thin fabrics like silk, because they can be a bit slippery while you get the hang of thread tension.
Threads that add texture and color
This is where you can get as creative as you want. Personally, I love using the Mouliné-type cotton thread (the typical cross-stitch one), using three or four strands so that the design stands out.
Another fantastic option is the perle cotton thread (from number 8 or 12, depending on how thick you want the finish), since it has a very nice satin shine and doesn’t fray when working with it.
Suitable embroidery needles
Look for a needle that has an eye big enough to thread the thread without straining your eyes, but not so thick that it makes huge holes in the fabric. Embroidery needles with a sharp point (sometimes called long sewing needles or embroidery needles), they are the ideal ones.
Small, sharp scissors
A good pair of sewing scissors or little embroidery scissors that cut thread cleanly will save you a lot of frustrations and prevent the thread ends from fraying too soon.
The step before making the first stitch
Before we start stitching away, it’s important to prep the fabric a bit so that the final finish looks clean and doesn’t fray with washes.
This step is really simple but makes the difference between a project with a professional finish and a sloppy one.
The clean cut
Make sure the edge of the fabric is nice and straight. If it’s a linen or plain cotton fabric, a great trick is to pull a thread from the fabric itself and cut along the little transparent channel that forms.
This way you make sure you’re cutting perfectly along the grain and the finish won’t be crooked.
The safety hem
Depending on how much your fabric frays, you have two options:
- Simple folded hem: fold the edge of the fabric about half a centimeter to the wrong side, and then another half centimeter. Baste it quickly, or pin it so it doesn’t move. We’ll do the embroidery right over this fold to hide the frayed edge.
- Controlled frayed edge: if you like the rustic, frayed style, you can leave the edge free, pull out a few threads to create a small fringe, and do the embroidery just above where the fringes start, to stop it from fraying further with use.
The step-by-step guide to finishing fabrics by embroidering
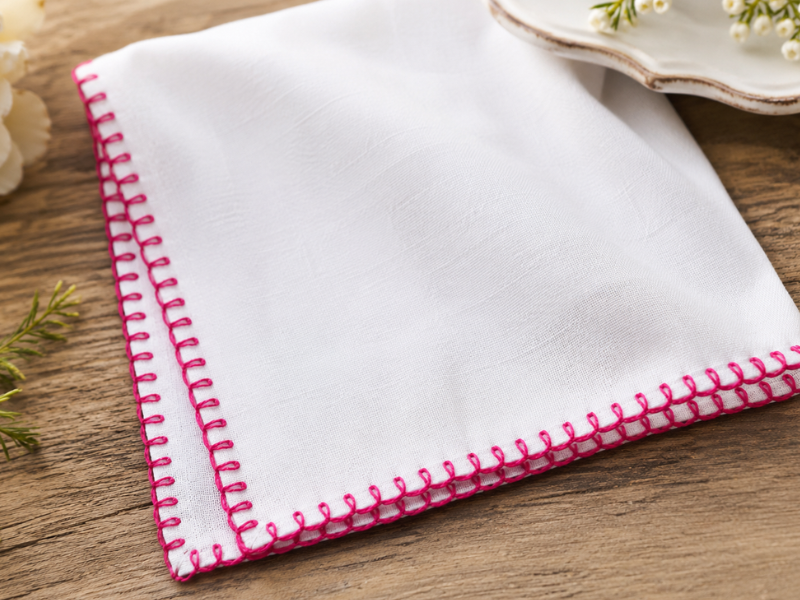
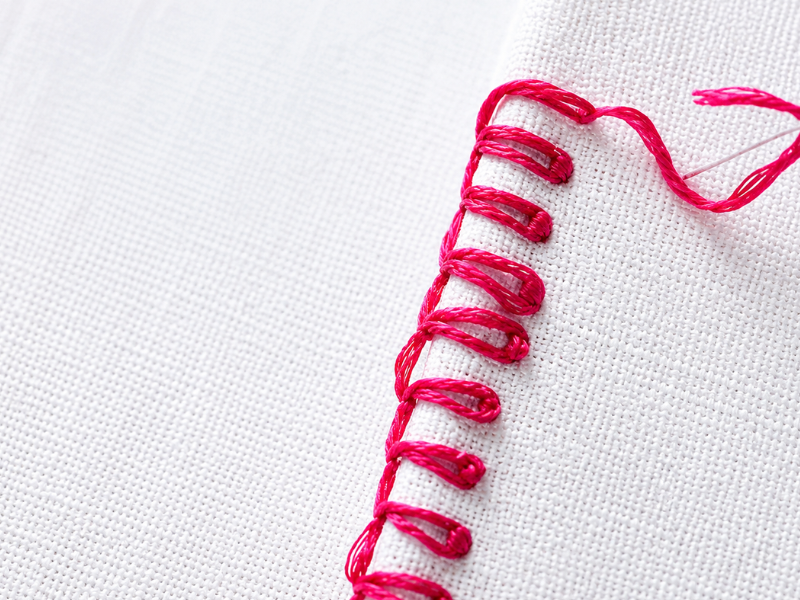
This design is based on a very pretty and decorative variation of the buttonhole or blanket stitch, combined with a three-dimensional touch that gives it body.
How to finish the edge of your fabrics with a simple hand embroidery
Total Time: 30 minutes
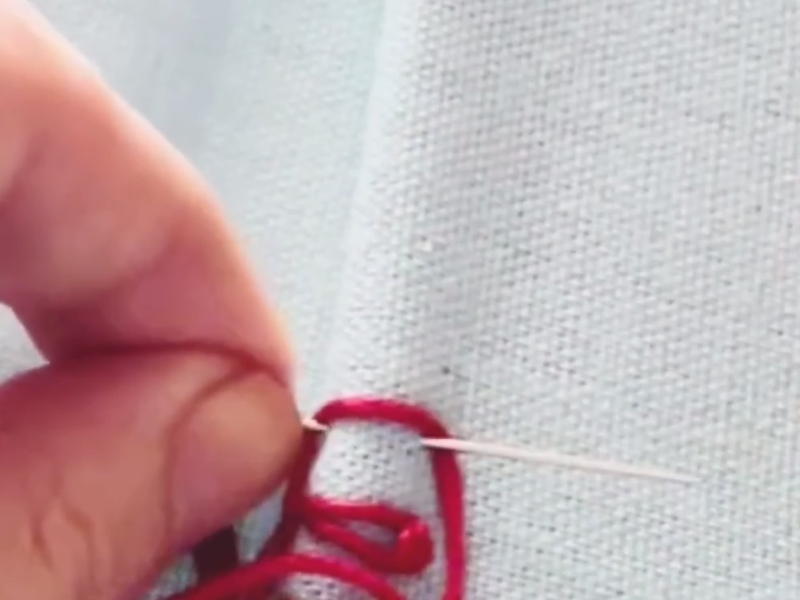
Hide the starting knot
Pass the needle from the inside of the hem fold to the right side of the fabric. This will keep the starting knot completely hidden on the back.
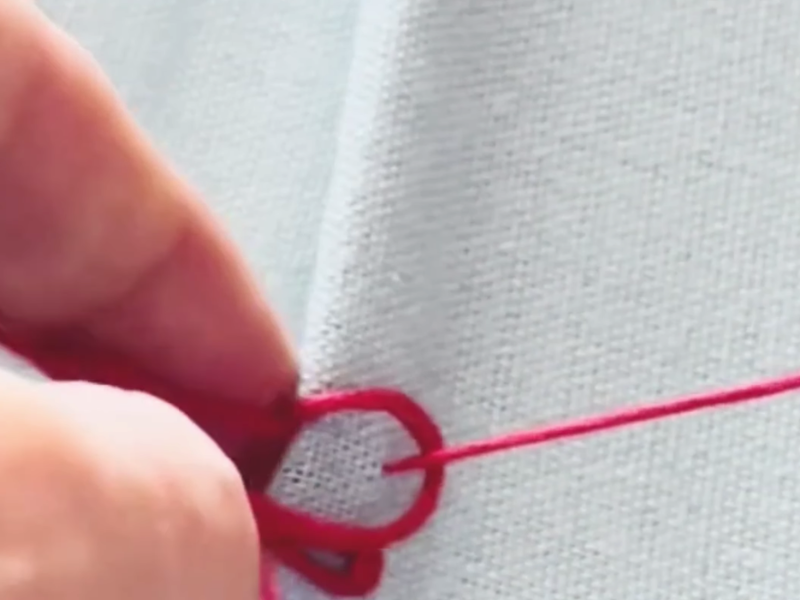
Make the structure of the finishing stitch
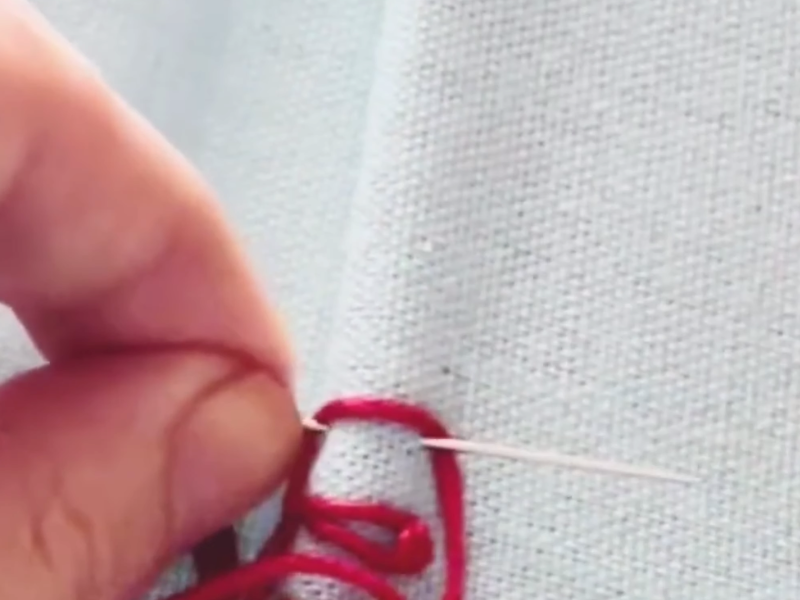
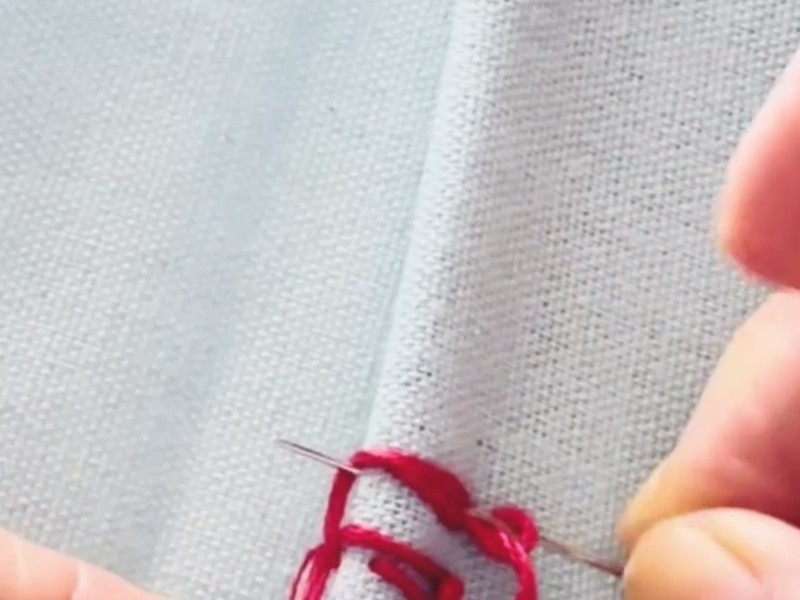
Insert the needle from back to front about half a centimeter from the edge. Pass the needle through the thread loop before pulling to form a protective horizontal line on the edge.
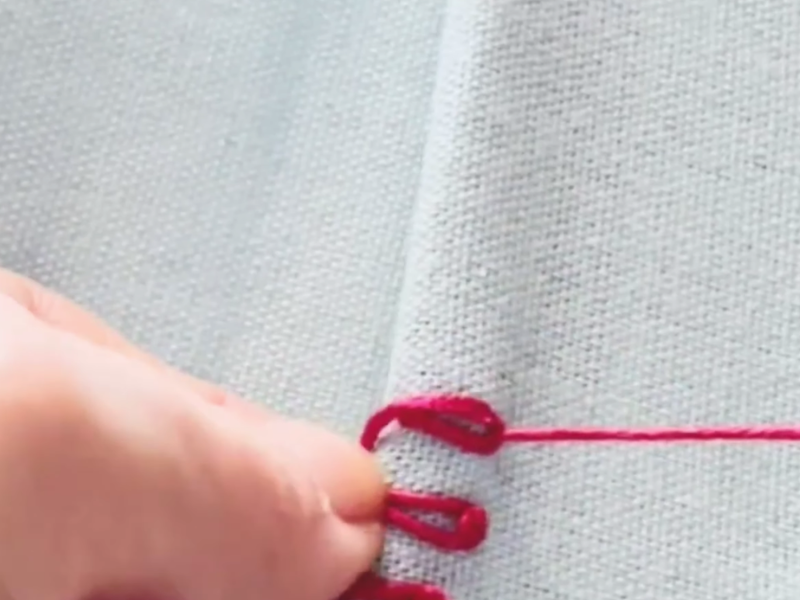
Keep the distance and the pace
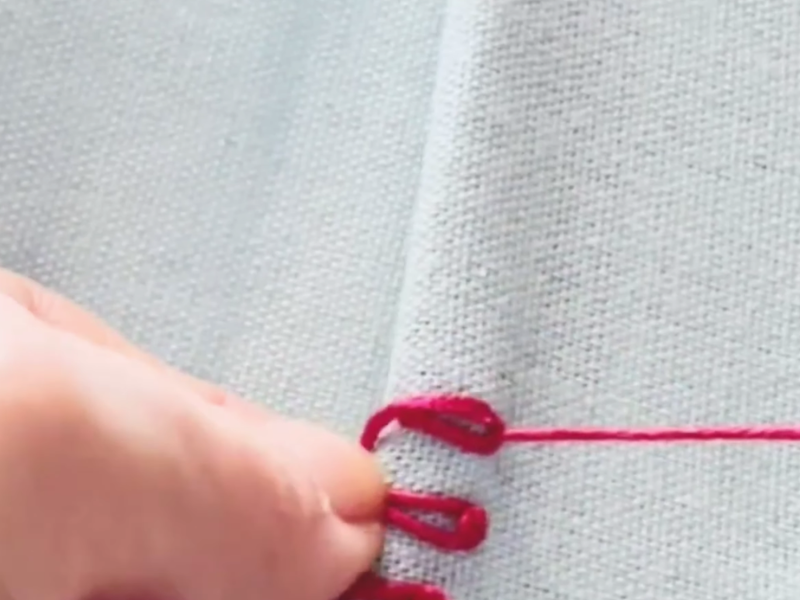
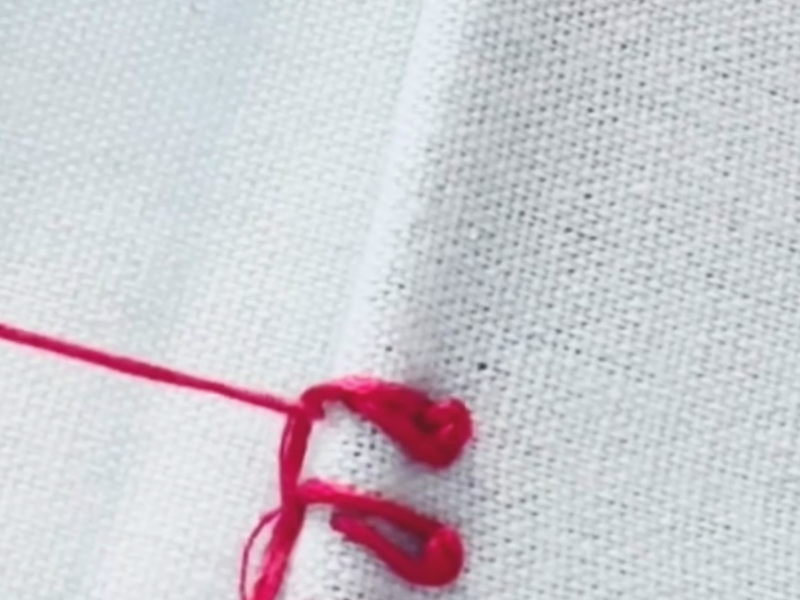
Move to the right, leaving half a centimeter between stitches. Keep a light and steady tension to prevent the fabric from puckering or gathering.
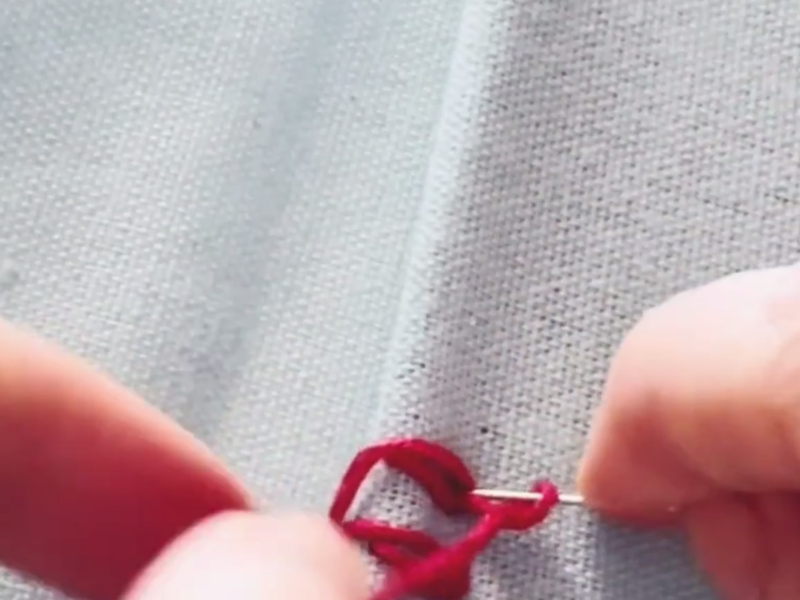
Add the decorative French knot
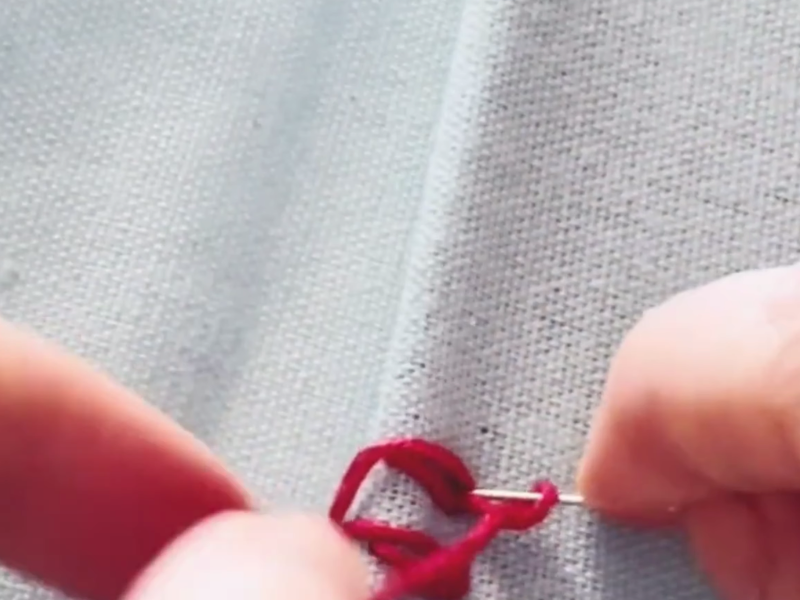
Hold the thread tight, wrap it around the needle twice, and insert the needle back in very close to the exit point. Pull the thread back to create a small raised effect.
Estimated Cost: 2 USD
Supply:
- Linen or cotton fabric
- Cotton thread Perlé or Mouliné
Tools:
- Sharp-tipped embroidery needle
- Small sewing scissors
You can see it in a video on YouTube
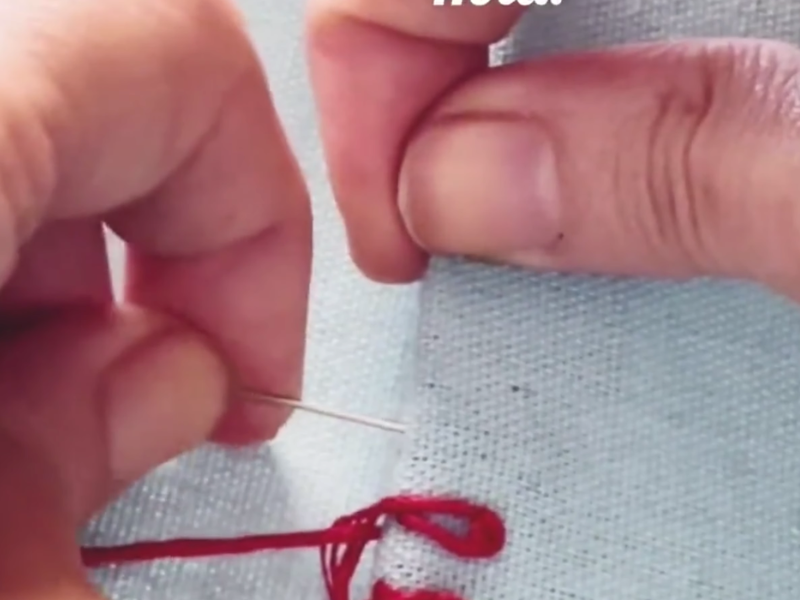
Step by step in pictures:
Practical tips to make your embroidery look flawless
As you keep progressing, you’ll discover your own tricks, but here are some tips that would have been really helpful to me when I started out with hand-finishing:
Control the thread tension
This is the most common mistake when we start. If you pull the thread too much, the edge of the fabric will shrink and become gathered.
If you leave it too loose, the edge loops will wobble and won’t protect the fabric. The ideal tension is when the thread rests on the fabric, gently hugging it without deforming it.
The importance of needle length
To make this type of edge finish smoothly, a needle just a little longer than usual will help you guide the thread more precisely. Your hand will get much less tired if you work with a comfortable needle.
What to do when the thread runs out halfway
Don’t worry, it’s not the end of the world and you don’t have to undo anything. When you see that you have about ten centimeters of thread left, just pass the needle to the back of the fabric, make a small securing stitch by passing the needle through the loop on the back, and hide the remaining thread by running it under the stitches you’ve already made.
To start with the new thread, thread your needle, tie the knot, and bring the needle up through the same spot where you finished the last stitch to continue like nothing happened.
Creative ideas to apply this finishing touch in your home
Once you get the hang of this trick, you’ll want to put it on everything that comes your way.
Consider yourself warned that this little world is really addictive. Here are a few ideas to inspire you to create pretty details for your home:
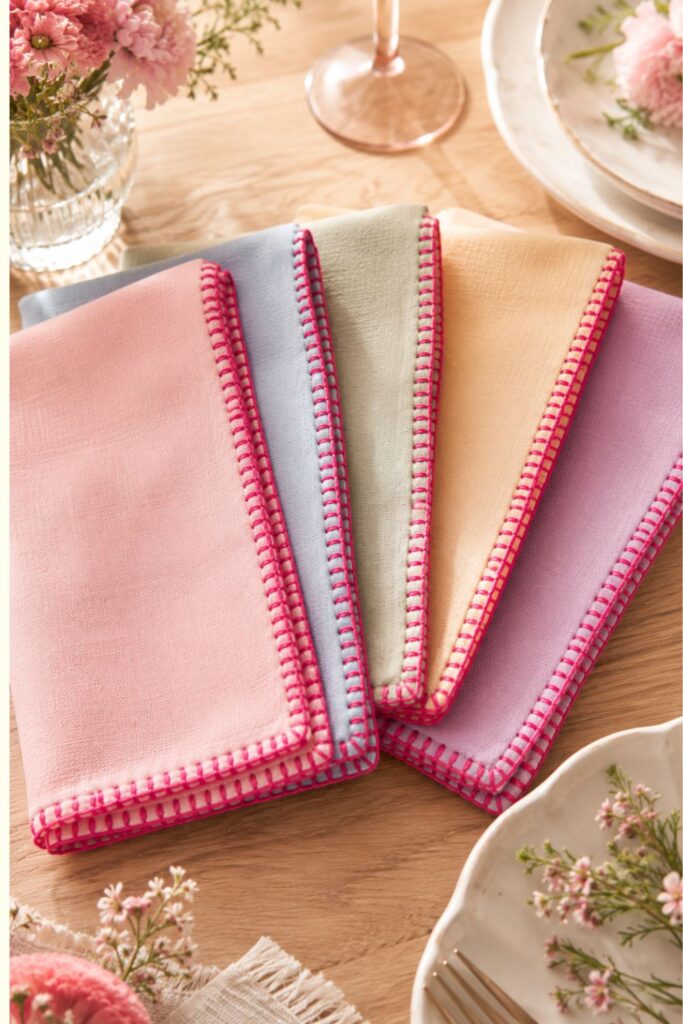
Individual linen napkins
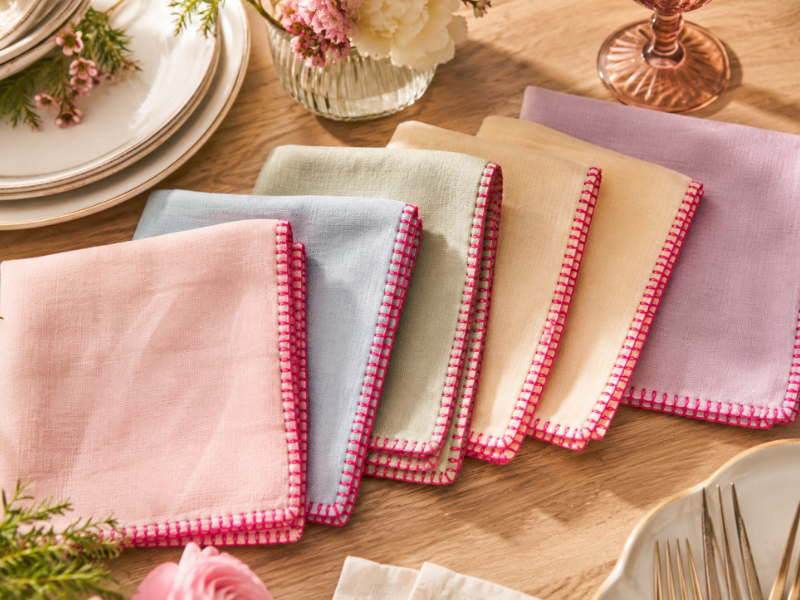
Buy a meter of rustic linen in a natural shade (like sand or stone), cut it into squares of about 40×40 centimeters, and finish the four sides with perlé cotton thread in a contrasting color, like olive green, terracotta, or navy blue. You’ll have a unique set of napkins that will dress your table with a perfect Provençal style.
Charming sofa cushions
If you have a plain and somewhat boring cushion cover, you can add this decorative trim all around the outer edge. Use a thick thread so it really stands out, and you’ll see how that simple cover becomes the star of the sofa.
Pocket squares and little gift details
A white cotton handkerchief finished by hand with a delicate thread in a pastel shade is a classic, subtle, and meaningful gift. It’s a lovely way to tell someone that you took the time to create something special just for them.
Frequently asked questions about Finishing fabric edges with embroidery
Can the fabric be washed after doing this hand embroidery?
Of course. Well-finished hand embroidery is very durable. I recommend washing these pieces with lukewarm or cold water, preferably on a delicate cycle if you use a washing machine, or by hand if the fabric is very fine. Use a mild detergent so the thread colors don’t lose their intensity over time.
What kind of thread is best for fabrics that are going to be washed a lot?
For everyday items like napkins, tablecloths, or towels that are going to be washed a lot, high-quality Perle cotton thread or Mouliné thread are the best options. These threads are designed to withstand washes without losing color or falling apart.
Do I have to use a hoop to do this embroidery finishing?
For this type of embroidery on the edge of the fabric, a hoop is usually not necessary and, in fact, it can be a bit uncomfortable because we’re working right at the edge of the material. It’s much more comfortable to hold the fabric directly with the fingers of your left hand, controlling the tension directly and manually.
How do I prevent the corners from looking weird or puckered?
Corners are always the critical point of any finish. When you reach the corner of your fabric, make a stitch right at the forty-five-degree angle to secure the corner well. You can make three stitches that start from the same central point at the base but fan out upwards: one to the left side, one to the corner, and one to the right side. This way, the corner is perfectly protected and has a very decorative pattern.
Can I do this finishing on stretch fabrics like jersey?
It can be done, but it takes a bit more practice because knit fabrics stretch very easily when you pull the thread. If you feel like trying it on a T-shirt or stretchy garment, I suggest applying a strip of water-soluble interfacing to the back of the edge before you start embroidering. This will give the fabric stability while you work and will disappear completely with the first wash.
Would you like to try this finishing touch on any of your sewing projects?
Do you have any scraps at home waiting for a second chance? If you have any questions while you’re holding the needle or want to share which fabric you’ve chosen to start with, leave me a comment down below.
I’m really excited to read your comments, share tips, and see how you put your personal touch on these stitches. I can’t wait to hear from you!