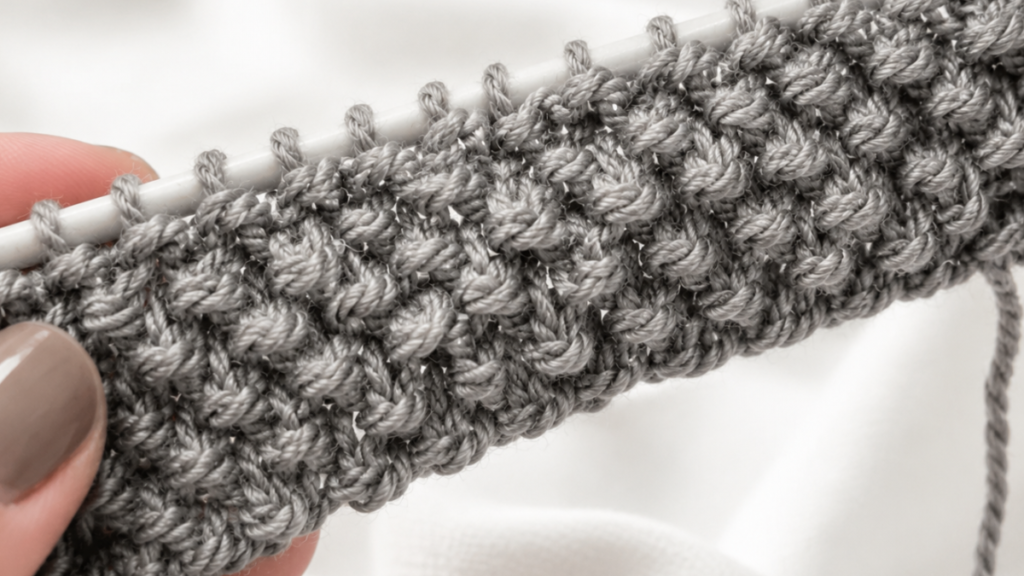
Seed stitch is so much more than a mix of knits and purls. It is a lesson in balance. It is the stitch that, despite how simple it looks, can lift a basic garment into designer piece territory. It is versatile, hard wearing, reversible, and above all it is wildly addictive once you understand the logic behind it.
If you have ever felt frustrated because your knitting does not look as “professional” as you would like, or if you are simply after a technique that lets you tune out the noise and drop into a state of total creative flow, you have come to the right place.
This post contains affiliate links. Using them supports my work at no extra cost to you
Why seed stitch is the perfect partner for any project
When we start out in the knitting world, we often get swept up by the appeal of lace patterns, impossible braids, or cables that look like mazes.
That makes sense, since they are gorgeous and eye catching. Over time, though, you realize that true elegance lives in even textures. Seed stitch is, at heart, a texture stitch.
As you knit it, you create a grainy effect that calls to mind seeds scattered across the surface. That effect is no accident. It comes from constantly alternating knits and purls, both across the row and up the fabric. This structure brings undeniable technical advantages:
- It is reversible: unlike stockinette, which has a defined right side and a wrong side we do not always want on display, seed stitch looks identical on both faces. That is a huge advantage for scarves, blankets, cowls, and shawls, where the back will be visible constantly.
- It adds structure: have you ever knit something that went baggy with wear? Seed stitch is a “stable” stitch. Alternating the stitches builds a supporting structure that helps garments hold their original shape far better.
- Thickness and warmth: because of the way the stitches interlock, the resulting fabric is thicker and insulates better. It is easily one of the best stitches for winter in cold climates.
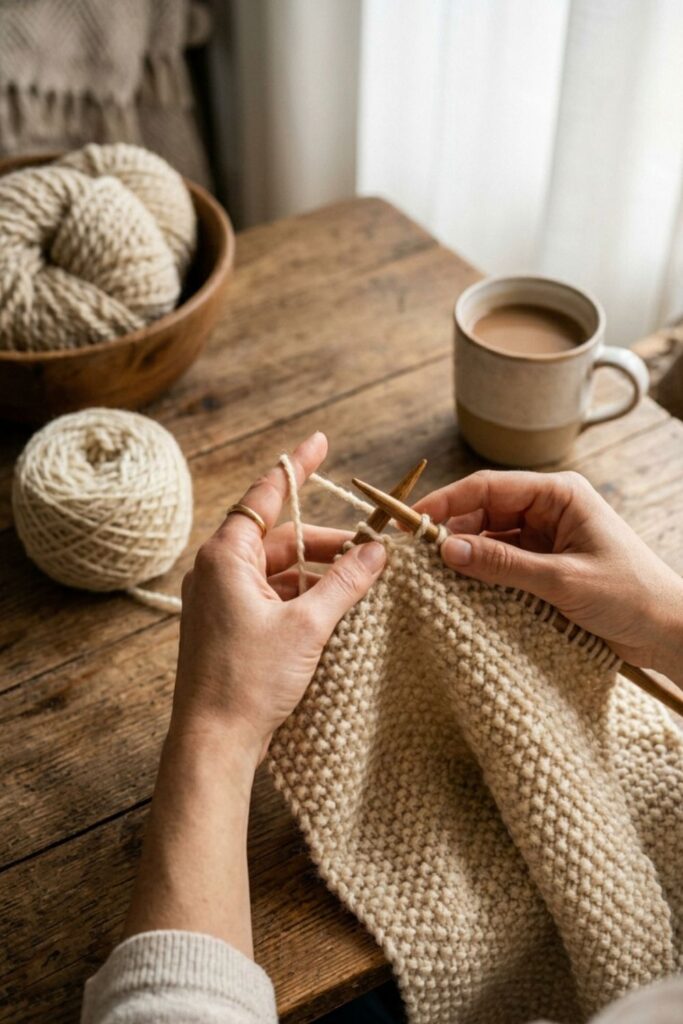
The anatomy of the stitch: understanding the rhythm of the offset
Knitting well means understanding what is happening between your fingers. The magic of seed stitch lives in the “offset”.
Picture yourself working a row. You start with a knit stitch and follow it with a purl. On the next row, if you knit exactly the same way, you would end up with a column of knits and a column of purls, which is ribbing. Seed stitch is the rebel of the family, since it sets out to break that continuity.
On the second row, wherever you see a stitch sticking out like a “V”, which is a knit stitch, you purl it. Wherever you see a small bump or nub, which is a purl stitch, you knit it.
Doing this “flips” the stitch. You are forcing the fabric to change direction. That constant change is what creates the grainy, rich, tactile surface.
It is an exercise in attention. You cannot run on autopilot, yet it does not demand exhausting concentration either. That sweet spot of mental engagement is exactly what makes knitting seed stitch so relaxing.
Getting ready: choose your tools
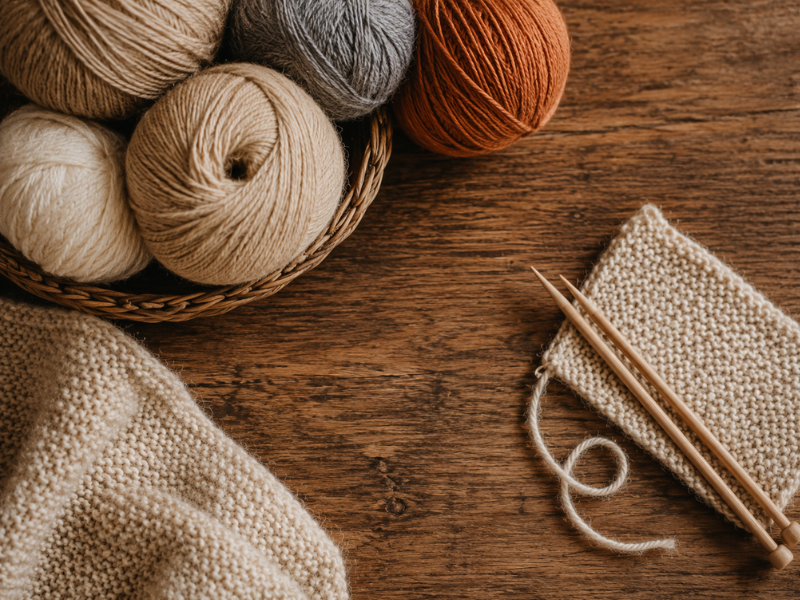
Knitting may be an austere art, but choosing your tools well can be the difference between a pleasant experience and a constant fight against your materials.
Choosing your yarn
For seed stitch, I strongly recommend staying away from novelty yarns, meaning anything very fuzzy, sparkly, or irregular in texture.
The reason? Seed stitch already has a texture of its own. Add a complicated yarn on top and the visual result turns chaotic, so you never get to appreciate the work you put in. Look for fibers with good stitch definition:
- Merino wool: the gold standard. Incredibly soft with wonderful stitch definition.
- Alpaca blends: they give you unbeatable drape and warmth.
- Cotton with synthetic fibers: perfect for transitional pieces, or if pure wool bothers your skin.
The needles: wood vs metal
If you are in your early stages, go for bamboo needles. Why? Because seed stitch has you moving the yarn back and forth constantly.
Metal needles are very slippery, so without much practice under your belt the stitches will slide right off. Wood gives you that slight friction that keeps stitches where you put them, which means control and confidence.
Needle size and tension
Always check the label on your skein. If the manufacturer recommends a US size 8, which is 5 mm, use that, or move up to a US size 9, which is 5.5 mm, if you want the fabric a little airier.
Needles that are too small will make your seed stitch so dense that it loses all its charm. You end up with a board rather than a piece of fabric.
Tutorial: seed stitch step by step
Let’s sit down together and knit. Take a seat, adjust your light, and drop your shoulders. This is our moment.
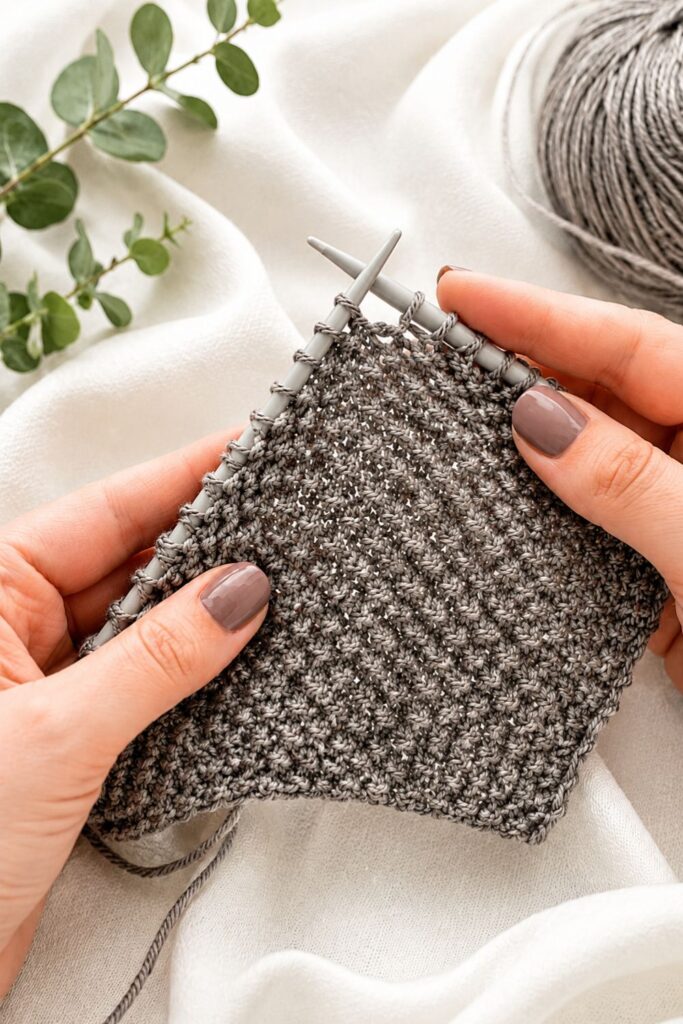
Learn how to master seed stitch, a reversible fabric with an elegant, professional grainy texture that is perfect for scarves, blankets, and winter sweaters.
Cast on your stitches
Grab your needles and cast on an even number of stitches. An even count is vital so the offset sequence never breaks and the fabric stays balanced.
Knit the foundation row
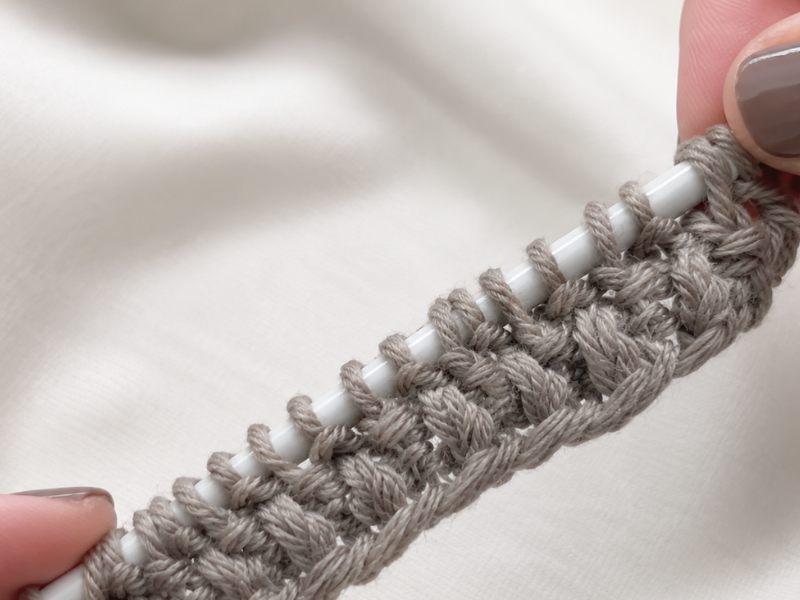
Alternate one knit stitch and one purl stitch all the way across the needle. Keep your tension steady so the texture comes out even.
Apply the offset on the second row
Look at the stitches on your needle. If a stitch looks like a “V”, it is a knit stitch, so you purl it. If it shows a small horizontal bar, it is a purl stitch, so you knit it.
Keep the rhythm going
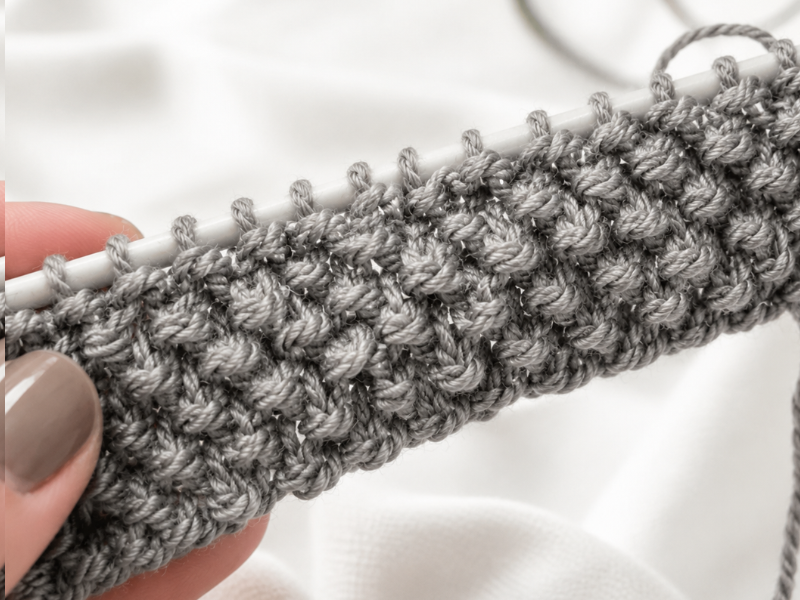
Carry on always working the opposite of what you see on the needle. That constant alternation is what generates the grainy effect seed stitch is known for, and what makes it so addictive.
Bind off your work
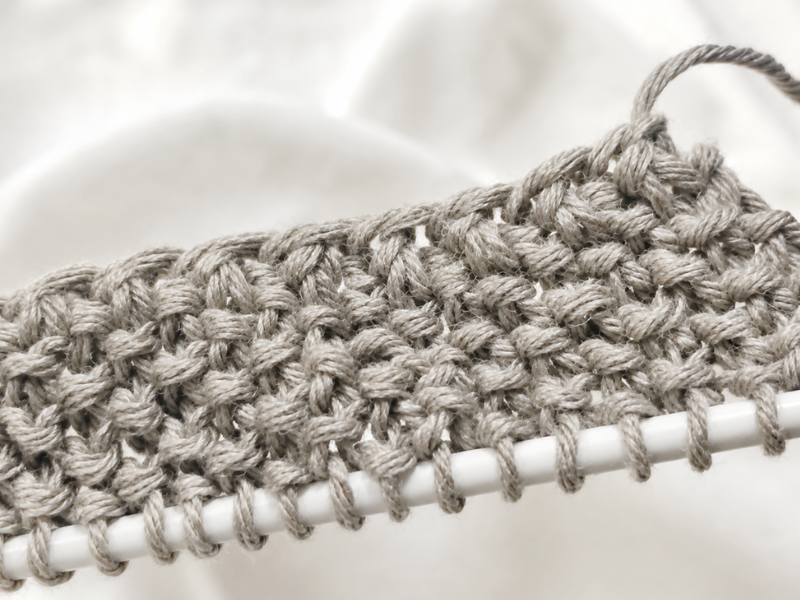
Once you reach the length you want, bind off gently. Avoid pulling the yarn too tight as you go so the edge does not end up taut or stiff.
Supply:
- Good quality yarn
- Stitch markers
Tools:
- Knitting needles
- Scissors
- Tapestry needle
Tips for a professional finish
I want your pieces to look handmade in the very best sense, with all the quality of an artisan workshop behind them, rather than homemade in the dismissive sense. These are the details that make the difference:
The chain edge, or slipped stitch selvedge
Nothing gives a beginner away faster than a loose, uneven edge. To avoid it, use the slipped stitch selvedge:
- At the start of every row, do not work the first stitch. Simply slip it from the left needle to the right without doing anything to it.
- Always knit the last stitch of every row, or always purl it, as long as you stay consistent. This creates a crisp, attractive chain edge that is also far easier to seam if you have pieces to join later.
Handling the join between skeins
Knots really show in seed stitch. Do not tie a sailor’s knot to join one skein to the next. Learn to work the new yarn in by knitting the first few stitches with both strands held together, the old one and the new one, for an inch or two, or use the magic knot method if your yarn allows it.
How to fix a mistake
Seed stitch is a little unforgiving when you slip up. Miss a stitch or work two of the same in a row and the pattern breaks, leaving a line that clearly “does not fit”. Do not get discouraged. Ripping back to the mistake is by far your best move.
- Tip: if you have to rip back, use a needle one size smaller than the one you are working with to pick the stitches up as you pull the yarn. That keeps the stitches from opening up or getting lost.
You can watch the video tutorial if you like
What should you knit in seed stitch? Inspiration for your next projects
You have the technique down. Now what do we do with it? Here is a list of projects sorted by difficulty and usefulness.
1. Cowl or infinity scarf
This is the beginner project par excellence. Being reversible and having that air trapping texture makes it perfect for keeping your neck warm. You can work it as one long piece and seam the ends together, or knit it in the round on circular needles.
2. Throw blankets for the couch
A seed stitch blanket is a treasure. My advice: pick a yarn with a good percentage of sheep’s wool for warmth and a little acrylic so it does not weigh a ton.
It is a long haul project, though the result is a piece that will get passed down through generations.
3. Tote bags
Seed stitch is very hard wearing. With a heavy cotton or a soft T-shirt yarn, you can knit yourself a bag with real body and structure. The texture helps it hold its shape even when you load it up with your things.
4. Oversized sweaters
If you are feeling brave, go for a sweater. Since it is a stitch with plenty of body, seed stitch gives loose fitting sweaters a modern, structured edge.
I recommend using a simple sweater pattern as your base and swapping the stockinette for seed stitch. The visual effect is striking.
Frequently asked questions about seed stitch
Why does my seed stitch look like ribbing?
Most likely you are not working the offset. If you work each stitch as it presents itself, knit over knit and purl over purl, you get ribbing, specifically 1×1 rib. Remember: in seed stitch you always have to do the opposite of what you see.
How do I block a piece knit in seed stitch?
Blocking is essential for evening out the stitches and letting the fabric breathe. I recommend a gentle block: dampen the piece, roll it in a towel to squeeze out the excess water, then lay it flat on another dry towel and coax it into the right shape. Do not stretch it too much, or you could lose the lovely texture you worked so hard for.
What do I do if I have a run or a dropped stitch?
Do not panic. If a stitch has come undone, find a crochet hook close in size to your needles. Work the stitch back up, catching each loose loop one at a time, until you reach the current row. It is a bit like minor surgery, and it is completely fixable.
Is it a good choice for children?
Yes, it is a stitch that feels wonderful to the touch. It is ideal for baby cardigans or booties, since the texture stimulates their sense of touch. Being such a dense stitch, it is also very warm, which is perfect for little ones.
The emotional connection: knitting as an act of self care
Beyond the technique, I want to talk to you about what happens inside you while you knit. We live in a society that rewards us for speed, for immediacy, for fast results. Knitting is, deep down, an act of quiet rebellion.
When you sit down with your needles, you are saying: “I am going to spend my time making something”.
Seed stitch has a hypnotic quality. That knit purl rhythm turns into a meditation. There are days when I sit down to knit with my head full of problems, and after two or three rows my breathing has synced up with the movement of my needles.
It is an incredibly powerful tool for managing your emotions. Never underestimate the power of this time alone with yourself.
If the world feels like it is moving too fast, grab a skein, find a comfortable corner of your home, put on music you love, and start knitting. It does not matter if all you make is a four inch square.
What matters is the space you gave yourself to be present.
Caring for your creations: treat them the way they deserve
You have spent hours, maybe weeks, creating a piece in seed stitch. Now comes the part where you look after it so it lasts for years.
- Washing: always by hand, with lukewarm water and a mild detergent made for delicates. Skip the fabric softener, since natural fibers lose their breathability with it and the fabric can end up matted.
- Drying: never hang a wet seed stitch piece on a hanger. The weight of the water will distort it beyond repair. Always dry it flat on a level surface, ideally on top of a towel.
- Storing: do not store heavy wool pieces hanging up. Fold them carefully and keep them in a drawer. If you can, tuck in a few lavender sachets to protect them from moths.
The value of the process over the result
I know we often fixate on the ending: “How will the sweater turn out?”, “Will it be too small?”, “Will the mistakes show?”. I want to invite you to shift your focus, though. The magic of seed stitch is not in the finished sweater, it is in the feel of the yarn running through your fingers.
Every stitch is a thought. Every row is a pause. Making a mistake is not a disaster, it is part of the journey. I have seen work by incredible makers that has small errors in it, and far from taking anything away, those errors add value. They are the human proof that someone sat down with their hands and gave their time to create that.
Mastery is not the absence of mistakes, it is the ability to accept them and keep going. If this is your first time knitting seed stitch, get ready to enjoy the road. Do not compare yourself to anyone else. Your knitting is the result of your own energy, your own tension, and your own story. That is what makes it unique.
Your turn
I would love to know how you get on with this stitch. Did the logic of the offset take a while to click? Have you started a project and gotten stuck? Or maybe you finished something and cannot wait to show it off?
Leave a comment below. Tell me what you thought of this guide, what questions you still have, and above all what you are going to knit. It thrills me to watch us grow together.
Every time one of you shares her progress, it inspires me to keep creating content, to keep digging into new things, and to keep sharing this love of yarn.
Do not forget to bookmark this post, share it on social media if you think it could help a friend who wants to get started, and above all, keep knitting.
The world is a little warmer, a little more human, and a whole lot lovelier when we spend our time making beautiful things with our hands.