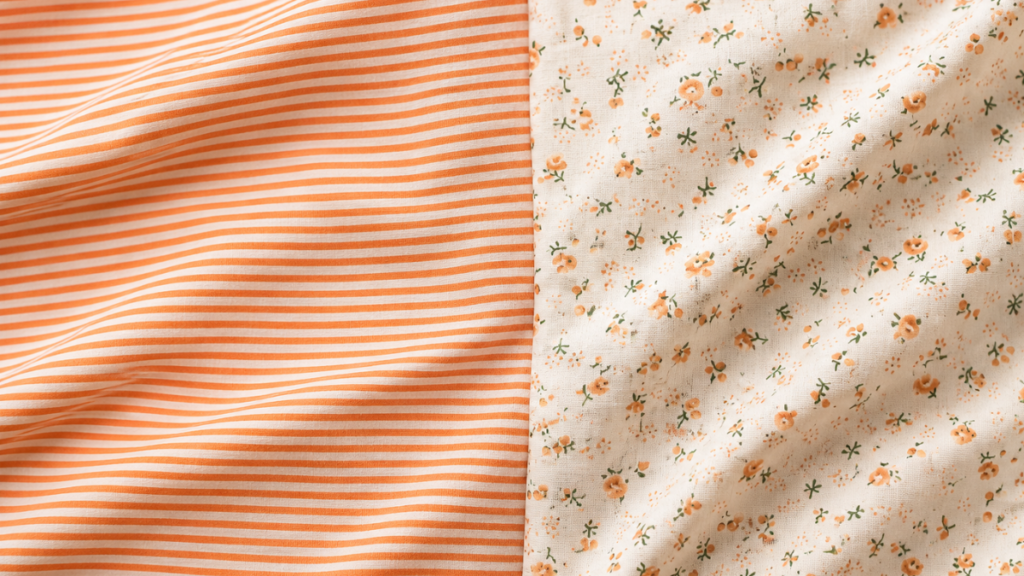
Discover the relaxing art of hand sewing patchwork. A step by step guide packed with secrets, tricks, and slow stitching tips for creating quilts with soul while you enjoy every single stitch.
Some days life pulls us along at a pace that is far too fast to really savor anything we do. The sewing machine is a fantastic tool that helps us move quickly and finish big projects in the blink of an eye. That same speed, though, often disconnects us from the tactile pleasure of handling fabric, of nudging the fibers into place, of enjoying the process itself.
Hand sewing, especially in a craft as detail oriented as patchwork, is not an outdated method or a waste of time. It is a wonderful way to take back control of your free time and enjoy a space that belongs entirely to you.
This post contains affiliate links
The slow stitching movement and the wellbeing it brings to your routine
When you decide to sit down and piece patchwork by hand, you slip into a state of focus that does you a world of good. The steady, rhythmic motion of the needle going in and out of the fabric works like a mental pause button. It lowers the stress you have built up over the workday, helps you gather your attention, and pulls you back into the present moment.
While you stitch, you are not turning over tomorrow’s worries or your to do list. All of your attention goes to the exact spot where your needle is about to land next.
This kind of handwork gives you a flexibility no sewing machine can match. You can tuck your little sewing kit into your bag for a train ride, stitch while you wait at a doctor’s appointment, enjoy your project on a park bench, or work on your blocks from the couch while you chat with your family. Your sewing pouch becomes a portable refuge that goes wherever you go, letting you turn those small pockets of dead time into something that genuinely fills you up.
There is one important detail that anyone who has been piecing for years knows perfectly well. Certain seam intersections, like the ones you find in many pointed star blocks or in traditional hexagon designs, are far easier to match by hand than by machine. Your fingers have a sensitivity and an ability to adapt that no piece of metal or presser foot can replicate, no matter how advanced it is.
Sewing by hand lets you feel the real thickness of the fabric, coax the seam allowances into place gently, and make sure every corner lines up exactly before you secure it. The fabric will not shift or stretch invisibly the way it sometimes does under the pull of the machine feed dogs, which guarantees a final result that lies flat, looks clean, and feels deeply satisfying.
The tools you need to sew patchwork by hand
Hand sewing is a wonderfully minimalist craft that asks for very little. Choosing the right materials, though, will completely change your sewing experience by keeping your thread from tangling constantly or your fingers from getting stabbed by the wrong tools. Let’s go over the items I consider essential in any sewing kit that aims for good results.
The best needles for working comfortably
Not every needle in the notions aisle is meant for the same job. To piece patchwork by hand, you need a needle that is short, fine, and very resistant to bending. In quilt shops you will find them sold as quilting needles or betweens, which are the traditional choice for this kind of work.
These needles have a small eye and a short shaft, which lets you take closely spaced stitches and keep total control over the fabric without the needle flexing as it passes through several layers. Their sizing runs by number, usually somewhere between eight and twelve.
Keep in mind that the higher the number, the finer and shorter the needle. If you are just starting out, I recommend beginning with a size nine, since it strikes an excellent balance, it is not impossibly tiny, and it threads without much of a fight. Once the motion starts to feel natural, you can move up to a size ten or eleven for even more discreet stitches.
The right thread to keep your seams durable
It is essential to steer clear of the cheap thread sold at discount stores, since it tends to snap under the slightest tension and sheds so much lint that it ruins the look of your stitching. Your effort and your time deserve materials that can stand up to years of use and washing.
Fifty weight cotton thread is the standard, most recommended option for patchwork. Sewing cotton fabric with thread made of the same fiber means the whole piece reacts the same way when you wash it or when it faces changes in temperature. Well known brands like Aurifil, Gütermann, or Mettler are choices you will never regret.
As for color, there is no need to buy a huge range right away. With a neutral light gray, a beige, or a taupe, you can stitch almost any combination of light and dark fabrics without the stitches showing on the right side of your work. As a general rule, match your thread to the darkest of the fabrics you are joining.
Good quality cotton fabric for easier handling
To make patchwork successfully, one hundred percent cotton fabric is a must. This kind of cloth has the right thread count so it will not distort when you cut it, plus it holds a crease with nothing more than a press of your fingernail. If you try to piece with synthetics, heavy linen, or blends with spandex, you will find the pieces sliding around constantly, fraying at the drop of a hat, and making it genuinely hard to keep your block measurements accurate.
The extras that make your sewing time better
A thimble can feel awkward at first and does take some getting used to, yet it serves the vital purpose of protecting your fingers from repeated needle jabs. These days there are plenty of options beyond the classic rigid metal thimble, like soft leather ones that mold to the shape of your finger with body heat, or soft silicone ones that breathe better. My advice is to try a few until you find one that feels comfortable, because your middle finger will thank you after a few hours of stitching.
Another handy extra is beeswax or a commercial thread conditioner. Running your thread across the wax before you thread the needle smooths down the fibers, which keeps it from twisting, forming unwanted knots, or weakening from constant friction against the fabric as you sew. You will also want a small pair of sharp tipped sewing scissors so you can snip threads flush without nicking the fabric underneath.
Marking and cutting your pieces for hand piecing
Before you take that first stitch, there is a prep stage that determines the final quality of your patchwork block. Unlike machine sewing, where we usually cut pieces with the seam allowance already included and follow the edge of the presser foot, hand piecing succeeds or fails on drawing the exact sewing line on the wrong side of the fabric.
How to mark the sewing lines correctly
To get your pieces to fit together perfectly, with no fabric left over and none missing, you need to carefully draw the path your needle will follow.
The process starts by making a template from a rigid material, such as template plastic or heavy cardboard, cut to the exact finished dimensions of the piece with no seam allowance included. Place that template on the wrong side of your chosen fabric and, using a soft 2B graphite pencil or a heat erasable fabric pen, trace the entire outline with a thin but visible line.
Around the line you just drew, add your seam allowance, which is usually a quarter inch or about six millimeters, before you cut the fabric out. A clear quilting ruler makes it easy to mark that second cutting line. Having the real sewing line drawn on the back gives you complete certainty about where the needle goes, no matter whether your outer cut ended up a millimeter wider or narrower than intended.
Step by step guide to sewing patchwork by hand
Learn how to join two patchwork pieces by hand from start to finish, from marking the sewing line on the wrong side of the fabric to anchoring the thread, stitching along the line, and pressing the seam so your block lies perfectly flat.
Total Time: 15 minutes
Mark the sewing lines
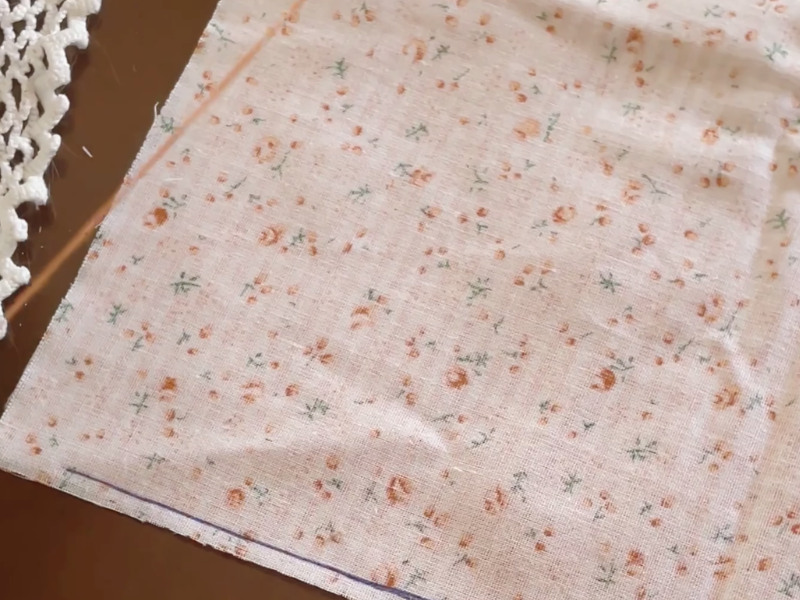
Using your template and a soft pencil, draw the exact sewing line on the wrong side of both fabrics. Add an outer seam allowance of about six millimeters, or a quarter inch, before you cut the fabric out.
Place the fabrics right sides together and pin
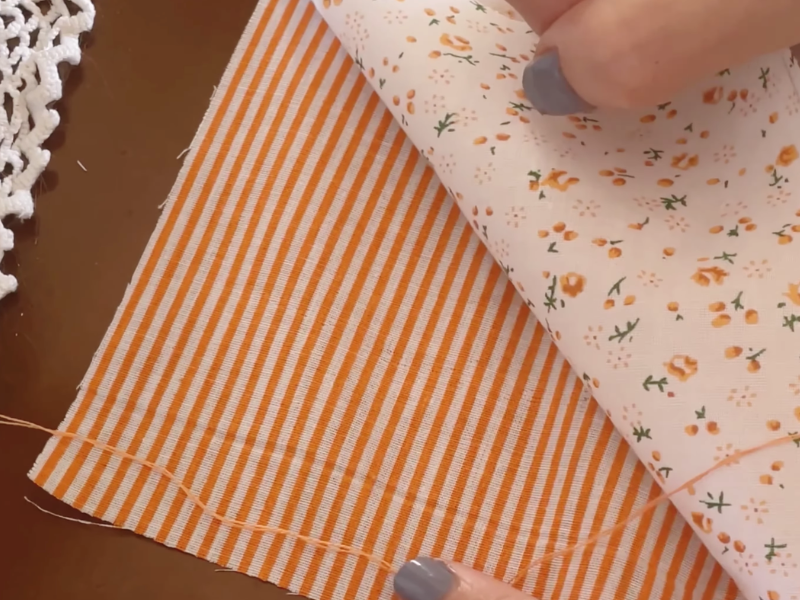
Lay the two pieces of fabric right sides together, so the printed sides face in and your marked lines are visible on the outside. Push a pin straight through the beginning and the end of the lines on both layers to confirm they line up exactly.
Anchor the thread at the start
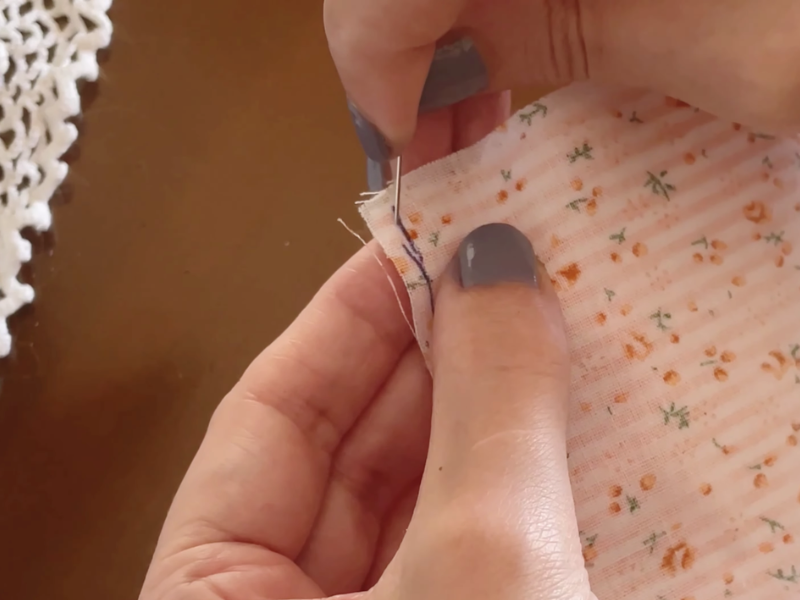
Bring the needle in through the seam allowance so the knot stays hidden. Take one small backstitch right at the starting point to lock the thread in place and keep the seam from pulling open as you handle the block.
Stitch along the marked line
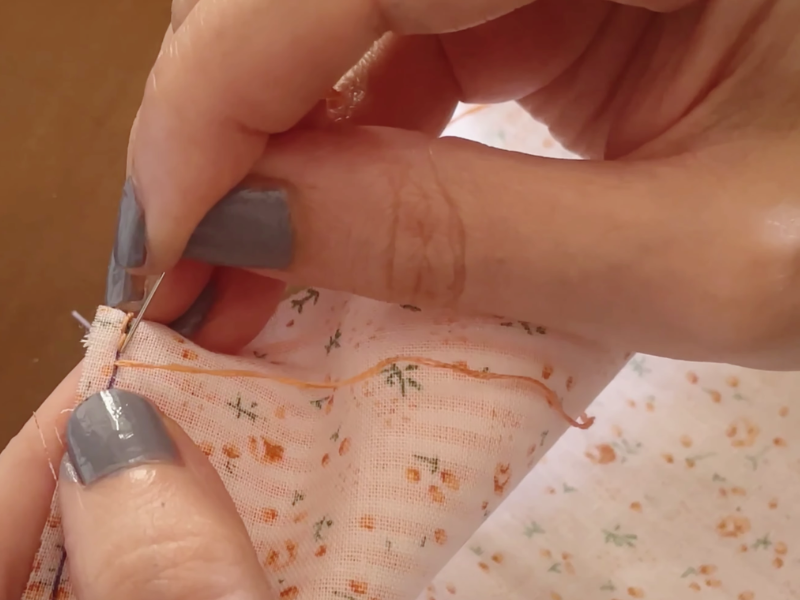
Work your way along the drawn line using either a backstitch or a running stitch, whichever feels more comfortable in your hands. A running stitch moves faster and leaves the seam soft and flexible, while a backstitch gives you a stronger, tighter join for pieces that will take more stress. Aim for small, evenly spaced stitches and check every so often that the needle is coming out exactly on the marked line of the bottom piece. Stop at the drawn line rather than sewing into the seam allowance, since leaving those ends free is what lets you press the seams in any direction later on.
Finish off and press the seam
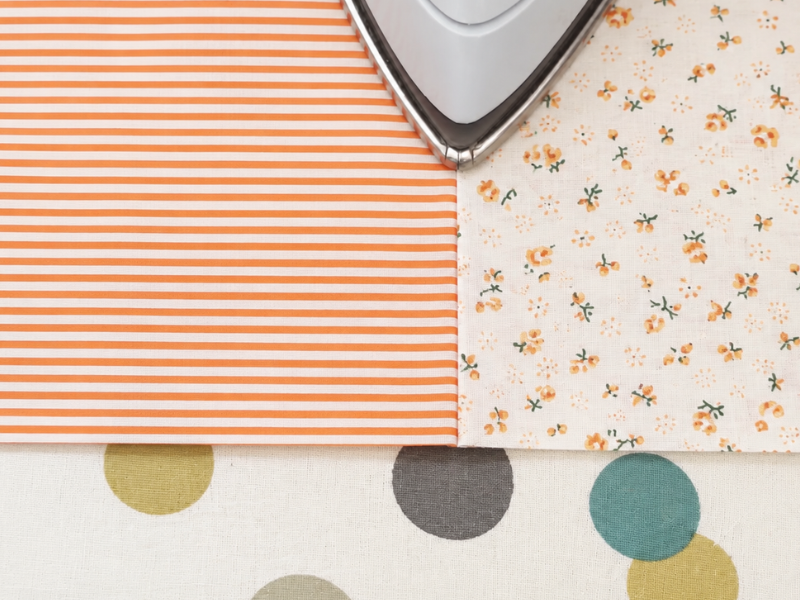
When you reach the end of the line, take one backstitch and pass the needle through the loop to close it with a firm knot. Trim the tail and set the stitches by pressing with a warm, dry iron before you open the pieces up. Press both seam allowances toward the darker fabric rather than opening them.
Tools:
- Quilting needle (size 9 between)
- Sharp sewing scissors
- Soft 2B graphite pencil or erasable fabric pen
- Clear quilting ruler
Materials: Two pieces of 100% cotton fabric Fifty weight cotton thread Fine pins
You can watch the video version if you prefer
The essentials of pressing and placing your seam allowances
Plenty of people starting out assume the whole job is in the stitching, but the truth is that using your iron properly is fundamental to a clean finish. Well set seams are what separate sloppy work from a piece with a professional finish.
How to set the stitches before handling the pieces
Before you open the fabrics up to admire your work, set a warm, dry iron on the closed seam, exactly in the position you sewed it. This small step helps the cotton thread settle into the fibers of the fabric, releasing any small tensions that built up during hand stitching and flattening the path of the thread.
Which direction to press your seam allowances
In traditional patchwork, seam allowances are not pressed open the way we normally do when sewing garments. They are folded over completely toward one side of the work.
The general rule tells us to press the allowances toward the darker fabric, which keeps the extra bulk from shadowing through the lighter patches when you look at the piece from the right side. If you are joining several rows of blocks, a very useful trick is to press the seams of the first row to the right and those of the second row to the left.
Working this way means that when you go to join the two rows, the seams will nest into one another like gears, cutting down considerably on bulk at the corners and letting your needle pass through more easily. Always press gently from the right side of the fabric, checking that no little pleats form along the seam line.
Tips for caring for and preserving your hand sewn pieces
When you spend hours of your free time cutting and joining pieces by hand, you are creating something that needs a certain amount of care so it does not break down with regular use or over the years. Cotton fabric and hand stitches need simple but consistent maintenance to hold on to their color and their original structure.
How to wash finished blocks and projects
Patchwork with hand sewn seams should not be washed too often, so you avoid unnecessary wear on the fibers and on the thread holding everything together. When a wash is truly necessary, a few precautions go a long way.
If it is the first time you are washing the piece, tossing a couple of color catcher sheets into the water is a very good idea, since deeply saturated cottons like reds or dark blues tend to release leftover factory dye that could permanently stain the light fabrics in your work. Always use a mild liquid soap with no optical brighteners or harsh additives that would weaken the cotton thread.
If the piece you made is small, washing it by hand in a large basin of lukewarm water is your best bet. Should you prefer the washing machine, always choose a delicate cycle with cold water and a very gentle spin so the seams are not put under strain.
Drying your work away from harsh heat
The dryer is completely off limits for hand pieced patchwork, since the excessive heat and the rough tumbling of the drum wear down the cotton thread of those short stitches.
Ideally, dry your pieces flat on a level surface or on top of a clean, dry towel in a well ventilated spot. If you hang the work vertically while it is still holding a lot of water, the weight of that moisture will stretch out the hand stitched seams and end up distorting the geometry of your block. Always keep it out of direct sunlight during the middle of the day, since strong sun weakens the pigments in cotton fabric and dulls the original colors fast.
Frequently asked questions about hand piecing patchwork
Do I have to prewash my cotton fabric before cutting the pieces for a block?
Prewashing is a very good habit that will save you trouble later in the finish of your sewing projects. Quality quilting cottons tend to shrink a little, somewhere between three and five percent, the first time they meet water, simply because the fibers settle.
If you mix already washed fabric with pieces you just bought straight off the bolt in the same block, the next time you wash it you will get internal tension, strange puckering, and warped seams. Prewashing also lets you check whether a fabric bleeds before it becomes part of your finished design. If you decide to wash one fabric for a project, wash every other fabric in that same combination too.
Are hand sewn seams as strong as seams made on a sewing machine?
There is a common misconception that machine sewing is always far more secure, but a well worked running stitch sewn by hand with good quality thread is extremely durable. In fact, plenty of traditional textiles sitting in museums in perfect condition are more than a century old and were made entirely by hand, long before electric motors existed.
Hand sewing has a lightness and a natural flexibility that moves with the fabric, which keeps the thread from snapping under tension the way overly rigid, dense machine stitching sometimes does.
What should I do if a knot forms in my thread in the middle of a seam?
The first thing to do is stay calm and resist yanking on the thread, since that will only tighten the knot further and stress the fabric. If the loop is still loose, work it open patiently with the tip of a pin or a thicker needle placed in the center of the knot.
If the knot is completely tight and impossible to undo, cut the thread a little before that spot, carefully unpick the last two stitches you made, and tie off neatly on the wrong side of the fabric. Then simply rethread your needle with fresh thread and pick the seam back up a couple of stitches before where you had to stop, overlapping the new stitching over the old so there is no unsecured gap in the seam line.
How can I get my hand stitches to be consistently even?
Consistency in hand sewing is a skill you build through practice and steady repetition, so do not be discouraged if your first blocks show slightly uneven stitches. Your hands and your eyes will settle into a natural rhythm within a few weeks of stitching.
If you want a visual aid during those early days, you can draw small reference marks spaced at the right distance on the skin of the index finger that supports the fabric from underneath, or stick a small piece of adhesive measuring tape on your finger so you can check the length of each stitch before you pull the needle through.
Can I combine hand sewing and machine sewing within the same patchwork block?
You can absolutely mix both methods depending on what your project needs or what you feel like doing at any given moment. A very common approach among quilters is to join the smaller central pieces, or the ones with complicated geometric shapes, entirely by hand so the points match up cleanly, then switch to the machine for the outer strips, borders, or larger, simpler blocks around the edges that call for long straight seams.
What really matters is adapting the process to your own pace and enjoying the craft at every stage.
Your space to share your hand sewing experiences
Now that we have gone over the theory, the essential materials, and the details that separate an ordinary finish from a well built block, the most rewarding step is in your hands. The loveliest part of this hobby is not just collecting technical knowledge, it is the personal experience you get when you sit down calmly and shape your ideas with your own two hands.
I would really love to hear your take on it and how you approach your sewing time at home. Do you prefer the speed of the sewing machine, or does the calm of slow hand stitching appeal to you more? Have you ever struggled to get the corners of your patches to line up?
Leave a comment below to share your thoughts, questions, or sewing experiences. I check the comments often so I can read what you write and answer whatever you ask, helping to keep this corner a useful meeting place for everyone who loves making things out of fabric. Go ahead and write to me about how your next project is coming along.