
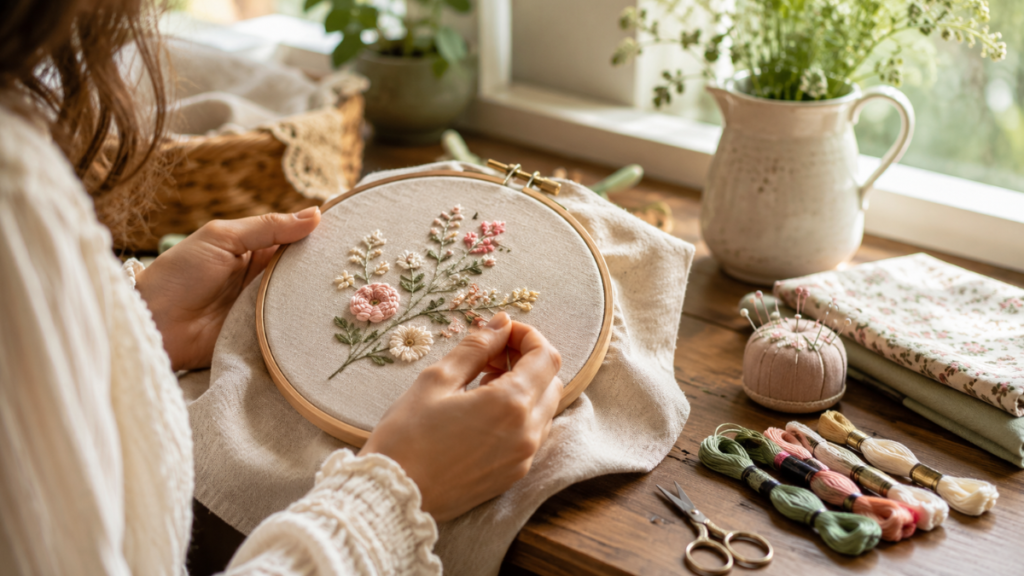
Learn how to start hand embroidery from scratch. Discover the basic supplies, easy stitches, beginner tips, and first embroidery projects to try.
Learning hand embroidery does not have to be complicated. One of the loveliest things about this craft is that you can start with very few supplies, practice at your own pace, and see results from day one.
If you have never picked up a needle, or if it feels like there are far too many stitches, fabrics, threads, and gadgets out there, this guide is for you. Here you will find a simple road map for figuring out where to start with hand embroidery, what to buy first, which stitches to learn early on, and how to go from those first practice runs to your first finished projects.
The whole point is to begin.
This post contains affiliate links. Using them supports me at no extra cost to you
How to use this embroidery guide
This guide is meant to be a road map for starting hand embroidery from zero. There is no need to learn everything in a single day, or to master every stitch before moving on to the next one.
The best approach is to work through it in phases:
- First, gather your basic supplies.
- Next, prepare your fabric and learn how to get it into the hoop.
- Practice a handful of simple stitches.
- Work a small sampler to shake off the nerves.
- Pick an easy first project and finish it without obsessing over perfection.
Come back to this guide any time you want to review a technique. Embroidery improves enormously with repetition, so every stitch counts, even the slightly crooked ones.
What you need to start hand embroidery
Getting into embroidery does not mean filling an entire bin with supplies. A few well chosen basics are all you need to practice, work samplers, and create your first designs.
Basic embroidery supplies
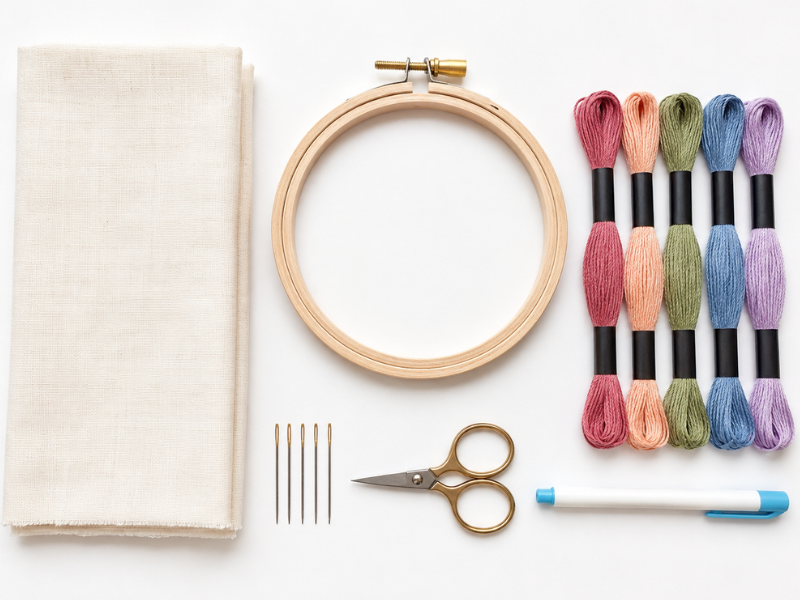
These are the must haves for getting started:
- Cotton or linen fabric: choose something with no stretch and a fairly tight weave. Light colored fabric makes the work much easier at first.
- Stranded cotton floss: this is the most common thread for hand embroidery. It usually comes as six strands twisted together, so you can adjust the thickness depending on the effect you want.
- Embroidery needles: the eye is a little larger than on a regular sewing needle, which makes threading much easier.
- An embroidery hoop: it keeps the fabric taut, which makes your stitches look cleaner.
- Small, sharp scissors: a fine tipped pair helps you cut thread precisely.
- A fabric marker: this can be a pen that erases with water, heat, or air, depending on your project.
Optional but useful extras
Once you have those first practice pieces behind you, a few extras can make the whole experience more comfortable:
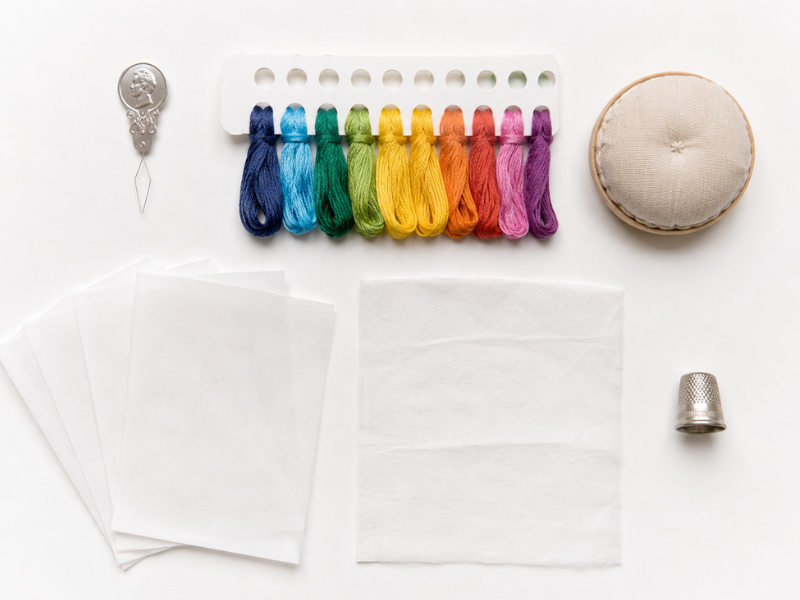
- A needle threader.
- A floss organizer.
- A pincushion or needle book. You can also make your own, and I show you how in this post.
- Transfer paper for fabric.
- Water soluble stabilizer.
- A thimble, if you tend to push hard on the needle.
You do not need all of it from day one. The sensible move is to start stitching with the basics and buy more tools only once you know you will actually use them.
Prepare your fabric before you stitch
Good preparation heads off a lot of classic beginner problems, like wrinkled fabric, warped stitches, and crooked designs.
Before you begin, wash the fabric if you think it might shrink. Then press it well so it lies smooth. That makes it easier to transfer your design accurately and more comfortable to work on.
Set the fabric in the hoop, aiming to keep it centered and taut, like a little drum. There is no need to stretch it out of shape, though it does need to feel firm. If the fabric goes slack while you stitch, tighten the hoop again.
One important tip: if you are going to leave a project untouched for several days, take the fabric out of the hoop. That way you avoid marks that are hard to get out.
How to transfer a design onto fabric
If you are stitching a specific design, you will need to get it onto the fabric first. There are several easy ways to do it.
The light or window method
This is one of the easiest methods for beginners. Place your design under the fabric, hold it up against a window or set it on a light box, then trace the design with a fabric marker.
It works beautifully with light fabrics and simple line drawings.
Transfer paper for fabric
Another practical option is transfer paper made for fabric. You lay the paper between your design and the fabric, go over the lines, and the design comes through.
This one is handy when your fabric is not sheer enough to trace against a light source.
Water soluble stabilizer
Water soluble stabilizer lets you draw or print your design onto a sheet that sticks or bastes to the fabric. You stitch right over it, then rinse it away with water.
It is a great alternative for dark fabrics, garments, or designs with a lot of fine detail.
Tissue paper
Tissue paper is another simple way to get a design onto fabric, especially when you are working with dark, thick, or hard to trace material.
First, draw or trace your design onto the tissue paper. Then set it on top of the fabric and hold it in place with pins or a few large basting stitches. Stitch directly through the paper, following the lines of the drawing.
When you are done, carefully remove the paper, tearing it away little by little around your stitches. Going slowly matters here so you do not tug the thread or distort the embroidery.
This method works really well for line designs, simple lettering, and decorative motifs. It gets a bit fiddly with very detailed drawings, though as a starting point it is practical and cheap.
How to choose the number of strands
Stranded cotton floss usually comes as six strands. You can work with all six together or separate out just a few, depending on the result you are after.
To start, stitching with two or three strands is a solid choice. It is a comfortable thickness, it shows up nicely on the fabric, and it lets you control the stitch without too much bulk.
As a general rule:
- Use one strand for fine details.
- Use two or three strands for lines, small flowers, and lettering.
- Use four to six strands for chunkier effects, bold embroidery, or sturdy fabrics.
If you are following a pattern, check its instructions. Plenty of designs specify how many strands to use in each area.
How to thread your needle for embroidery
Threading a needle seems like a minor detail, yet early on it can be the difference between starting to stitch calmly and wrestling with your floss for ten minutes.
Cut a length of about 16 to 18 inches. If you are using stranded floss, separate out the number of strands you need first. For beginners, two or three strands are usually a good call.
Lightly dampen the end of the thread or flatten it between your fingers so it becomes more compact. Then pass it through the eye of the needle. If you are struggling, use a needle threader. It is not cheating, it is textile survival.
Avoid working with lengths that are too long. It might feel like a time saver, but the most likely outcome is thread that tangles, wears out, or knots up on the back of the fabric.
How to start and end a thread
A very common question when you start embroidering is how to secure the thread.
The simplest option is a small knot at the end of the thread. For practice samplers that is perfectly fine. If you are stitching a garment, a napkin, a handkerchief, or any piece where the back will be seen, though, a cleaner finish is worth the effort.
You can start a thread by anchoring it with a few tiny stitches on the back, or by tucking the tail under stitches you have already worked. To finish, run the needle under several stitches on the reverse and trim the excess.
Do not fixate on a perfect back at the beginning. Learn to control the needle, the tension, and the stitches first. Tidiness comes with practice.
Basic embroidery stitches for beginners
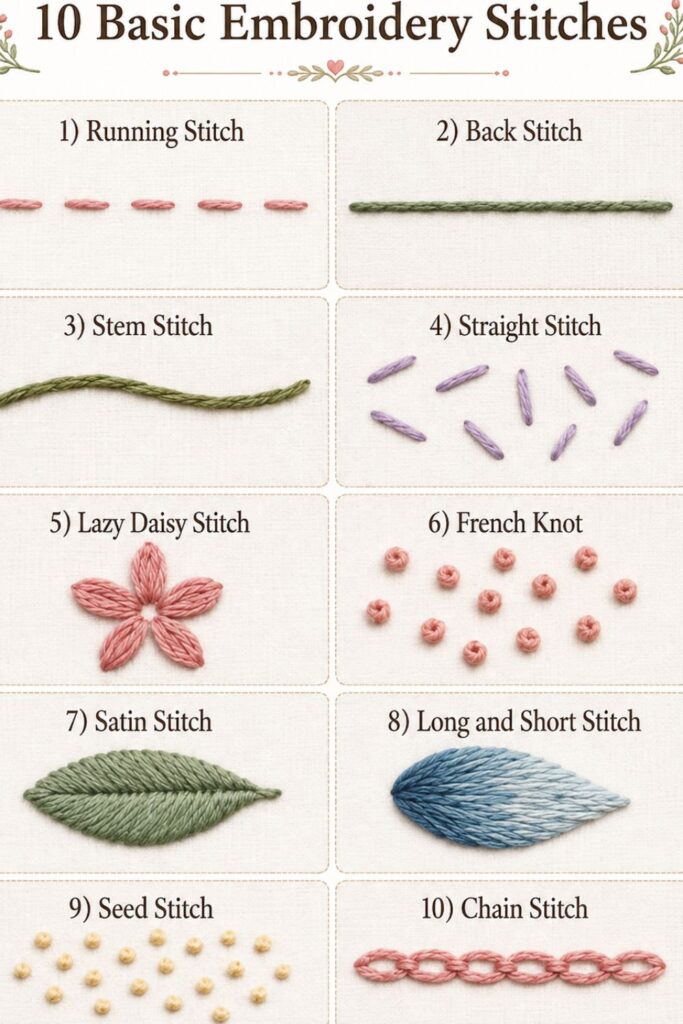
There are countless embroidery stitches out there, though you do not need to learn them all to get going. With just a few basics you can make flowers, lettering, leaves, lines, fills, and small decorative motifs.
1. Running stitch
The running stitch is one of the most basic stitches in hand embroidery. You simply pass the needle up and down through the fabric, creating a dashed line of small stitches.
It is ideal for practicing the movement of the needle, controlling the space between stitches, and getting used to thread tension.
Use the running stitch for simple lines, decorative borders, small details, visible seams, and practice guides.
Simple as it is, it can look gorgeous when you keep your stitches even. You can also play with different lengths for a more casual or decorative effect.
2. Backstitch
The backstitch is one of the best stitches for beginners. It works for lines, outlines, words, and small details.
It gives you a continuous line and it is easy to control. If you want to stitch names, phrases, or silhouettes, this stitch will be one of your best friends.
3. Stem stitch
The stem stitch gets a lot of use for branches, stems, curves, and soft lines. It has a slightly ropelike finish that is more decorative than backstitch.
It is perfect for botanical motifs and floral designs. You will find more detail in this post.
4. Straight stitch
The straight stitch is just a single stitch worked from one point to another. Very simple, yet very versatile.
Use it for small leaves, stars, sunbursts, geometric details, or texture.
5. Lazy daisy stitch
The lazy daisy stitch is perfect for petals and leaves. It forms small loops held down with a short anchoring stitch.
It is a rewarding, pretty stitch, and very handy for making simple flowers right from the start.
6. French knot
The French knot adds dimension and texture. It gets used for flower centers, polka dots, decorative details, or little dots of color.
It can be tricky at first, though once you get the knack it is pretty addictive. It is the “just one more” of embroidery stitches. Here is a closer look at it.
7. Satin stitch
The satin stitch fills small shapes with a smooth, glossy finish. It is used a lot for petals, leaves, thick lettering, and compact shapes.
The secret is keeping your stitches parallel, holding an even tension, and resisting the urge to fill areas that are too large when you are starting out.
8. Long and short stitch
The long and short stitch fills areas with a softer, more natural finish than satin stitch. It shows up often in petals, leaves, animals, gradients, and more painterly embroidery.
The idea is to alternate long and short stitches so no rigid line forms at the edge of the fill. Colors and shapes blend much better that way.
To practice, draw a small leaf or a simple petal. Start from one edge and work stitches of different lengths toward the center. Do not chase perfect symmetry, since this stitch looks best when it feels slightly organic.
It is a little more advanced than backstitch or running stitch, though it is well worth knowing once you want more depth and movement in your work.
9. Seed stitch
The seed stitch is very easy and very useful for adding texture. You scatter small individual stitches across an area, like seeds sprinkled over the fabric.
Use it to fill backgrounds, decorate leaves, create soft shading, or add little details around a main motif.
It works especially well when you want something lighter than a solid fill. It is also a good way to practice distributing stitches by eye without following an exact line.
For a natural look, avoid placing every stitch in the same direction or at the same distance. The charm of seed stitch lives in that small bit of controlled chaos.
10. Chain stitch
The chain stitch creates a line made of small linked loops. It is decorative, eye catching, and great for outlines with personality.
Use it for lettering, borders, flowers, or bolder details.
Practice before your first project
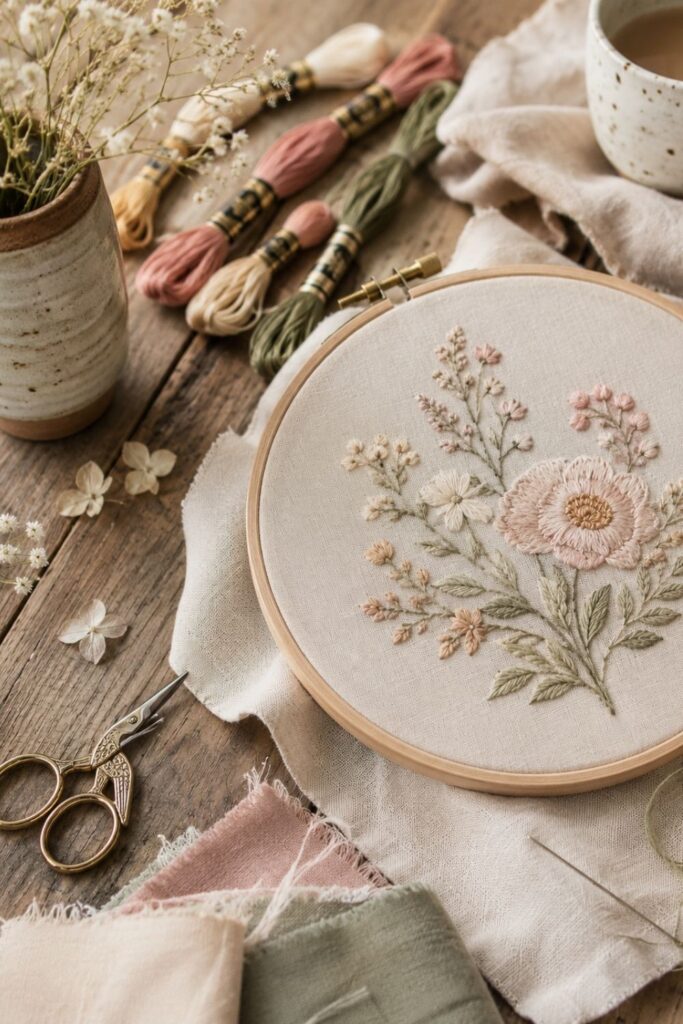
Before diving into a garment or a big design, put together a small stitch sampler. It does not have to be pretty or perfect. Its job is to help you understand how the fabric, the thread, and the needle behave together.
Draw a few lines, circles, leaves, and simple flowers so you can practice:
- Straight lines with running stitch or backstitch.
- Curves with stem stitch.
- Petals with lazy daisy stitch.
- Decorative dots with French knots.
- Small fills with satin stitch.
- Texture with seed stitch.
- Simple gradients with long and short stitch.
That sampler becomes your little laboratory. There you can make mistakes with no pressure, try color combinations, and find out which stitches feel most comfortable in your hands.
Tips for stitching better from day one
Certain mistakes are completely normal when you start embroidering. The good news is that nearly all of them have a fix.
Use short lengths of thread
Working with a very long thread seems practical, though it usually ends in knots, tangles, and worn out floss. Cut lengths of roughly 16 to 18 inches.
Do not pull the thread too hard
The stitch should rest on the fabric rather than sink into it. Pull too hard and the fabric puckers, which means your design loses its shape.
Keep the fabric taut
Check your hoop every now and then. If the fabric goes slack, your stitches can end up uneven.
Choose simple designs
For your first projects, stay away from drawings with too many tiny details. Simple flowers, initials, hearts, stars, leaves, or short phrases are a better bet.
Do not unpick everything
Early on every stitch feels hugely important, yet the piece as a whole almost always looks better than any single detail on its own. Only unpick what you truly need to.
First hand embroidery projects
Once you have a few stitches under your belt, you can move on to small projects. Ideally, choose pieces that are quick, useful, and light on filled areas.
Easy ideas for beginners
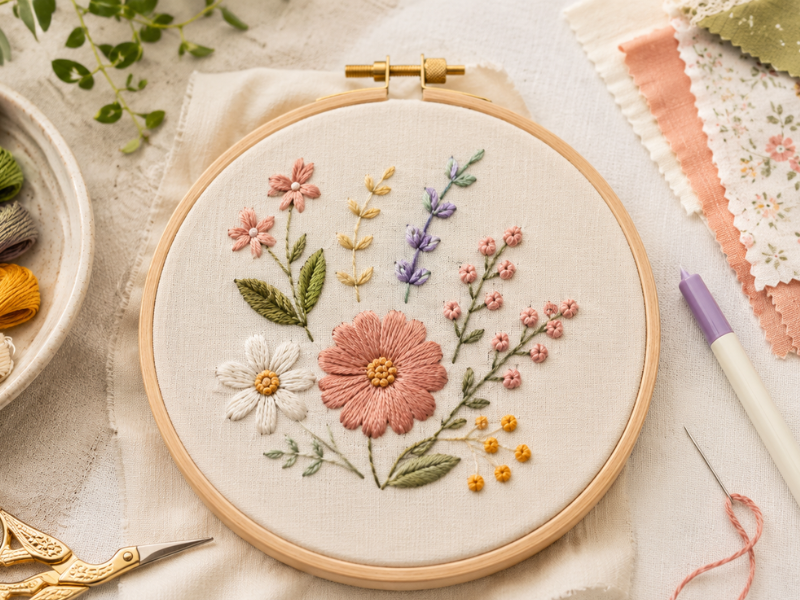
- A decorative hoop with one simple flower.
- An initial embroidered on a napkin.
- A handkerchief with small flowers in one corner.
- A tote bag with a short phrase.
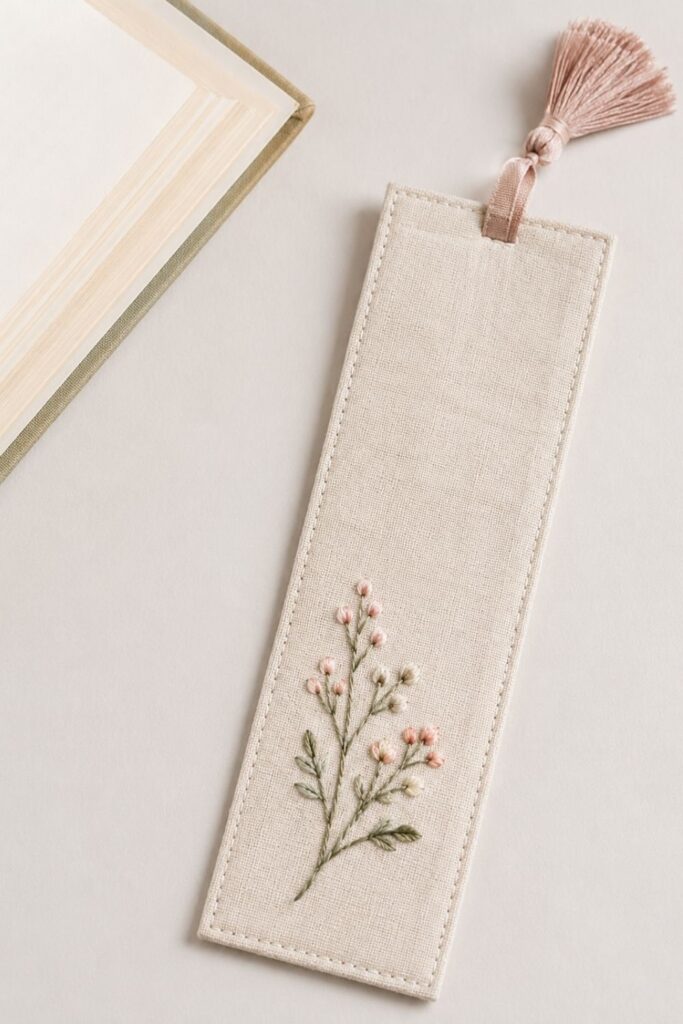
- A fabric bookmark.
- An embroidered patch for a jacket.
- A small motif to dress up a pair of jeans.
- A personalized drawstring pouch.
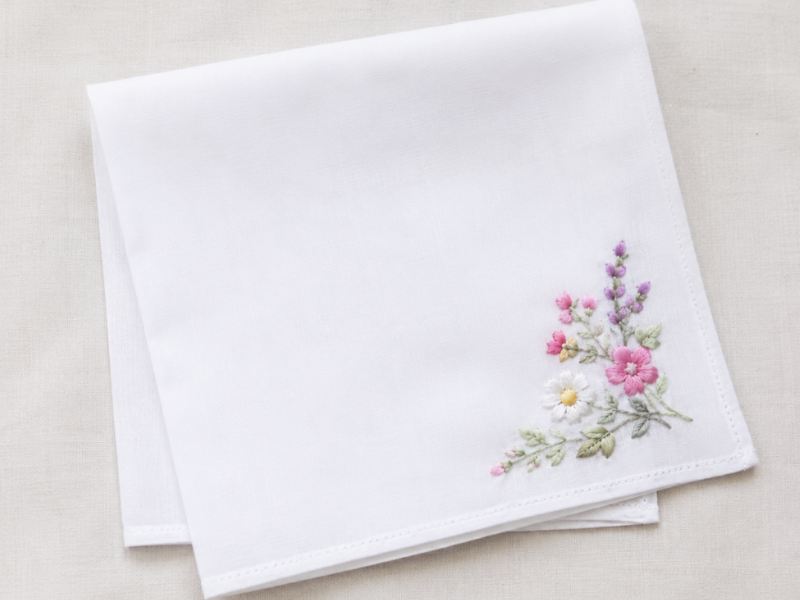
Start with designs you can finish in a short sitting. Completing a project, however small, is hugely motivating and keeps you learning. You can also find affordable beginner kits that give you plenty to practice on.
There is also our book of 20 embroidery patterns, which is ideal for practicing with different motifs: flowers, animals, fruit, coffee, and more.
How to care for a finished embroidery
When you finish stitching, check whether any transfer marks are still showing. If you used a removable marker, take it out following the manufacturer’s instructions.
If the piece is washable, wash it by hand in cold or lukewarm water with a mild soap. Avoid scrubbing directly on the embroidery.
To dry it, lay the fabric on a clean towel and let it dry flat. Then press it from the back, or with a thin cloth over the top, so you do not crush the stitches.
If your embroidery is staying in a decorative hoop, you can trim the excess fabric at the back and finish it off with stitching, felt, or cardboard, depending on the look you want.
What to learn after the basic stitches
Once you have the simpler stitches down, you can keep building little by little.
A few ideas for what comes next:
- Learn more decorative stitches.
- Practice embroidered lettering.
- Try stitching on clothing.
- Work visible mends on garments.
- Create floral compositions.
- Stitch on linen, denim, or felt.
- Design your own patterns.
- Combine embroidery with sewing or fabric appliqué.
Hand embroidery opens a lot of doors: home decor, fashion, personalized gifts, creative clothing repair, and art pieces. The beautiful part is that you can take it in whatever direction suits you best.
Where you can put your new skills to work
Once you have the basic stitches down, you can bring hand embroidery to all sorts of projects. There is no need to stop at decorative hoops, even though they are a wonderful way to practice.
You can stitch tees, sweatshirts, and jackets, jeans or back pockets, tote bags and pouches, napkins, tablecloths and kitchen towels, pillows, decorative covers, patches, fabric bookmarks, and personalized gifts.
Embroidery can also give a second life to clothes you already own. A flower over a stain, an initial on a shirt, or a small border on a pocket can turn a plain garment into something one of a kind.
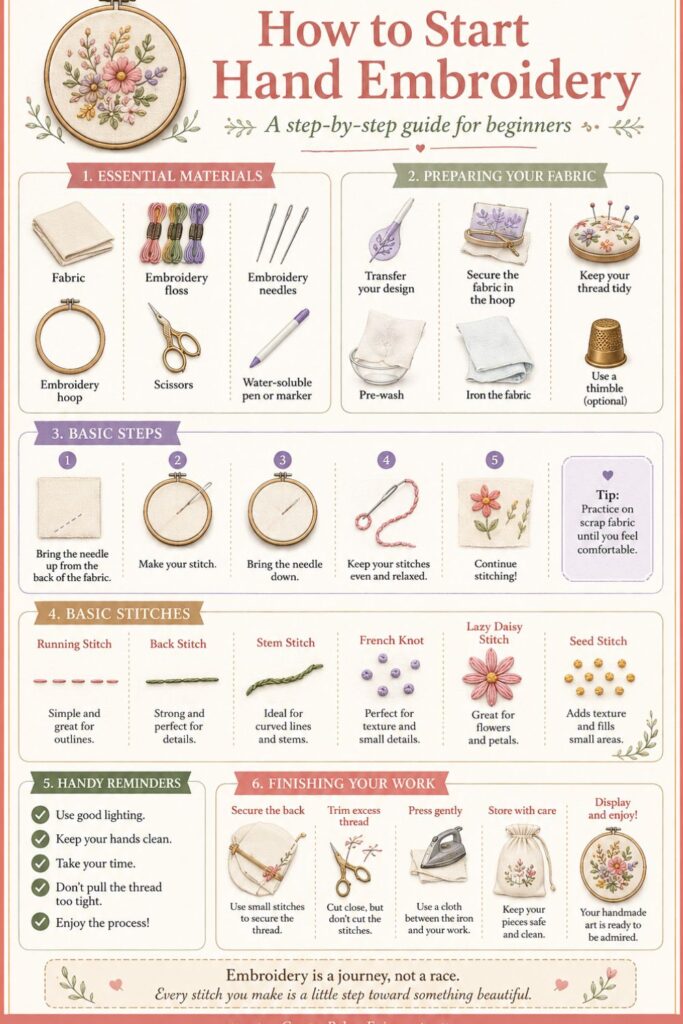
Frequently asked questions about getting started with embroidery
Is hand embroidery hard to learn?
Not at all. Hand embroidery is an accessible craft and a great fit for beginners. What matters is starting with simple stitches and small projects.
How long does it take to learn embroidery?
You can learn the basic stitches in an afternoon. What takes longer is building ease, consistency, and confidence, which comes with practice.
Which stitch should I learn first?
Running stitch and backstitch are two of the best places to start. Running stitch helps you practice the basic needle motion, while backstitch lets you create more continuous, defined lines.
What fabric is best for beginners?
A cotton or cotton linen blend, in a light color and with no stretch, is usually the most comfortable choice to start with.
Can I embroider without a hoop?
Yes, though a hoop is highly recommended for beginners. It keeps the fabric taut, which makes it much easier to get even stitches.
Is hand embroidery expensive?
It does not have to be. You can start with fabric, a needle, floss, scissors, a marker, and a hoop. Extras can come later, as you need them.
Where can I use what I learn from embroidery?
You can bring hand embroidery to clothing, accessories, home decor, personalized gifts, patches, decorative hoops, and visible mending projects. It is a versatile craft that adapts easily to different styles.
Start small and practice without fear
To learn how to start hand embroidery, you do not need expensive supplies or dozens of stitches under your belt. All you need is suitable fabric, a needle, some floss, a hoop, and a simple design.
Start by practicing the basic stitches, work a small sampler, then move on to an easy project. Every stitch builds your confidence, improves your tension, and helps you discover your own style.
Hand embroidery is slow, yes, though that is part of the charm. It is a way to create calmly, decorate everyday objects, and turn a piece of cloth into something personal.
So get your hoop ready, pick a color you love, and start with that first stitch. The rest will follow on their own.

