Master zigzag embroidery with this definitive guide. Learn professional secrets, tricks for flawless finishes, and how to transform your clothes with vibrant designs. Wake up your creativity now!
Have you ever stared at a denim jacket or a plain tablecloth and felt like it was missing “something”? That something is usually personality, soul, and a touch of color. Get ready, because today we’re discovering together how the zigzag stitch can turn any forgotten scrap into a display piece.
I used to think the zigzag was just that boring setting on the sewing machine my grandmother used to keep seams from fraying. How wrong I was! When I discovered you could work it by hand, adding dimension, playing with textures, and mixing improbable threads, a whole new world opened up. It’s a rhythmic, almost therapeutic technique, and today I’m sharing everything I’ve learned by pricking a finger here and there and having as much fun as a kid.
This post may contain affiliate links. If you buy through them, you’re supporting my work (at no extra cost to you).
What is zigzag embroidery, and why is it so addictive?
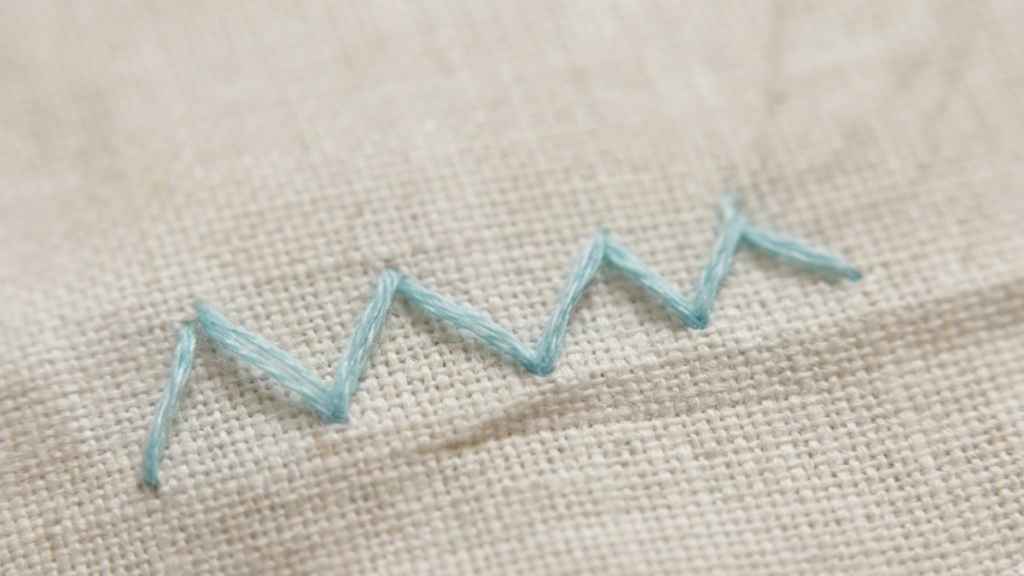
Unlike traditional filling stitches or the stem stitch, the zigzag is pure geometry in motion. It’s built on broken lines that rise and fall, and the wonderful part is that it has a thousand variations. You can work it dense like a rug, open and delicate like a spiderweb, or even use it to attach other fabrics (what we call appliqué).
For me, it’s the wild card stitch. It works for the stem of an exotic flower, for ethnic-style borders, or simply for mending a tear in a pair of pants so it looks like you did it on purpose, purely for style. It’s forgiving, fast, and above all very striking.
The foundation: materials that make your life easier
Before the first stitch, we have to talk about our tools. You don’t need to spend a fortune, but you do need to choose wisely so you’re not frustrated five minutes in.
Fabric: where are we stitching?
If you’re starting out, look for tightly woven fabrics that aren’t too stiff. Good quality linen or cotton duck is ideal. Avoid stretchy fabrics at first, because if you haven’t mastered your tension the zigzag will look like an accordion the moment you take it out of the hoop.
Threads: your inner artist’s palette
This is where you can go wild.
- Six-strand cotton floss is the classic: use anywhere from 1 to 6 strands depending on the weight you want.
- Pearl cotton gives the zigzag a sheen and dimension that’s absolutely gorgeous.
- Metallic threads: a little rebellious to work with, but they look fantastic for details at the peaks of the zigzag.
Needles and the blessed hoop
Use a needle that isn’t too thick so it doesn’t leave holes in the fabric, but with an eye big enough that threading it doesn’t ruin your eyesight. Please, use a hoop. Keeping the fabric drum tight is 50% of success in hand embroidery. If the fabric is slack, the zigzag will pull in and the result will be a mess.
Preparing your design
Look, some people stitch freehand, but if we want a zigzag that truly impresses, we need guidelines.
- Use a marker that erases with heat or water. They’re a brilliant invention.
- Draw two parallel lines. The distance between them is the height of your zigzag.
- If you want more precision, mark dots along the lines so you know exactly where to insert the needle at each step.
The basic technique: the simple zigzag step by step
Let’s get to the good part. Imagine your fabric is already in the hoop and your needle is threaded (with no knot at the end if you want to be very pro, though if you’re just starting, tie a small knot and let’s not overcomplicate life).
The first move
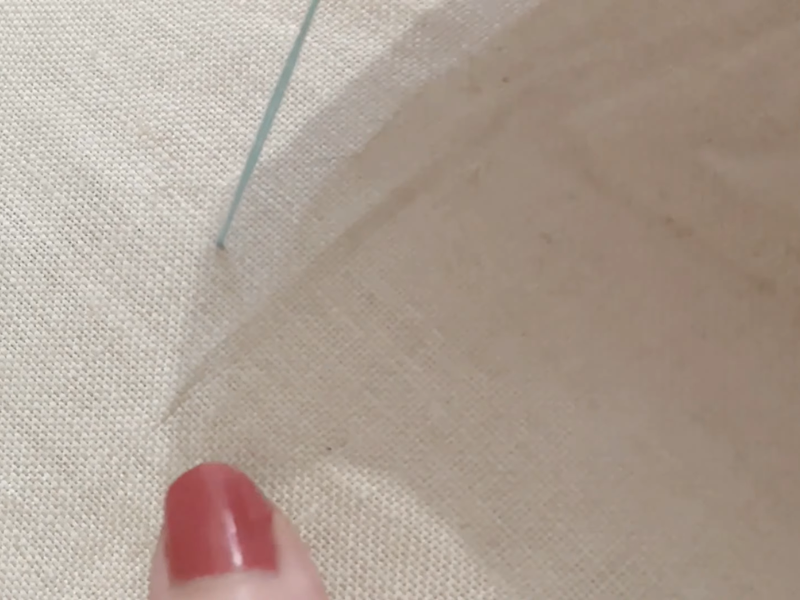
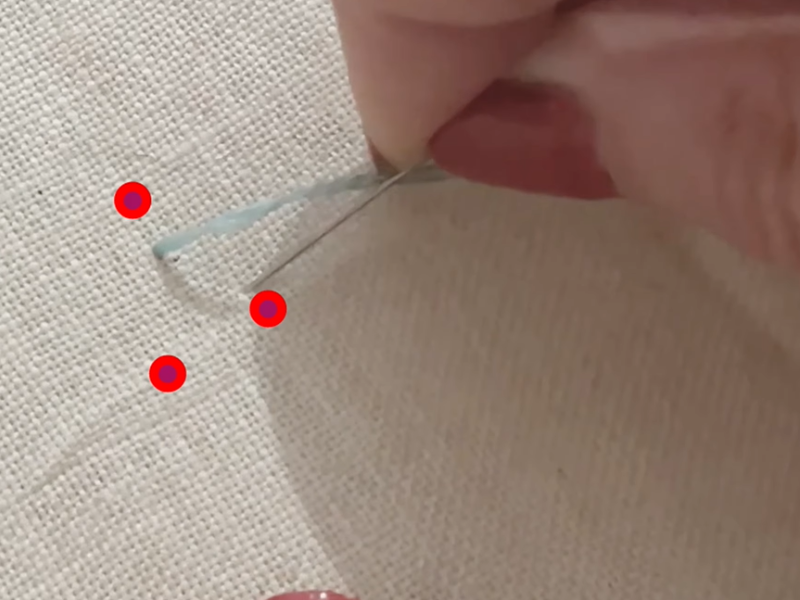
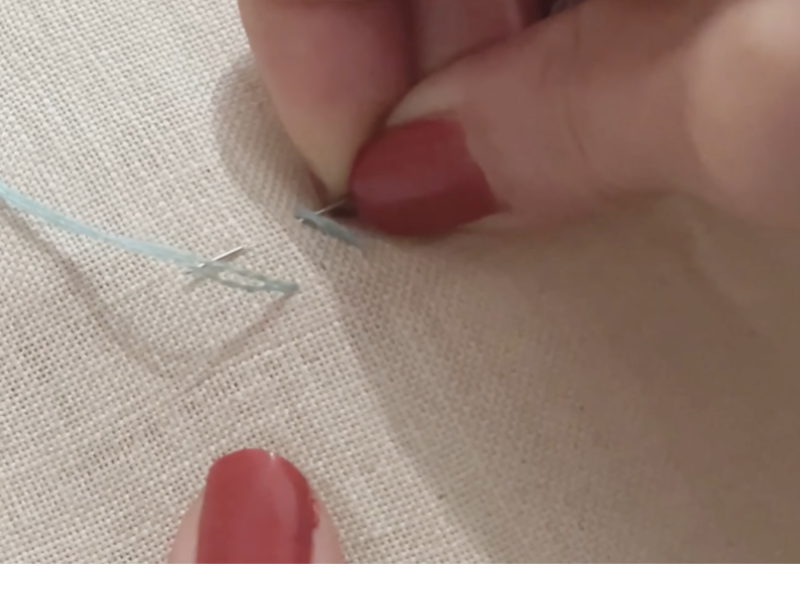
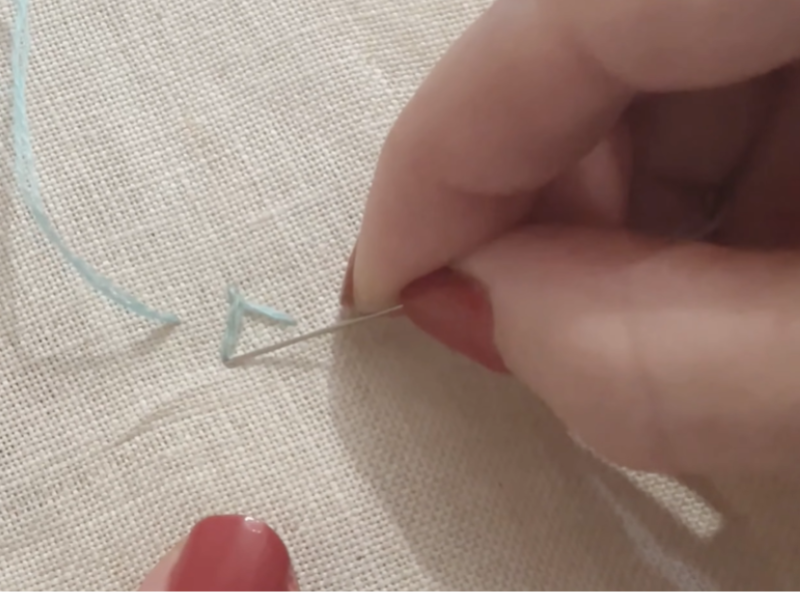
Bring the needle up on the bottom line. Now take it to the top line, not directly above the previous point but a little to the right. There’s your first diagonal. If you’re right-handed, you’ll be working from right to left.
Closing the angle
Now bring the needle up on the top line a little further left and take it back down to the bottom line (point D). There’s your first upside-down V!
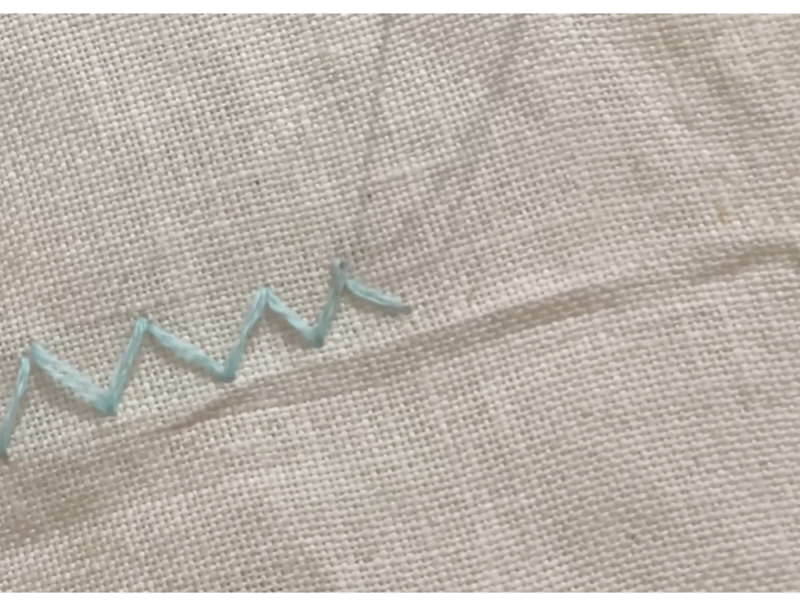
Seems easy, right? It is. The secret is consistency, though. The distance between points has to stay the same so your zigzag doesn’t look like it has the hiccups.
The tension trick
Don’t pull the thread like your life depends on it. The thread should rest on the fabric, not strangle it. Pull too hard and the fabric puckers. Leave it too loose and the thread wanders and snags on everything. Look for that middle ground of gentle firmness.
You can see it in detail on YouTube, and feel free to subscribe to the channel, it’s free^^
Zigzag variations that take your embroidery up a level
If the simple zigzag is the alphabet, these variations are the poetry. Don’t be intimidated, because however complex they look, they’re built on the same logic you already know.
1. The herringbone stitch
This is the zigzag’s elegant cousin. Instead of the stitches meeting only at the tips, they cross slightly at the top and bottom.
- How it’s done: cross the diagonal upward, take a small backward stitch along the line, then cross down to the other side.
- What it’s for: ideal for wide stems, leaf edges, or even joining two pieces of fabric with a beautiful vintage feel. It’s also very flexible, so it adapts wonderfully to curves.
2. The laced zigzag
Here’s where we bring out the heavy artillery. Imagine you’ve already stitched your basic zigzag. Now take a thread in a contrasting color (if the zigzag is blue, grab orange or gold) and, without piercing the fabric, weave the needle under the stitches you’ve already made.
- The effect: you create a kind of wavy chain over the zigzag that looks like three-dimensional lace. It’s simply spectacular for finishing blouse collars.
3. The satin zigzag fill
If what you want is to fill a shape (a heart or a letter, say), you can work your zigzag stitches very, very close together, almost touching.
- The expert trick: packed that tightly, the thread creates a satin sheen. Use variegated floss and you’ll watch the peaks shift color gradually. It’s hypnotic!
How to stitch a zigzag on difficult surfaces
We’re not always stitching on a docile, freshly pressed piece of cotton. Sometimes life (and fashion) throws us a challenge.
Stitching on denim
Denim is tough, my friend. Here the hoop is lifesaver number one. You’ll need a stronger needle (size 22 or 24) and probably a thimble unless you want a sore fingertip. A zigzag in white or natural on dark denim has a bohemian look that never goes out of style.
Zigzag on fine or sheer fabrics (chiffon or tulle)
Here the challenge is the opposite: delicacy.
- Don’t use heavy threads. A single strand of cotton floss is plenty.
- Don’t draw with a marker, since it can show through. Baste a guideline with fine thread you can pull out later.
- A zigzag on these fabrics should be very light, almost like a sigh of thread.
The secret to perfect angles: keep your peaks from rounding off
One of the most common problems is that, as you go, the peaks of your zigzag start looking round and sad. That happens because we insert the needle too far from the previous point, or because thread tension pulls the vertex inward.
To get peaks with real bite: when you bring the needle up at the top vertex, make sure you go in at exactly the same hole, or a hair away from where the previous stitch ended. That precision is what creates a clean, aggressive line (in the best sense). If you want a wave-style zigzag, do the opposite: space out your entry points and watch the design soften into an ocean swell.
Combining the zigzag with other stitches: create your own style!
Zigzag embroidery is an excellent host for other stitches. It doesn’t have to go through life alone.
- With French knots: try putting a small French knot at each upper peak of the zigzag. It’ll look like a crown of tiny flowers or beads.
- With sequins: instead of a knot, sew a sequin into each valley. The shine it gives the movement of the zigzag is perfect for evening pieces or accessories.
- Double zigzag: stitching one zigzag over another but offset creates a beautiful diamond lattice known as zigzag trellis stitch. It takes a bit more work, but the result looks like couture.
Frequently asked questions about zigzag embroidery
What do I do if I run out of thread halfway through a run of peaks?
Never try to squeeze the thread down to the last inch. When you have about 4 inches left, secure it on the back by running it under the stitches you’ve already made and start with a fresh strand. If you try to stretch it, the last peak will end up loose and the pattern will fall apart.
How do I get all the Vs the same size without measuring with a ruler every second?
Use your thumbnail or the width of the needle itself as a visual guide. Here’s a friendly secret, though: imperfection is part of the charm of hand embroidery. If one is a hair different, it’s fine, it proves there’s a person behind the work and not a cold machine.
Can I machine wash an embroidered garment?
If you used quality floss (DMC or Anchor, for instance) that doesn’t bleed, you can wash it on a delicate cycle, preferably inside a mesh bag. Always press embroidery from the back on a plush towel, though, so the dimension of the zigzag doesn’t get flattened.
Is the zigzag good for covering stains?
It’s the best thing in the world for that! If you have a small stain that won’t come out, stitch a little geometric motif using the zigzag as your base. Nobody will know there’s a drop of coffee from that one Monday morning underneath.
Can I use zigzag embroidery for lettering?
Of course! I’d recommend sans serif letters, though (nothing with complicated curves). The zigzag looks great on big chunky letters, giving them a fun collegiate or athletic feel.
What thread do you recommend for a rustic finish?
Fine embroidery wool (tapestry wool), without a doubt. A zigzag worked in wool has a deliciously plush texture, ideal for customizing knit sweaters or throw blankets.
Can the zigzag be combined with beads?
It’s one of my favorite combinations! You can slide a small glass bead onto the needle before taking the stitch at the peak. The result is a jeweled zigzag that catches the light with every movement.
The zigzag as a bridge: how to join fabrics with style (hand appliqué)
If you have a scrap of gorgeous fabric (a piece of silk, a Japanese print, or even lace) and you want it in the center of a plain sweatshirt, the zigzag is your best ally.
1. Preparing the patch
Don’t cut the fabric and start stitching right away, because the edges will fray and the zigzag will suffer.
- The interfacing trick: use double-sided fusible interfacing (the kind you bond with an iron). Fuse it to the back of your scrap, cut out the shape you want, then iron it onto the main garment.
- That keeps everything in place while you work your magic with the needle.
2. The overcast zigzag edge
Now you’re going to stitch a zigzag right along the edge of the appliqué.
- The needle should go inside the appliqué at the high point and outside (into the base garment) at the low point.
- Work the stitches close together and you’ll create a solid edge that looks like cord. It’s what professional sewers call a satin zigzag. It looks flawless and keeps the fabric from shifting for good.
Geometric designs: create your own zigzag mandalas
Who said a zigzag can only run in a straight line? If you’re feeling creative, try stitching it in concentric circles.
Imagine starting with a tiny zigzag at the center of a circle and widening the angle as you move outward. You’ll end up with a kind of radiant sun, or a geometric flower, that looks incredible on the back of a jacket.
Playing with color gradients
This is where I encourage you to pull out every thread you own.
- Work the first round of zigzag in a dark shade.
- On the next round, lace the peaks with a slightly lighter shade.
- You’ll watch a visual texture emerge that seems to vibrate. It’s what I call embroidery with rhythm, and I promise it’s the most relaxing thing you’ll do all week.
Mistakes we all make with zigzag embroidery
My friend, I’ve made genuine disasters trying to go fast. Here are my most typical confessions so you don’t fall into the same traps:
- The ghost zigzag: stitching without a hoop, then letting go at the end and watching the fabric wrinkle so much the design disappears. Solution: always use a hoop! If the fabric is very fine, put tissue paper underneath while you stitch and tear it away carefully afterward.
- The treacherous knot: making enormous knots on the back that show through as a lump on the front. Solution: learn to finish off by running the thread three times under previous stitches. It’s flatter, cleaner, and more professional.
- Forgetting the back: if you’re stitching something visible from both sides (a scarf, for instance), the zigzag can turn into a tangle of crossed threads on the reverse. Trick: try to make your outgoing and returning stitches symmetrical on the back too. It’s a challenge, but what a rush when you pull it off!
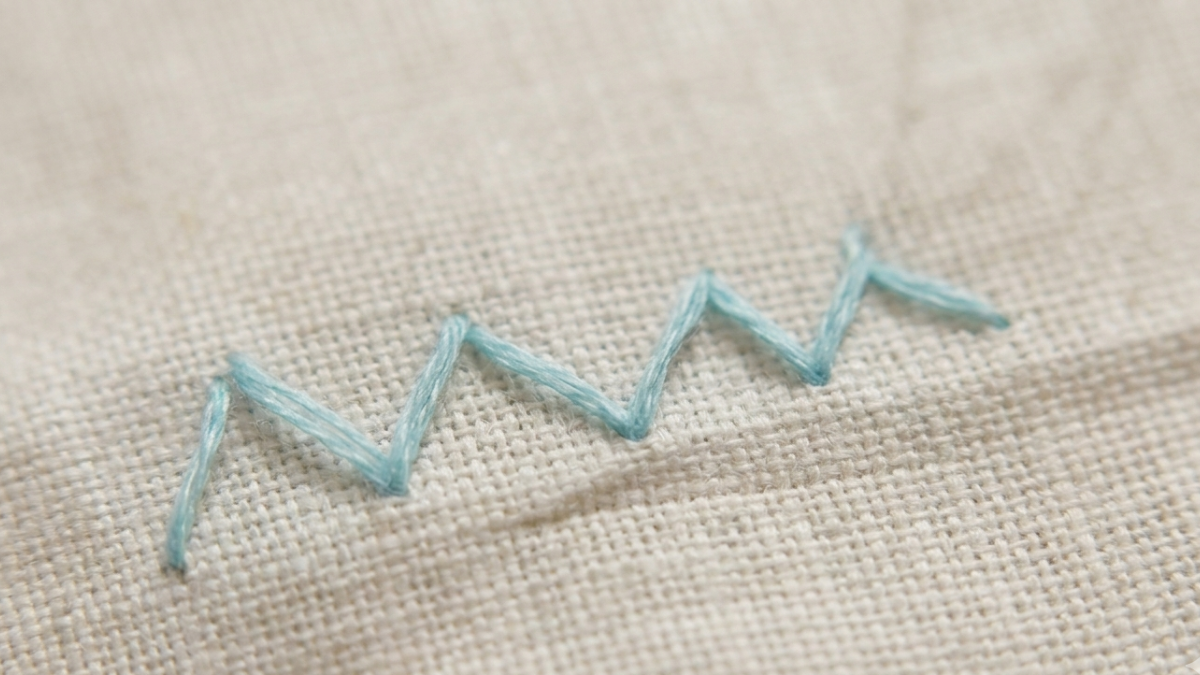
How to work the zigzag embroidery stitch
Prep and first stitch
Draw two light parallel lines with a pencil to guide the width of your zigzag. Bring the needle up on the bottom line.
The first angle
Take the needle up to the top line, shifting it slightly to the right. Insert the needle and come back up to the left of the first point.
Maintain your tension
Make sure the thread isn’t too loose (it’ll look messy) or too tight (it’ll pucker the fabric). Repeat the motion in an N or upside-down V shape. Alternate between the top and bottom lines.
Finishing off
To finish, insert the needle right beside the last stitch, take it to the back of the fabric, and either tie a small knot or run the thread under previous stitches.
Tools:
- Embroidery hoop.
- Sharp needle.
- Scissors.
Materials: Linen or cotton fabric. Six-strand embroidery floss.
We sometimes overcomplicate things chasing impossible stitches from old books, when the zigzag has it all: it’s structural, it’s decorative, and it’s incredibly fast.
Zigzag embroidery is like writing your own story in angles. Some days you’ll want tall, sharp peaks because you feel powerful, and other days you’ll prefer a low, calm zigzag. That’s the beauty of handwork: it speaks about you.
Are you curious to try it on some old piece of clothing yet? Tell me, what’s the first thing you’re going to customize? A boring T-shirt, a pair of ripped jeans, or maybe a pillow for the living room? I can’t wait to hear how it goes!