
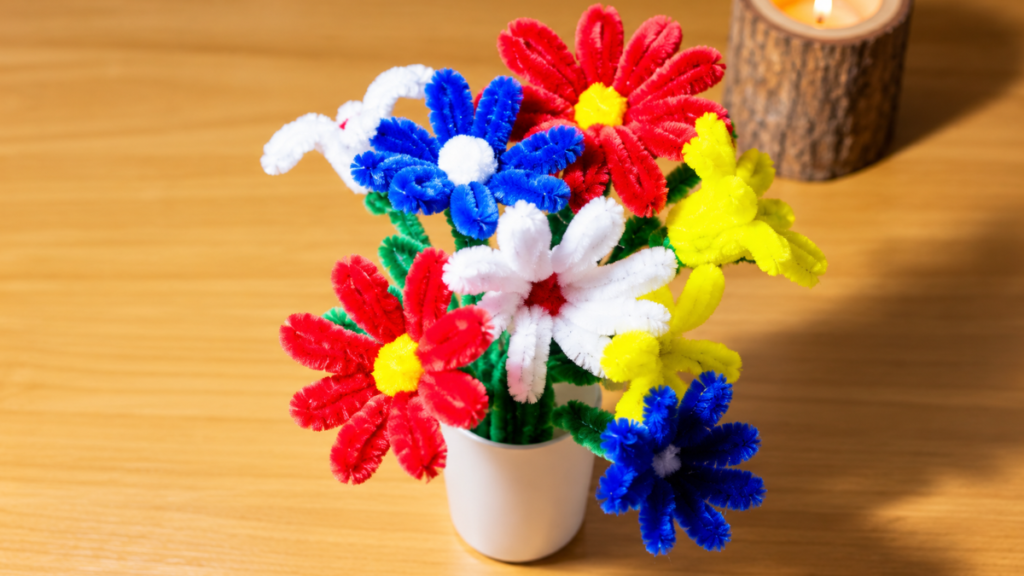
Learn how to make beautiful, long-lasting flowers with pipe cleaners. A detailed step-by-step guide to shaping perfect petals and putting together colorful bouquets without any fuss.
If you’ve ever wanted to fill a corner of your home with color or you’re looking for a relaxing craft project, you’re in the right place. Today I want to walk you through a gorgeous handmade process: making flowers out of colorful pipe cleaners.
Sometimes you just want a hands-on project you can start and finish in one afternoon without dealing with impossible patterns or endless drying times. Pipe cleaners have this great quality where they hold whatever shape you give them, but they’re flexible enough to let you adjust every bend as many times as you need until you get the look you’re after.
This post contains affiliate links; see the disclosure for details.
Why make flowers with pipe cleaners
There are moments when you just feel the itch to make something with your hands, right? But you don’t always have hours to spare or feel like covering the table in paint and glue.
Making flowers out of these fuzzy little sticks is one of the most rewarding craft options out there, and you can do it in small pockets of free time.
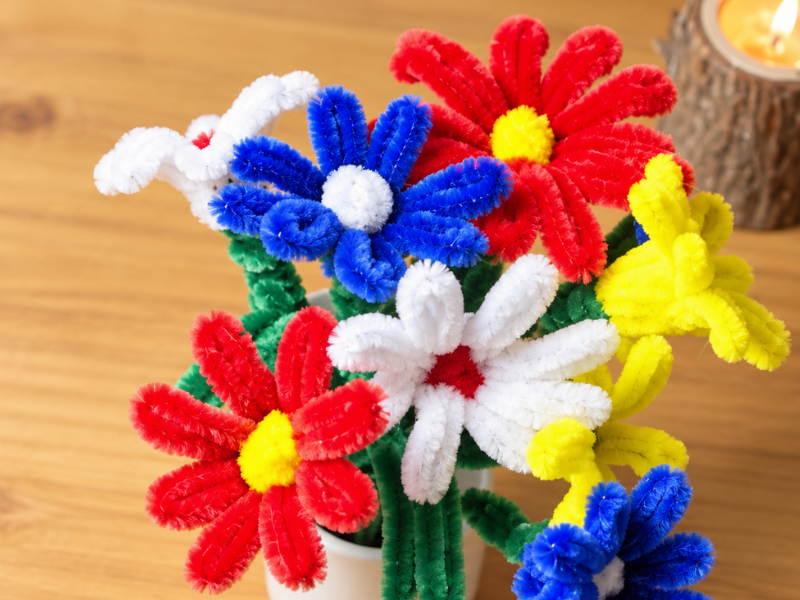
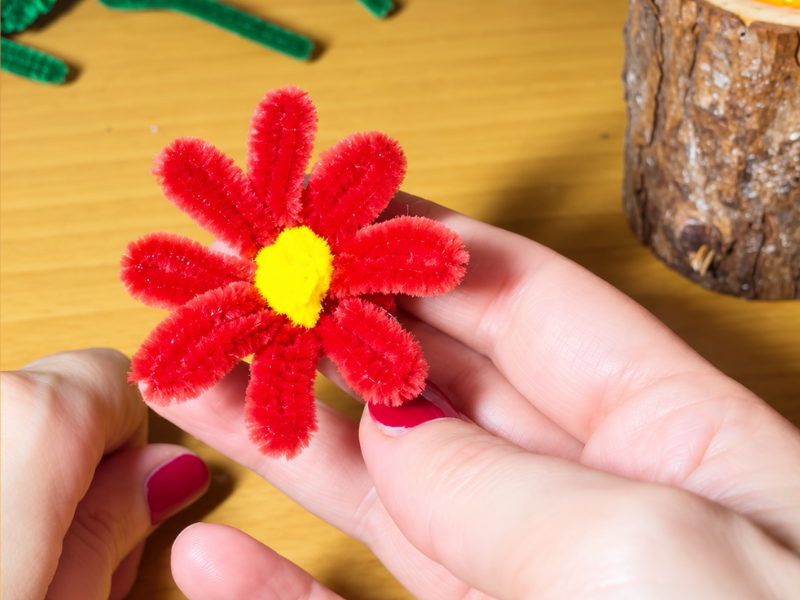
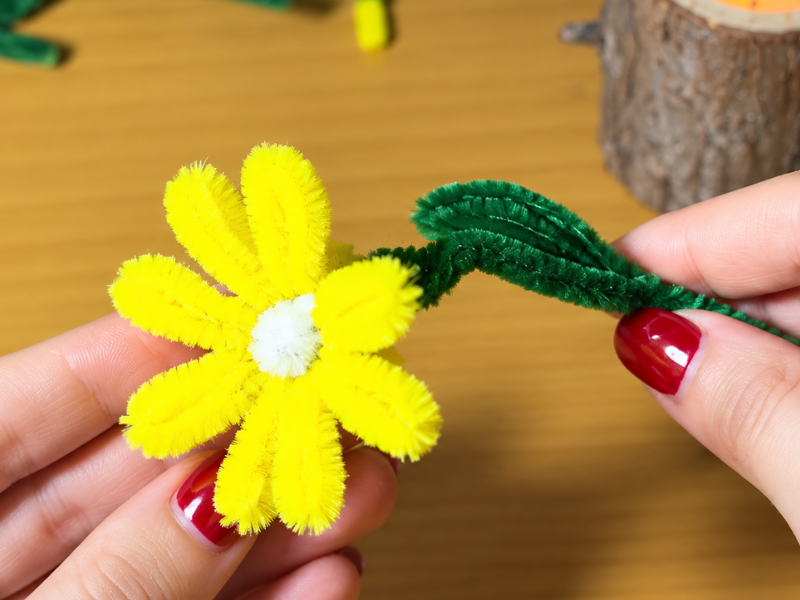
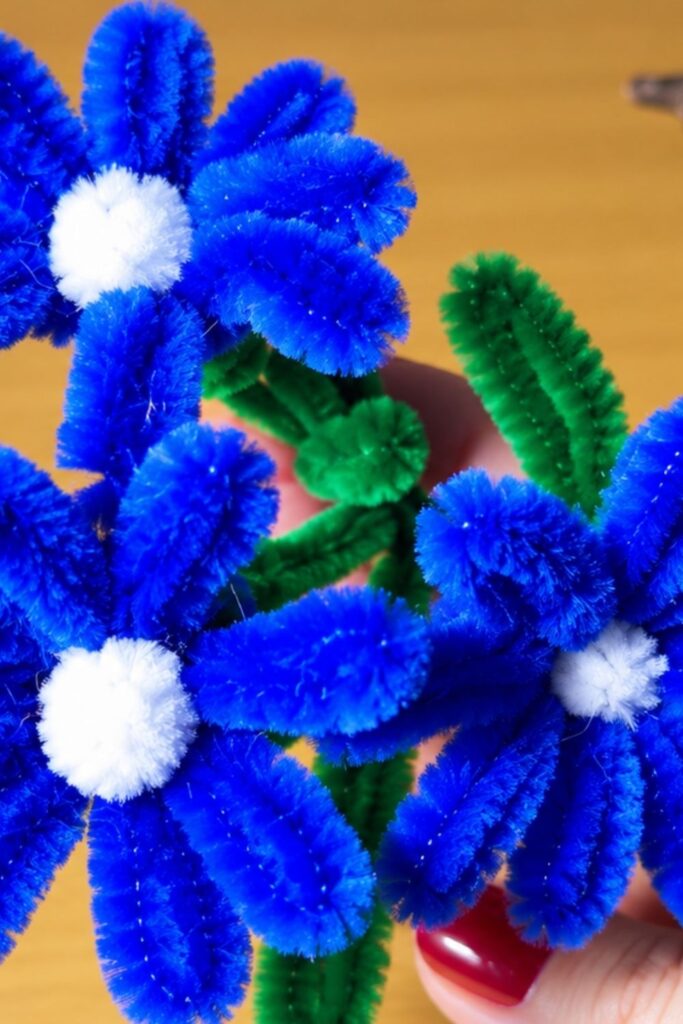
In a matter of minutes you can have a complete flower with a contrasting center, nicely opened petals, a green stem, and a couple of little leaves. You see the results almost instantly, which does wonders for clearing your head and stepping away from daily stress.
Real flowers are a gift from nature, but after a few days they wilt and you have to toss them. A bouquet made with pipe cleaners keeps its vivid colors, fuzzy texture, and shape intact for years. All they need is an occasional light dusting to look spotless in any glass vase or ceramic pot.
Materials you’ll need
Even though this is a pretty simple craft, choosing the right supplies makes a real difference in how your finished flowers turn out. Not all pipe cleaners on the market have the same fiber density or the same thickness of wire inside.
Choosing the right pipe cleaners
For flowers that look full and have real body, I’d recommend going with pipe cleaners with good fiber density, also known in the craft world as chenille stems. The ones with sparse, thin fuzz let the center wire show through and make the petals look washed out or flimsy.
As for colors, the variety is huge. I’d suggest having several shades for petals (think yellows, reds, pinks, purples, or whites), plus a yellow or deep brown for the centers and a couple of greens for the leaves and stems. Pairing a lime green with a darker leaf green in the same bouquet adds a really nice visual richness.
Everyday tools you already have
One of the best things about this technique is that you don’t need to buy any special molds. To give the petals a round, symmetrical shape, we’ll use cylindrical objects you already have lying around.
A chunky highlighter marker, a standard lighter, or even an elongated USB drive all work as a perfect template. Depending on how thick the object is, you’ll get tighter, smaller petals or wider, more open loops.
Besides your shaping tool, all you need is a pair of wire cutters or strong scissors to trim excess wire.
Anatomy of a pipe cleaner flower
Unlike paper or fabric flowers that are usually glued layer by layer, pipe cleaner flowers hold together through the twist of the wire itself.
The structure has four parts:
-The button or flower center, which is a small, tight flat spiral made from a short piece of pipe cleaner. This spiral acts as the focal point and as a physical stopper so the other pieces don’t slide off.
-The petal ring, which you create by wrapping one or more strips around a cylindrical object to form a series of even loops, then securing them at the base by twisting.
-The calyx and green stem, which is a green chenille strip that wraps around the bottom junction of the flower, covering the wire ends and extending downward to form the stem.
-The side leaves, which are shaped by forming simple closed arches and twisting them onto the stem at different heights.
Why tension matters when making pipe cleaner flowers
One thing I always remind people of is that how sturdy your flower turns out depends on how tightly you twist the wires together. Pipe cleaners are very forgiving, but if you only cross the ends once and leave them loose, the whole thing will start falling apart as soon as you add the leaves or move the flower around.
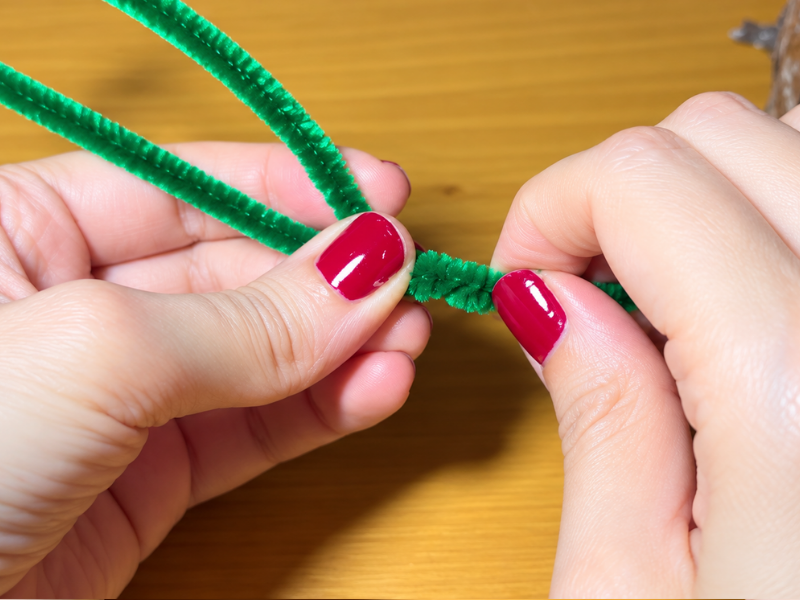
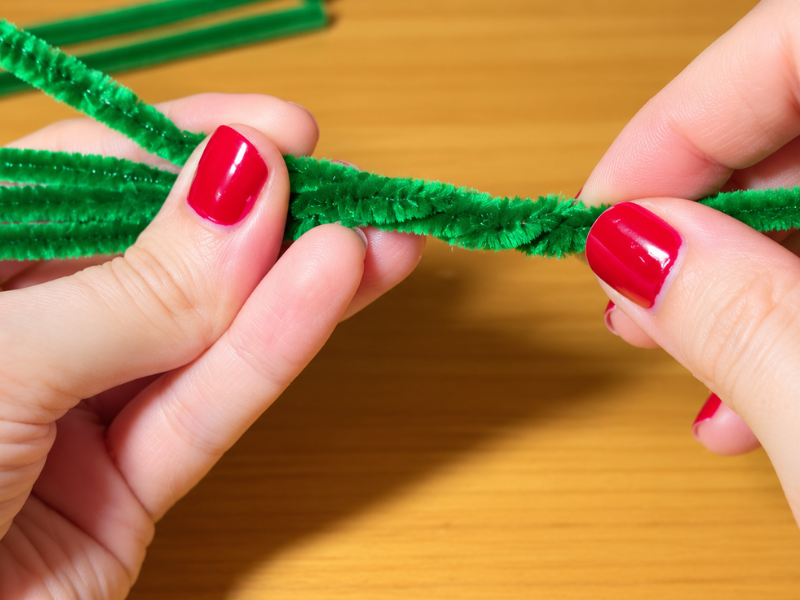
Every time the pattern calls for joining two parts, make sure you give two or three full twists around the wire’s own axis. You’ll feel the wires bite into each other through the fuzz.
Step-by-step guide to making pipe cleaner flowers
Step-by-step guide to making the flowers
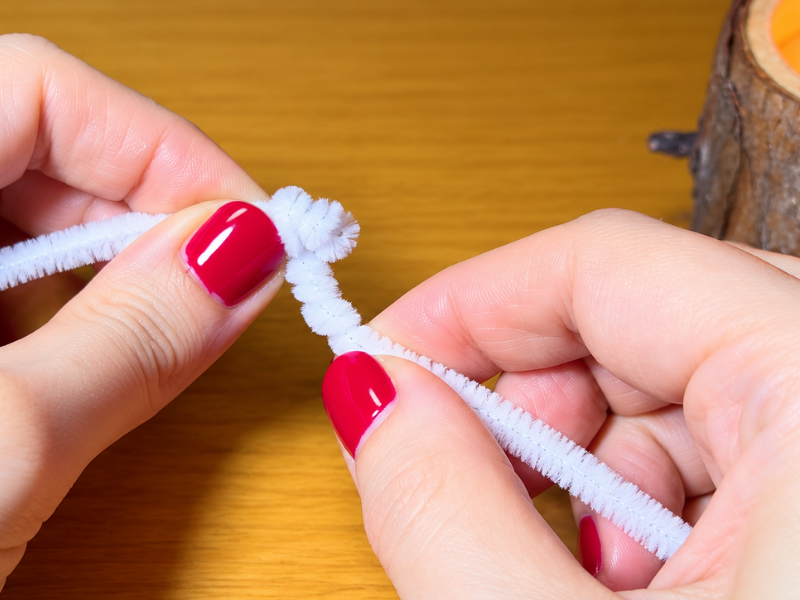
Make the flower center
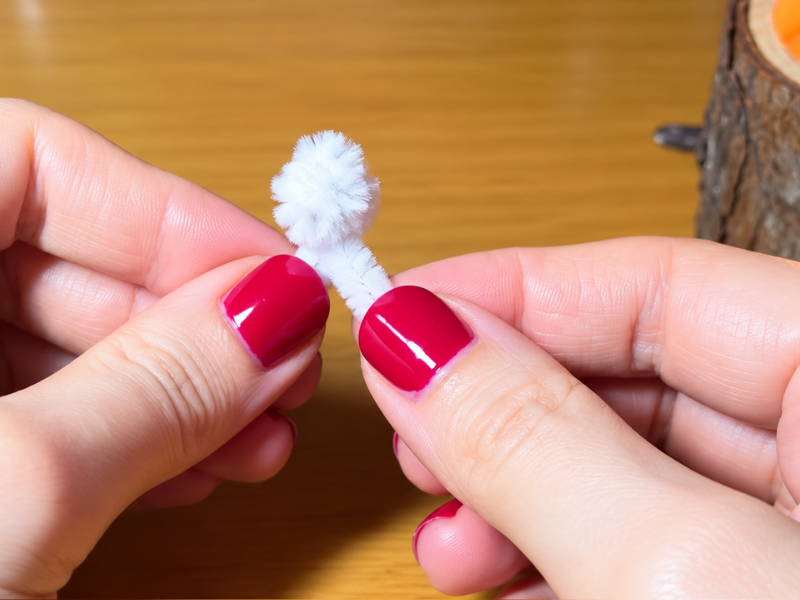
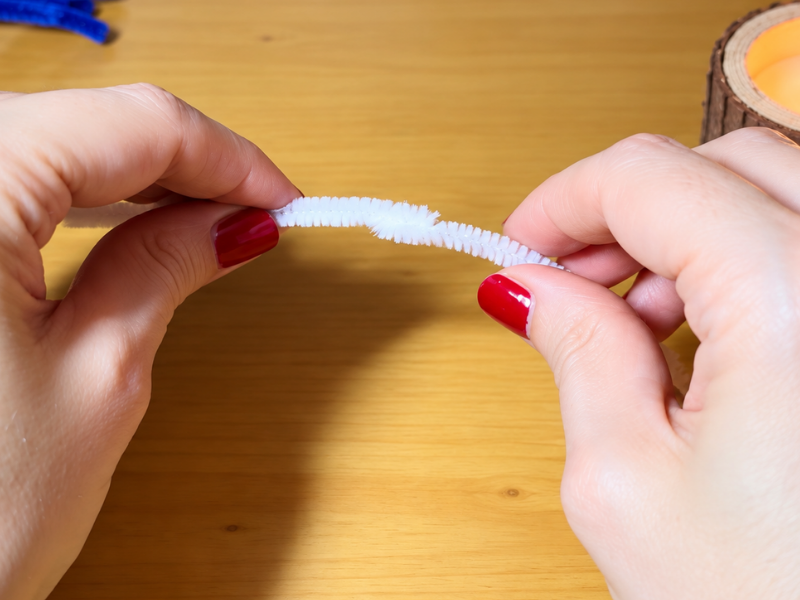
Take a pipe cleaner and start by making two small bends in the middle to form a tiny step. Wrap the free end around that base, pressing the spiral flat until you reach the size you want, then trim the excess.
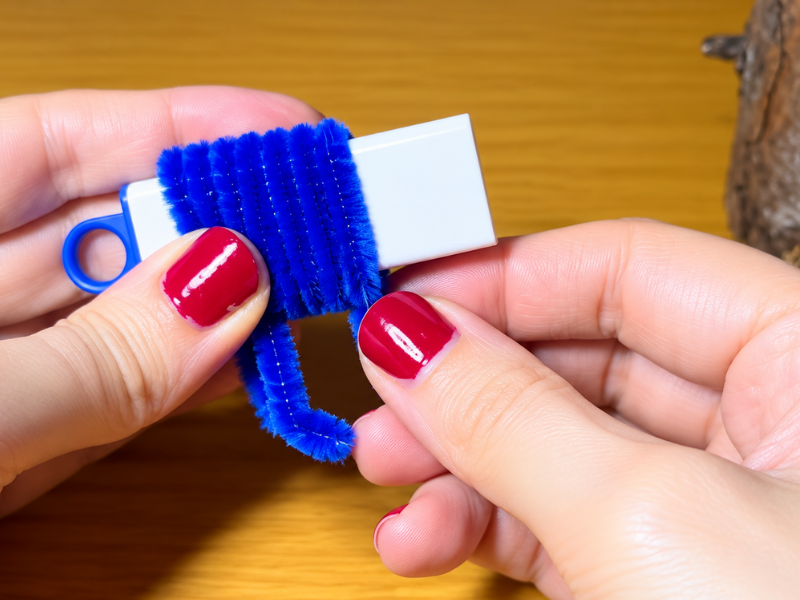
Shape the petals
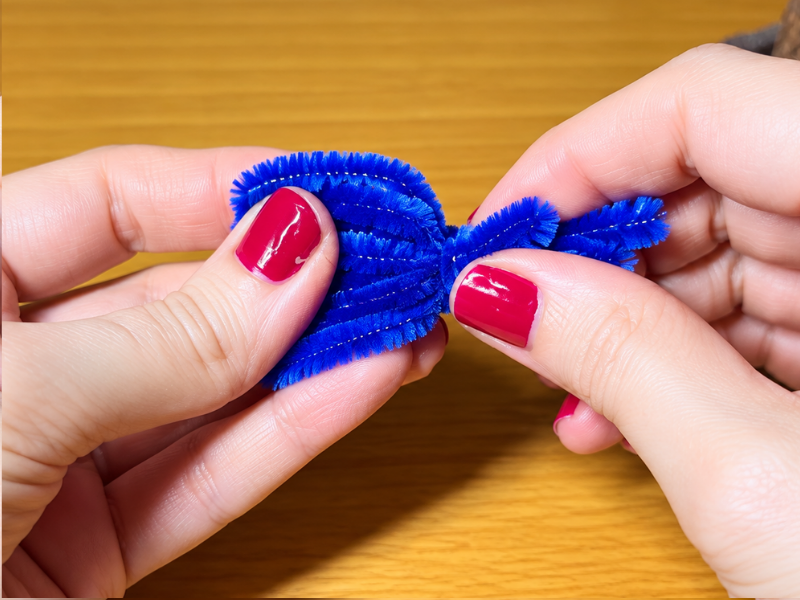
Wrap a pipe cleaner in your chosen color around a cylindrical object (like a highlighter or a lighter), forming continuous loops. Carefully slide the coil off, thread one of the long ends through the center of the loops, and twist it down to secure the base.
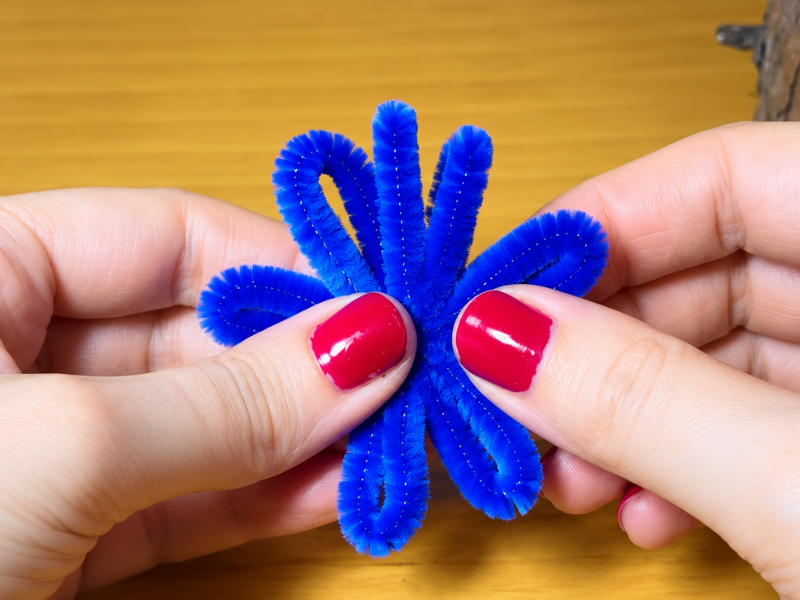
Arrange the petals
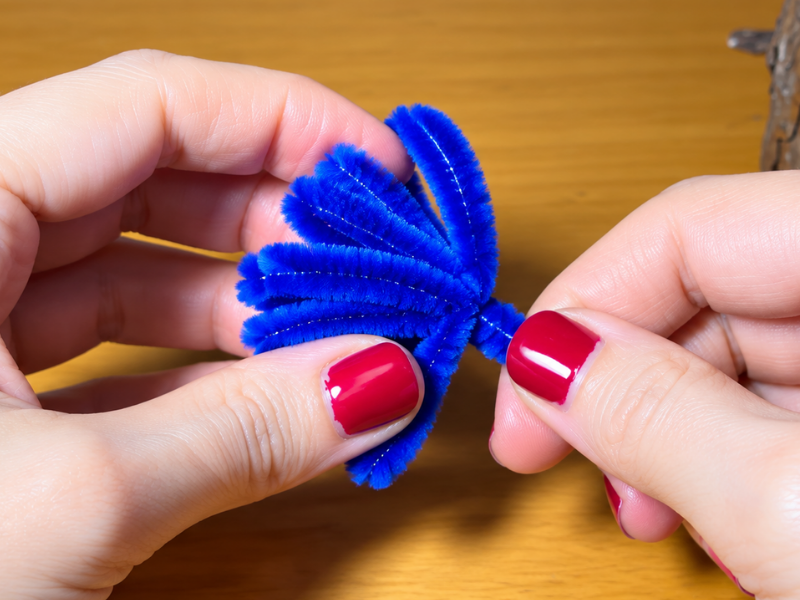
Separate the loops to fan them out and flatten them slightly. Take each petal one at a time and give it a 90-degree twist at the base to shift it from a vertical position into a flat, horizontal layout.
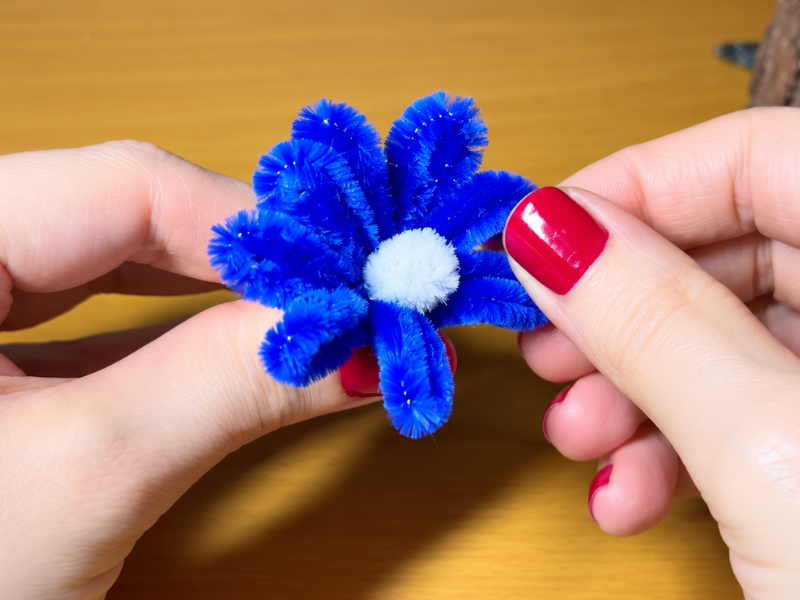
Attach the center and close the flower
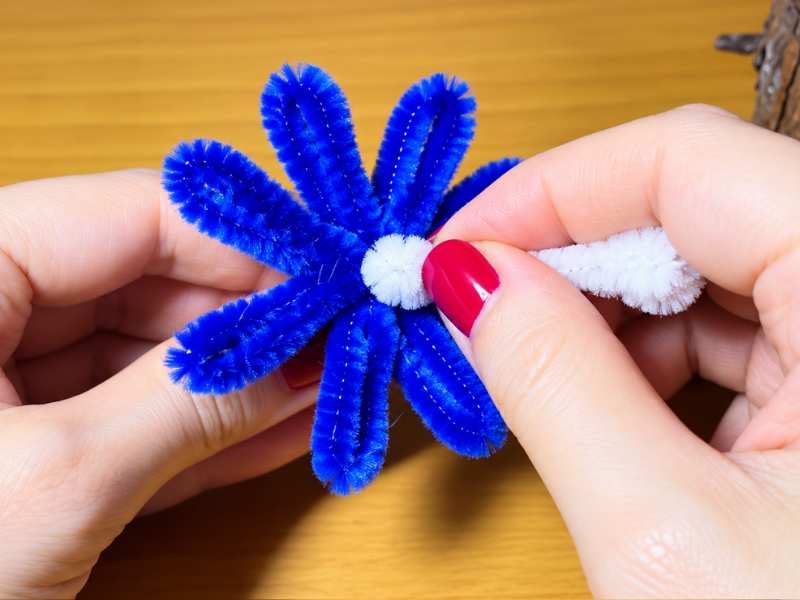
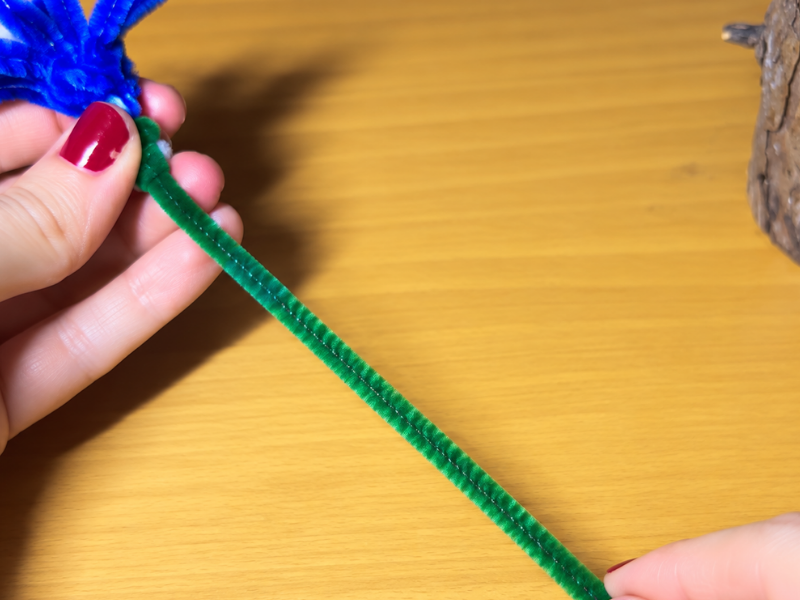
Push the end of the center piece you made earlier through the opening in the petal ring. Gently close the petals around the center to give the flower volume, then twist all the leftover tails at the back together into a single strand.
Form the stem and green leaves
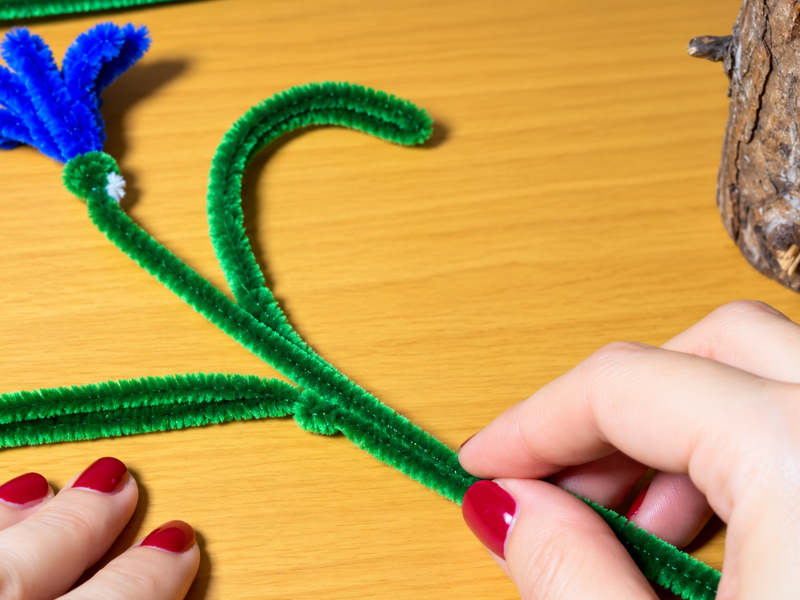
Shape a closed oval with a green pipe cleaner and twist its base to make a leaf. Hook another green pipe cleaner onto the back of the flower, wrap it downward to form the stem, and attach the leaves as you go by twisting them onto the stem at different points.
Tools:
- Cylindrical object (highlighter marker, lighter, or USB drive)
- Strong scissors or wire cutters
Materials: 3 or 4 colored pipe cleaners for the petals 1 pipe cleaner in a different color for the center 2 green pipe cleaners for the stem and leaves
You can also watch the video tutorial if you prefer.
The step-by-step in photos
Advanced techniques for more dynamic, realistic petals
Once you’ve nailed the basic cylinder-wrapping technique, a whole world of customization opens up. The secret to keeping your flowers from looking flat or repetitive comes down to a few small shaping moves you apply right at the end.
Curving the tips
If you leave the petals perfectly straight, the flower will have a nice geometric look but feel a little stiff. To loosen it up, try gently pinching the top of each petal between your fingertips and bending it slightly backward.
This subtle curve mimics what natural petals do when they reach full bloom and the weight of the corolla pulls them open. If instead you want to recreate a spring bud that’s just starting to open, bend the tips slightly inward, partially covering the center spiral.
Mixing textures and color gradients
Another fantastic way to level up your creations is to twist two pipe cleaners in different shades together before forming the loops. For example, if you twist a red strip with a light pink one along their full length and then wrap that double strand around the marker, each petal will have a beautiful two-tone marbling effect.
You can do the same thing with the center button. Just line up the tips of a yellow and an orange pipe cleaner and spiral them together flat. The result is a center full of subtle color shifts that gives the whole flower an incredible sense of depth.
How to build varied bouquets and centerpiece arrangements
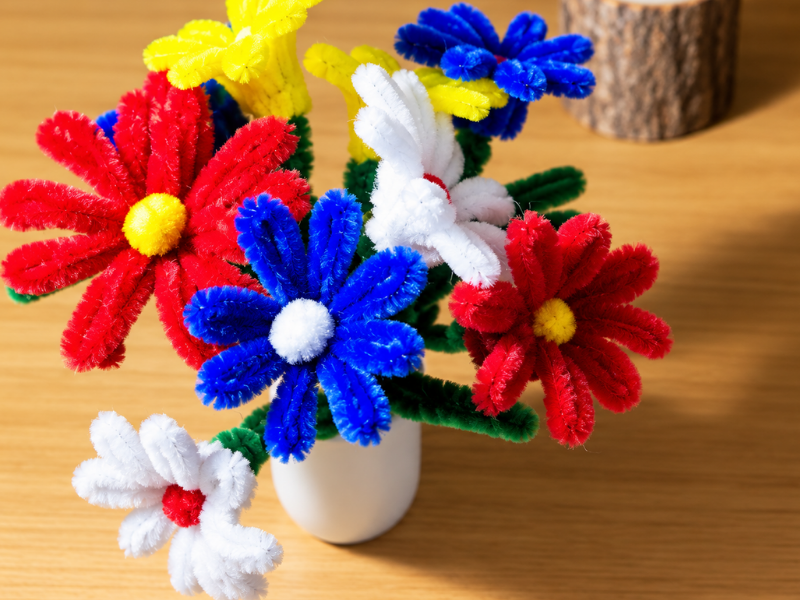
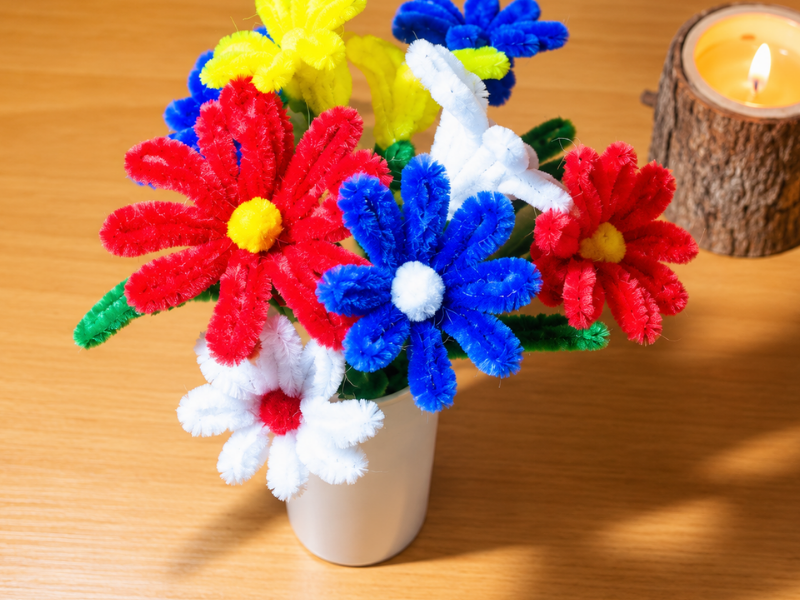
Once you get the hang of making your first flower, the natural instinct is to want to crank out ten more right away. Putting together a multicolor pipe cleaner bouquet is one of the most satisfying crafting activities out there, because you can match the colors to whichever room you plan to display them in.
Mixing classic blooms with daisy-style flowers
For a bouquet that looks balanced and polished, it helps to combine different flower styles in the same vase. You can make wide-petal flowers using thick cylindrical molds like highlighter markers and alternate them with daisy-style flowers with thinner petals shaped around a pen or a skinnier pencil.
Yellow or white daisies with an orange center bring a wonderful sense of lightness and freshness between flowers in deeper or bolder shades like wine red, violet, or navy blue.
Reinforcing stems for tall vases
If you’re planning to place your bouquet in a tall glass vase, the weight of the flower head might cause a single-pipe-cleaner stem to droop. The easy fix is to slip a piece of thin floral wire or a wooden skewer inside the green pipe cleaner while you’re wrapping the stem.
This gives the stem rigidity so it stays perfectly upright while keeping that nice fuzzy chenille texture on the outside. You can also wrap the lower section of the stem with some tightly stretched green floral tape, which evens out the texture and hides any leaf attachment points.
Troubleshooting common issues
What to do if the flower wobbles on the stem
If the flower head bobs around or won’t sit straight on the green stem, the back junction wasn’t twisted tightly enough. When you bundle together the leftover strands from the center and the petals, make sure to hold them firmly and give at least four tight twists.
If the flower is already finished, you can fix this by threading an extra green pipe cleaner through the base of the flower, right behind the petals, and giving it a couple of firm twists before continuing down the stem.
How to keep trimmed wire ends from poking
When you trim the excess chenille with scissors, the metal wire core is left exposed at the tip. To avoid snags or scratches when handling the bouquet, make it a habit to bend that cut tip inward using small pliers or just your fingertips.
Folding that tip back on itself tucks the wire inside the soft fuzz of the chenille, giving you a smooth finish on every side.
Creative ideas for decorating and gifting with handmade flowers
One of the best parts of mastering this craft is that your flowers can become thoughtful handmade gifts, or unique decorative touches for any spot in your home.
You can put together small bunches tied with a jute or twine bow to top off a gift package. Adding a single handmade flower on top of a plain cardboard box instantly elevates the whole presentation.
Another great idea is making themed napkin rings for dinner parties or family celebrations. Just form a closed loop with a green pipe cleaner sized to fit around a napkin and attach a small pastel flower on top. It makes for a cheerful, welcoming table with practically zero effort.
You can also work them into a kid’s room, placing them around a mirror frame or weaving them into a strand of warm LED string lights. Since they weigh next to nothing and hold their shape with just the wire, they adapt to any setup easily.
Frequently asked questions about pipe cleaner flowers
Can you wash or clean the flowers if they get dusty?
Since they’re made of synthetic fibers over a metal wire core, submerging them in water isn’t recommended because the iron center could eventually rust. The best way to keep them looking fresh is to go over them with a soft feather duster, or hit them with cool air from a hair dryer on low to blow the dust off in seconds.
How do I get all the petals to come out exactly the same?
The key to clean symmetry is using the exact same cylindrical object as your shaping template throughout the entire flower. By keeping the diameter consistent, every loop will have the same amount of curve and length.
Is this a good craft to do with kids?
It’s a perfect activity for a relaxed afternoon of crafting at home together. Since it doesn’t involve hot glue or dangerous tools, it’s easy for everyone to follow along. The only thing to watch out for is the trimmed wire ends — just make sure they’re bent inward so they don’t poke.
I really hope this guide inspires you to start shaping your own flowers and enjoy watching a couple of chenille stems turn into a gorgeous bouquet. There’s something deeply satisfying about making decorative pieces with your own hands.
I’d love to hear which color combo you went with for your first project and what you used as a template to shape the petals.
If any of the steps left you with questions or you’ve got a trick that worked well during assembly, drop me a comment below. I promise I’ll read it and get back to you so we can keep swapping ideas.
You can find more pipe cleaner ideas here.
Grab your pipe cleaners, add your own personal touch to every petal, and enjoy your creative time.

