Dive into the world of cross stitch with this master guide. Discover the essential cross stitch stitches: full cross, half stitch, quarter, three-quarter, backstitch, and French knot. Master every technique and create stunning designs!
Today we’re not talking about pretty patterns (you already know how much I love those). We’re talking about the very essence of our craft: the essential cross stitch stitches. Yes, those tiny feats of textile engineering that come together to create the wonderful designs we fall for again and again.
Cross stitch may look simple at first glance, but every crossing of threads hides a universe of possibilities, and the beauty, as always, is in the details. Knowing the different stitches inside out won’t just let you follow any pattern with confidence, it opens the door to real creative freedom. You’ll be able to adapt, improvise, and bring your own ideas to life with astonishing precision.
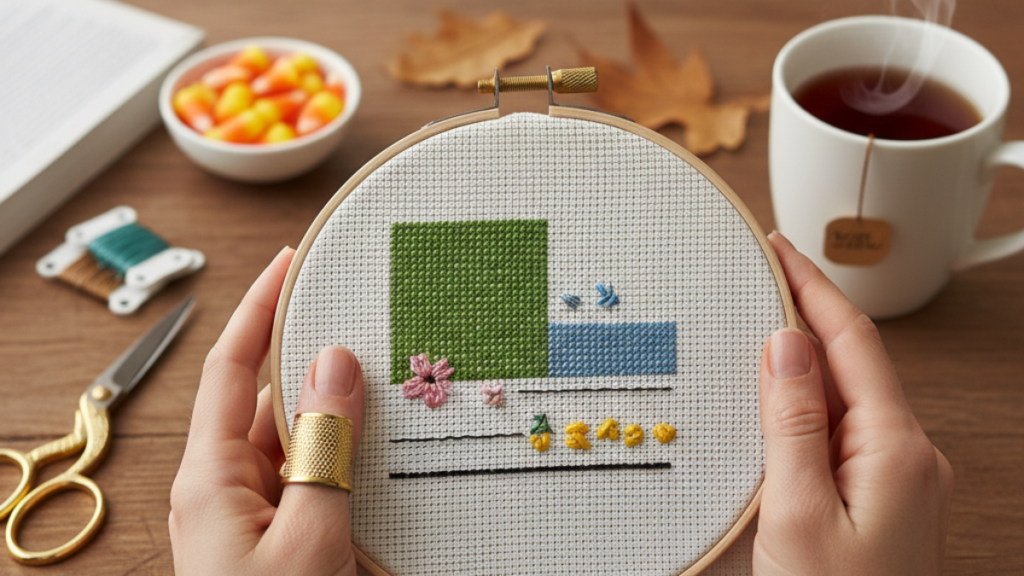
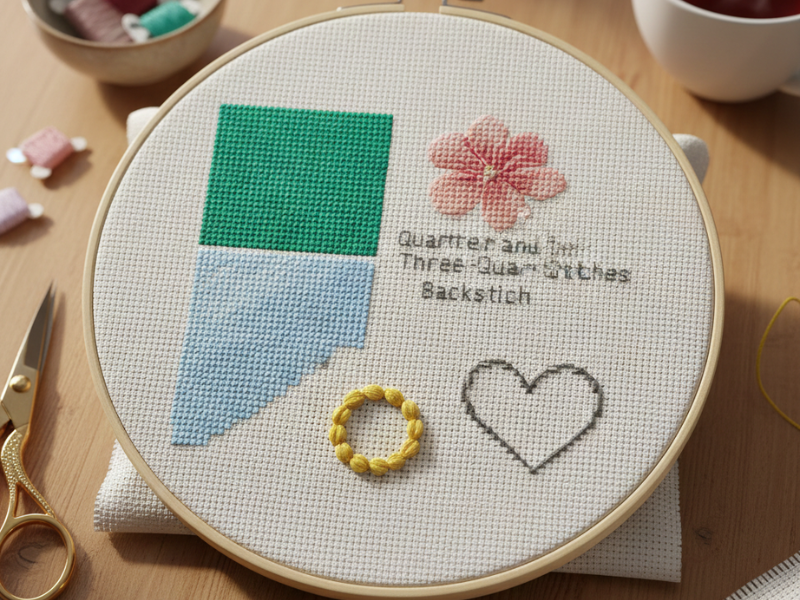
Today we’re breaking down the fundamental stitches one by one: the full cross stitch, the half stitch, the quarter and three-quarter stitches, the backstitch, and, as the finishing touch, the exquisite French knot. Get ready, because by the end of this read, your needle and floss will look at you differently. Let’s begin our adventure!
1. The absolute star: the full cross stitch
Here she is, the queen, the foundation of our entire universe. When people say “cross stitch,” most of them mean this stitch. It’s the heart of the craft and what gives it that signature pixelated look we love so much. Understanding how to execute it perfectly is the first step toward mastering any design.
What exactly is the full cross stitch?
Picture Aida or linen fabric as an invisible grid. Every “X” we stitch fills one of those squares. A full cross stitch is formed, as the name suggests, by two diagonal stitches that cross perfectly at the center of that square, making a clean X. One runs from the lower left corner to the upper right, the other from the lower right to the upper left.
The ritual of execution: step by step toward perfection
For your work to look flawless, technique is crucial. It isn’t just pushing the needle in and out, it’s doing it with intention and method.
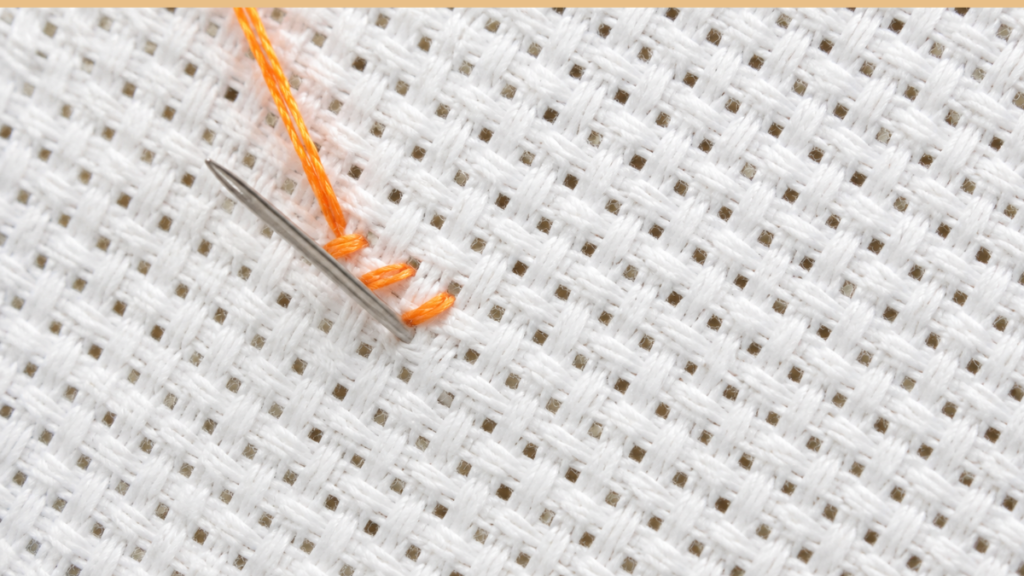
Step 1: The first diagonal (the bottom leg)
We always start with the bottom. Bring the needle up at the lower left corner of the square where you want your stitch. Pull the floss gently until the knot (if you start that way, though it looks better to go knotless) sits hidden on the back, or until the floss is secured if you’re using the loop method.
Now take the needle to the upper right corner of that same square and go through the fabric. Voilà! You have your first diagonal, the bottom leg of your cross. Try to keep the tension consistent. Not so loose that a loop forms, not so tight that it distorts the fabric. This is where a lot of people rush, but it’s the foundation of good work.
Step 2: The second diagonal (the top leg)
Once you have the first leg, bring the needle up at the lower right corner of the square (right beside where the first leg came up) and take it down at the upper left corner. As you pull the floss, the complete X forms. Look closely to make sure both diagonals cross right at the center of the square. That’s the mark of a well-made stitch.
The secret to consistency: stitch direction
This is the great secret of a professional finish, especially if your design has large areas of a single color. For your work to have an even texture and reflect light uniformly, all the top legs of your stitches need to run in the same direction.
Picture a field of crosses. Look at a finished cross stitch piece and you’ll see that every top leg of every X runs, say, right to left, while the bottom legs run left to right. You get there by stitching all the bottom legs of a row or block of color in one direction first, then coming back to make all the top legs in the opposite direction.
The “there and back” technique (or Danish method)
This is the most common technique and the one I strongly recommend.
- There: Stitch a full row of half stitches, all with the first diagonal (from the lower left corner to the upper right, for example). Now you have a row of diagonal bars.
- Back: When you reach the end of the row, turn around and stitch the second diagonals (from the lower right corner to the upper left) over each half stitch you already made.
This method doesn’t just guarantee consistent direction, it also helps you keep even tension and leaves the back of your work much tidier, with horizontal or vertical lines instead of a tangle of floss.
When and where does the full cross stitch shine?
This stitch is the workhorse of cross stitch. It’s used for:
- Filling large areas: think backgrounds, character bodies, skies. The density it provides is perfect for giving the image solidity and presence.
- Crisp, defined details: every X is a pixel, which lets you recreate images with impressive clarity. It’s ideal for portraits, landscapes, or lettering.
- Creating visual texture: depending on how many strands of floss you use (more on that shortly), you can make an area look denser and fuller (more strands) or lighter (fewer).
Subtle variations: tension and strand count
Here’s where we step into mastery. The same full cross stitch can look radically different depending on two key factors:
1. Floss tension
This is an art you acquire with practice. Tension that’s too loose leaves crosses puffy and poorly defined, with fabric showing through between them. Tension that’s too tight can distort the fabric and make the stitch sink, losing its volume. Look for that sweet spot where the floss sits firmly on the fabric, covering the weave, without pulling the grid out of shape. Every stitch is a whisper, not a yank!
2. Number of strands
Embroidery floss (DMC, Anchor, and so on) usually comes in a six-strand skein. Depending on the effect you want and the count of your fabric (that is, the number of squares per inch), you’ll choose one, two, or even three strands for your full cross stitches.
- One strand: ideal for a more delicate, vintage look, or when you’re working on high-count fabric (many stitches per inch) and want the design to stay very fine.
- Two strands: the standard. It gives excellent coverage on most mid-count fabrics (14 or 16 ct) and creates a pleasant, visible texture.
- Three strands: for a denser, plusher effect with more dimension. Great for rustic designs or when you want the color to really pop. Experiment with different strand counts on a scrap of fabric to see which effect you like best with your pattern.
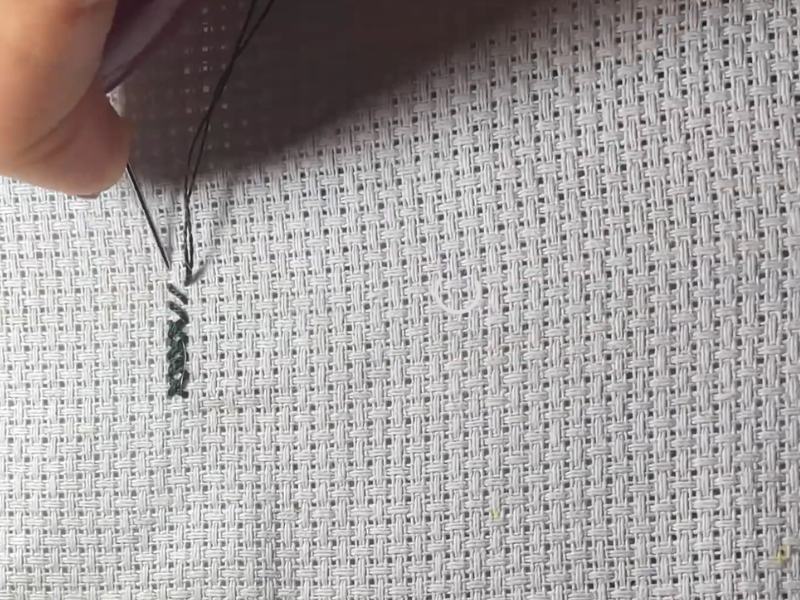
2. The art of subtlety: the half stitch
If the full cross stitch is the solid foundation, the half stitch is the soft brush. It’s a stitch people often underrate, yet it brings a depth and atmosphere the full cross simply can’t achieve.
What is the half stitch?
It’s literally half a cross. Instead of working both diagonals, you stitch only one. It’s usually worked from the lower left corner to the upper right of the square (following the direction of the bottom leg of your full crosses).
Why you should love it (uses and effects)
The half stitch has a very clear aesthetic purpose: creating lightness.
- Atmospheric backgrounds: it’s used constantly for skies, water, or blurred backgrounds. Letting a bit more fabric show through the floss creates a watercolor effect that adds real depth to a design.
- Shadow effects: with less coverage than a full cross, the color reads softer. It’s ideal for subtle shadow transitions along the edges of objects.
- Speed: obviously, needing only one pass means you move much faster. Don’t get overconfident, though. Tension matters even more here so all the diagonals stay perfectly parallel.
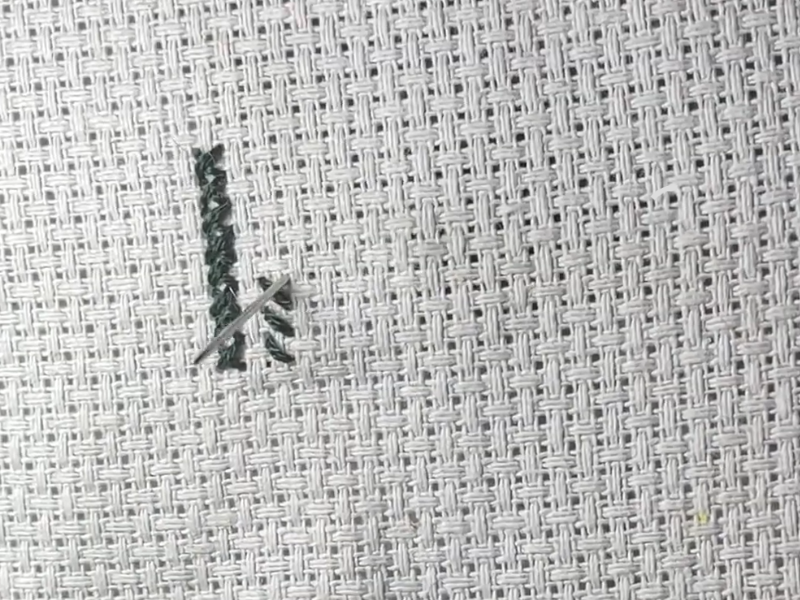
3-4. The fractional stitches: quarter and three-quarter
This is where a lot of beginners panic, but I promise there’s no mystery to it. These stitches come in when a design needs a softer curve or a detail smaller than a full square of fabric. They’re the subpixels of our stitching.
The quarter stitch
As the name says, it fills only a quarter of the square.
- How it’s done: imagine the fabric square divided into four mini-squares. The floss comes up at one of the corners and, instead of traveling to the opposite corner, goes down at the exact center of the fabric square.
- Master tip: to get the needle into the center, you’ll sometimes have to pierce the weave slightly if you’re using Aida. On linen or Lugana (stitched over two threads), it’s much easier because there’s already a natural hole in the middle.
- What it’s for: defining very small corners or isolated dots of color that don’t fill a whole square.
The three-quarter stitch
This is designers’ favorite stitch for creating curved lines and organic outlines. It’s a quarter stitch combined with a half stitch.
- How it’s done: first work the full diagonal (the half stitch), then add the short leg running from the other corner to the center. The result is a sideways Y that fills three of the square’s four corners.
- The design dilemma: sometimes a single square on the pattern shows two different symbols split by a diagonal line. That means you need two 3/4 stitches (or one 3/4 and one 1/4).
- Which one goes on top? if the pattern doesn’t specify, the golden rule is this: the color that belongs to the main object (the one in the foreground) is the one that gets the long leg (the half stitch), so it covers the background color a little.
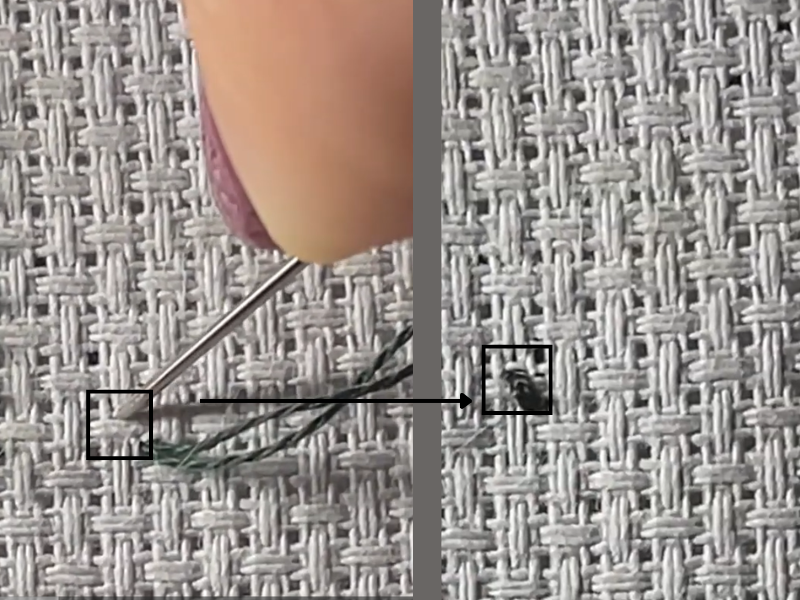
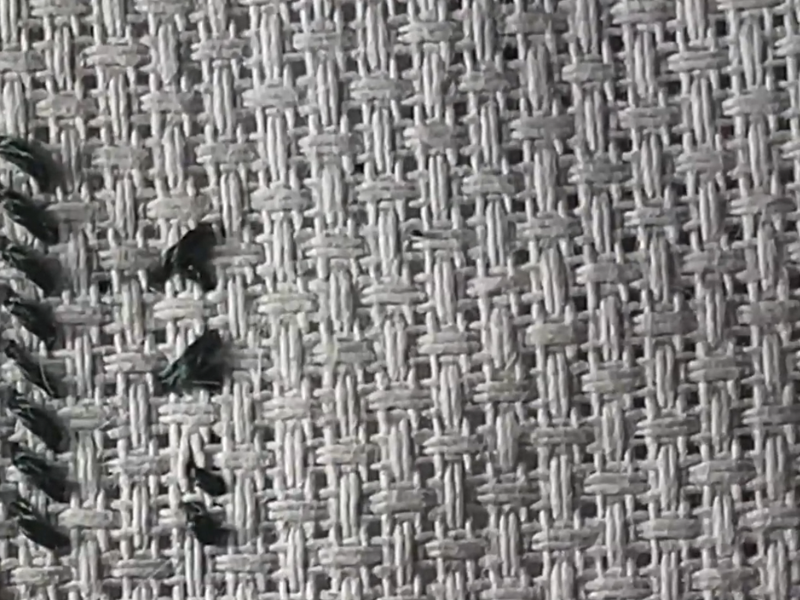
5. The backstitch: the outliner of dreams
If the essential cross stitch stitches above are the color, the backstitch is the drawing. It’s what makes everything click into place and makes the details stand out.
The outlining technique
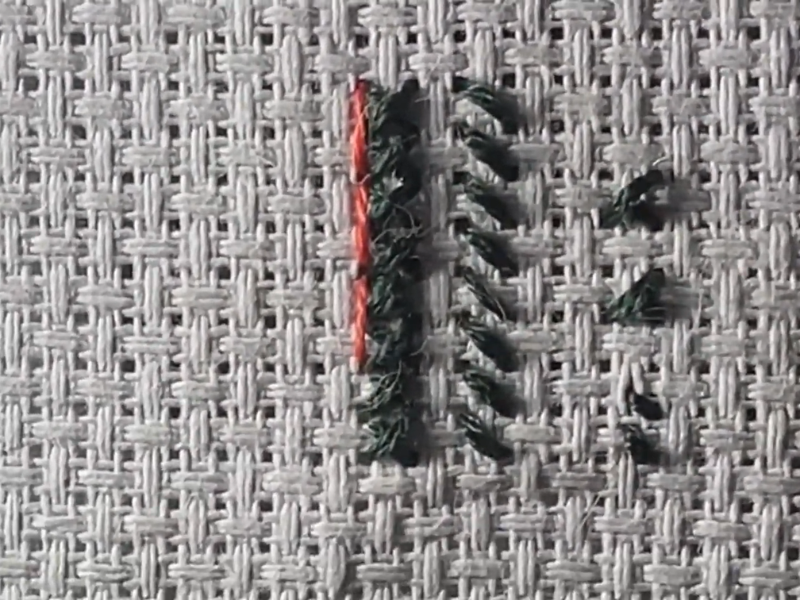
The backstitch goes in once you’ve finished all the crosses in an area. You follow the pattern’s lines (usually black or dark-colored lines) with straight stitches.
- Why “back”: because you bring the needle up one space ahead and go back to take it down where the previous stitch ended.
- The secret to crispness: don’t make your stitches too long. If you try to cover five squares in one go, the floss will sag and snag. Follow the holes in the fabric so the line stays firm and defined.
What do we use it for?
- Defining outlines: separating a character’s arm from the body, or the petals of a flower.
- Tiny details: eyelashes, cat whiskers, small lettering, or the thin branches of a tree.
- Bringing it to life: a cross stitch design without backstitch can look a little blurry. Add it, and suddenly everything gains sharpness and realism.
6. The French knot: those little jewels with dimension
If one stitch draws sighs and the occasional lump in the throat (pun very much intended), it’s the French knot. I promise that once you get the hang of it, it becomes addictive. It’s the finishing grace note, the third dimension of our work.
What it is and why we need it
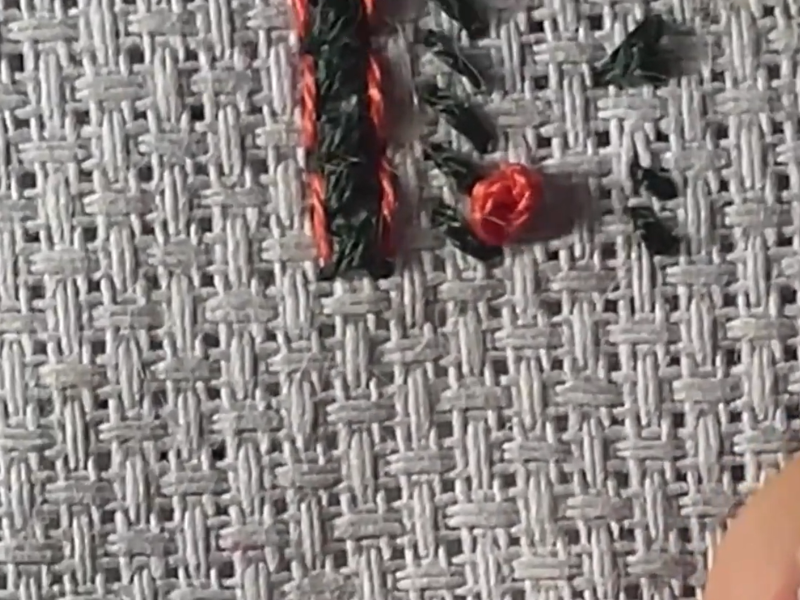
The French knot is a small bead of floss that sits above the fabric. Unlike crosses, which are flat, the knot adds texture and volume. It’s used for details that need to jump out at you.
The technique so it doesn’t get away from you
The secret to the French knot isn’t force, it’s floss control.
- Bring the needle up where you want the knot.
- Hold the floss taut with your left hand (if you’re right-handed).
- Wrap the floss around the needle once or twice (depending on how thick you want it).
- Take the needle down right beside where it came up (not in the same hole, or the knot will slip through to the back!).
- The golden trick: keep tension on the floss with the fingers of your left hand while you pass the needle down with your right. Let go too soon and the knot will end up limp and shapeless.
Creative uses for the French knot
- Flower centers: for that look of real pollen.
- Character eyes: they bring a sparkle and depth a cross can’t match.
- Snow or stars: scattered across a design, they create an incredible sense of magic.
- Animal texture: picture a lamb’s fleece worked entirely in white French knots. Irresistible!
You can see all the details on YouTube, and feel free to subscribe to the channel, it’s free^^
The needle clinic: FAQs about the essential cross stitch stitches
Here are the answers to all those questions that come up when we’re deep in floss and hoops. I’ve gathered the most common ones so this post can be your go-to guide.
Why does my cross stitch look uneven even though I’m following the pattern?
It’s almost always a matter of tension or stitch direction. Make sure every one of your Xs has its top leg pointing the same way. If some run right and others run left, light bounces off them differently and the piece looks “dirty.”
How many strands should I really use?
It depends on the fabric count. On 14 count Aida, the standard is 2 strands for the crosses and 1 for the backstitch. If white fabric shows through between the stitches, try 3 strands, but keep in mind that floss will run out much faster.
Should I wash my piece when it’s finished?
Absolutely! Our hands carry natural oils that can yellow the fabric over time. Washing also helps the fibers settle so the stitches look plumper. Use lukewarm water and a mild soap, never scrub, and dry it flat on a towel.
What do I do if my French knot slips through the hole in the fabric?
That happens because you’re taking the needle down in exactly the same spot it came up, or because the weave is very open (like 11 count Aida). Try going down just one thread away from where you came up. You can also add an extra wrap around the needle so the knot ends up bigger than the hole.
Is it better to stitch with a hoop or without one?
For cross stitch, a hoop is your best ally. It keeps the fabric taut, which makes it much easier to get the same tension on every stitch. Without a hoop, it’s very easy to end up pulling too tight and puckering the fabric.
How do I know whether to use a quarter or a three-quarter stitch?
Look at the image. If the color only needs to fill a small corner before giving way to another color, use the 1/4. If the color is part of the outline of an important object, use the 3/4 so the coverage is greater and the edge reads more defined.
Can I substitute something else for the French knot if I’m terrible at them?
Of course! Plenty of stitchers use small beads instead of French knots. They add a lovely sparkle and are far easier to place: you just sew them on like a tiny button.
Why does my floss twist so much while I stitch?
It’s normal, thanks to the movement of your hand. Every few stitches, let the needle dangle with the floss loose so it unwinds on its own. Twisted floss makes the stitch look thinner and it won’t cover the fabric well.
How do I finish off my floss so the stitching doesn’t come undone?
Never make knots on the back. Run the needle under 3 or 4 stitches you’ve already worked on the reverse. It’s much cleaner, it doesn’t create lumps when you frame the piece, and it’s surprisingly secure.
Essential cross stitch stitches at a glance
| Stitch type | Technical name | What is it for? | Level of detail |
| Full cross | Full stitch | Filling the design, adding color and body to the main image. | High (pixel effect) |
| Half stitch | Half stitch | Creating light backgrounds, shadows, skies, or watercolor effects. | Medium (translucent) |
| Quarter stitch | 1/4 stitch | Tiny details in corners or very small color changes. | Very fine |
| Three-quarter | 3/4 stitch | Softening curves, rounding petals, and defining organic edges. | Defined and curved |
| Backstitch | Backstitch | Outlining shapes, lettering, whiskers, and drawn details. | Crisp outline |
| French knot | French knot | Eyes, flower centers, snow, or any raised detail. | 3D (texture) |
Now it’s your turn: which of the essential cross stitch stitches is your favorite?
After this tour through the map of cross stitch, I’d love to know which stitch you enjoy most and which one still gives you a bit of trouble. Are you on team French knot, or do you prefer the peace of mind of full crosses?
Leave a comment below. It makes me so happy to read about your experiences, your tricks, and, why not, your little battles with the needle. In the end, we all learn from each other!
I’ll see you in the comments so we can keep sharing our passion for stitching. Until the next stitch!