Some stitches have a soul. They don’t just decorate fabric, they seem to carry a story inside them. The Pekinese stitch is one of those: simple, yet with an elegance that pulls you in. Its Eastern origins give it that delicate, unhurried quality I love so much.
You’ll see it isn’t difficult, and once you have it down you’ll love using it to add texture and movement to your embroidery. I’ll also cover how to care for your pieces, how to store them, and why stitching, even something this simple, can change the way you feel.
If you’re in the mood to learn something new, make a cup of tea, and give yourself a little time, come along. I promise this stitch will become one of your favorites ^^.
The Charm of the Pekinese Stitch
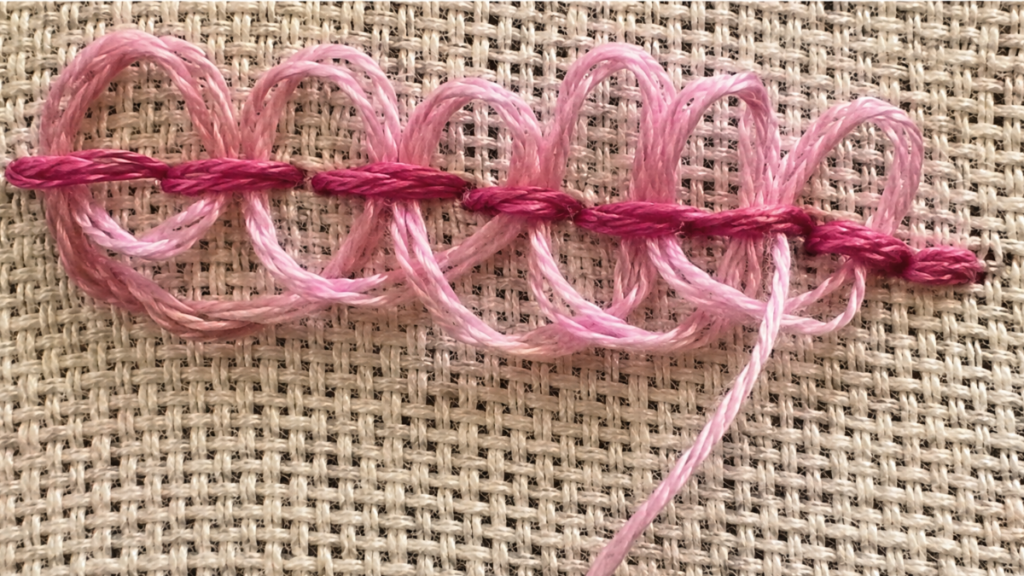
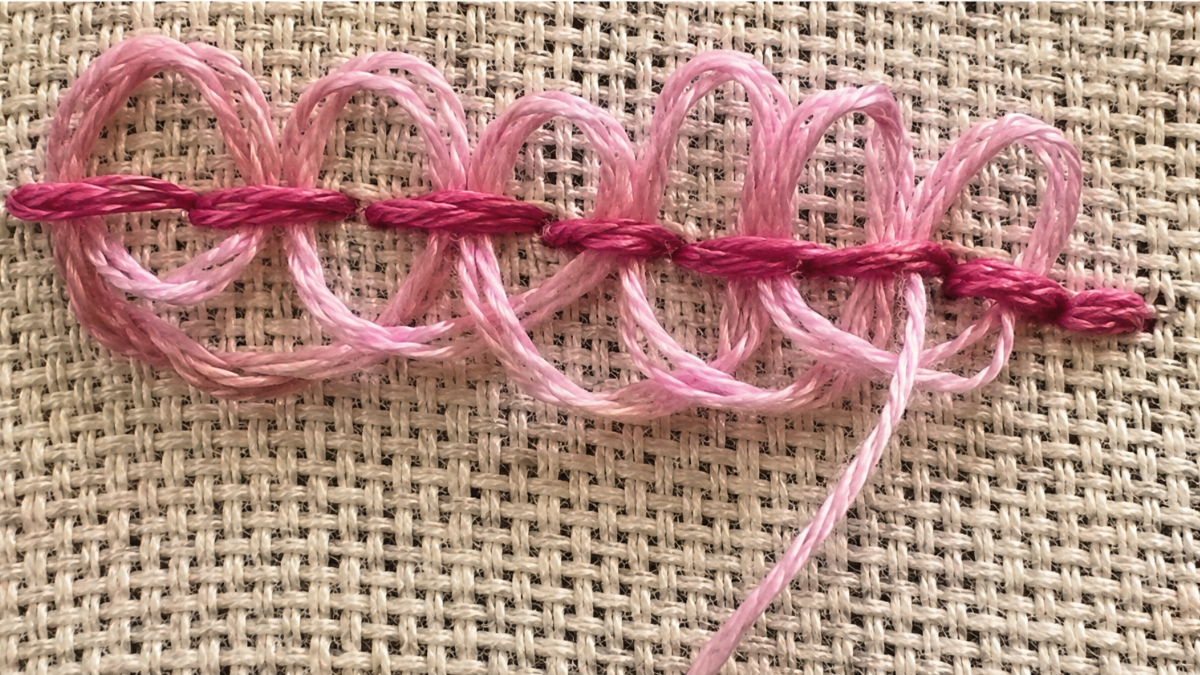
The Pekinese stitch, also known as Chinese stitch, is a stitch with rhythm. It’s built on a row of backstitch, then given a second interlaced pass that transforms it completely. The result is a soft, textured line that looks like a small braid of thread.
It has its roots in Chinese embroidery, where precision and harmony are part of the art. What’s lovely about this stitch is how it combines the simple with the elegant. It isn’t complicated, but the finished line has a presence that catches you off guard.
I like it because it’s so versatile. Use it for outlines, for framing flowers, for decorating lettering, or simply for filling in space. It also has that hypnotic quality that makes time slip by without your noticing.
Working the Pekinese stitch is like following a path. You move forward little by little, and when you look back there’s a beautiful line where nothing existed before.
What You’ll Need
The best part about this stitch is that it takes nothing special. A few basic supplies are enough to practice and get beautiful results.
You’ll need:
- Embroidery fabric, cotton or linen.
- Stranded cotton floss.
- A fine embroidery needle.
- A hoop to keep the fabric taut.
- Small scissors.
- A pencil or fabric marker.
If you’re just starting out, I’d suggest a light fabric and a contrasting thread so you can see your stitches clearly. The hoop matters here, since keeping the fabric taut helps the thread glide and keeps the stitch clean.
How to Work the Pekinese Stitch Step by Step
Let’s do it together, step by step, no rushing.
Draw your guideline
Start by drawing a straight or curved line with your fabric marker. That’s the guide you’ll follow. Mount the fabric in your hoop and tighten it well so nothing shifts.
Work a row of backstitch
First you’ll work a row of backstitch along the guideline. That’s the foundation everything else builds on.
Bring the needle up on the right side of the fabric, take a stitch backward, and come up again a little further ahead. Repeat that motion along the line. Try to keep your stitches the same size so the lacing comes out even later.
Add the second pass
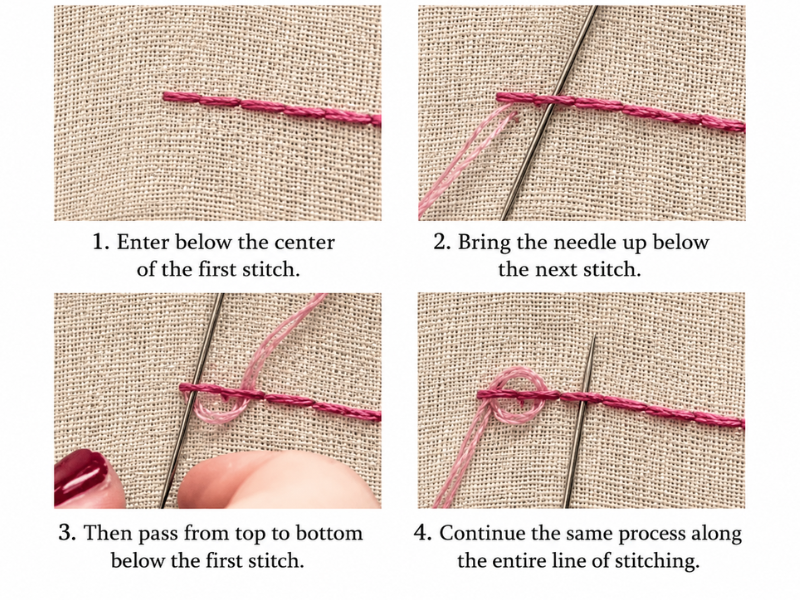
Here comes the magic. With the same thread or a different color, slide the needle under the second stitch without piercing the fabric. Then go over the first stitch, then under the third, and so on.
The needle keeps alternating over and under each backstitch. You’ll watch the thread start to form a kind of soft braid.
When you reach the end, fasten off carefully on the back. Don’t pull too tight. Let the thread breathe a little so the stitch keeps its natural loft.
That’s it. You’ve just worked your first Pekinese stitch.
Watch it on video if you’d rather follow along
Tips for Getting It Just Right
After practicing this one many times over, I can tell you a few details make all the difference.
- Don’t pull the thread too tight, or the stitch will shrink and lose its shape.
- Use finer thread for a delicate result. Two strands is usually perfect.
- Using two different colors, one for the base and one for the lacing, gives you a beautiful effect.
- Practice on straight lines before moving to curves or more complex shapes.
- Don’t be afraid to undo something you don’t like. Stitching is also about learning to start over.
This stitch isn’t complicated, but it does have a rhythm. Once you catch the motion it becomes almost automatic, as though the thread were guiding you on its own.
Where to Use the Pekinese Stitch
The nice thing about the Pekinese stitch is that it adapts to any style of embroidery. You can use it to:
- Decorate the edges of napkins or handkerchiefs.
- Frame lettering or monograms.
- Draw stems or flower outlines.
- Fill small areas within a design.
- Add texture to a minimalist piece.
It also looks lovely combined with other stitches, like stem stitch, chain stitch, or blanket stitch. Pair it with metallic or silk threads and the result has an almost jewel-like quality. It’s a discreet stitch with real character, the kind that makes a whole piece look more considered without ever looking fussy.
How to Work It into Your Designs
One of my favorite things about the Pekinese stitch is that it fits into any style. If you love floral embroidery, use it for stems or leaf outlines. If your taste runs more modern, try it in contrasting colors or along geometric lines.
You can also play with thread combinations. Use a lighter shade for the base and a darker one for the top pass, for instance, and you’ll get a gorgeous sense of depth.
If you’re feeling adventurous, mix textures: a matte thread with a shiny one, or cotton with metallic. Sometimes the simplest combinations are the most surprising.
The Pleasure of Stitching Slowly
There’s something lovely about stitching slowly. The simple act of passing the needle through the fabric over and over has an almost meditative rhythm to it.
When you embroider, you stop watching the clock. You focus on the colors, the texture, the soft sound of thread sliding through cloth. It’s a way of quieting your mind and reconnecting with yourself.
While I’m working the Pekinese stitch, I like to think of each stitch as a small breath. It’s time for me, with no demands and no hurry. When I finish and look at what I’ve made, I feel a mix of pride and calm.
This isn’t only about stitching something pretty. It’s about enjoying the process and giving yourself permission to go at your own pace.
How to Care for Your Embroidery
After putting so many hours and so much care into a piece, it’s worth looking after it properly. Always hand wash in cold water with a mild soap. Don’t scrub directly on the embroidery. Let the water do the work and press gently instead.
Dry it flat, away from direct sunlight. If you need to press it, lay it face down on a towel and cover it with a thin cloth before the iron touches it.
Store it somewhere dry, protected from dust and humidity. If you’re framing it, use non-glare glass and avoid pressing on the fabric. Caring for your embroidery is also a way of honoring your time and your energy.
Variations on the Pekinese Stitch
Once you have it down, you can experiment and give it your own spin.
- Work the second pass in the opposite direction and the stitch comes out denser and more braided.
- Leave space between the backstitches for a more open, airy effect.
- Use two shades of the same color for an elegant, subtle finish.
The Pekinese stitch pairs beautifully with other kinds of embroidery, traditional and modern alike. It’s one of those stitches that never goes out of style.
Stitching and Feeling Good
Embroidery isn’t only a creative activity. It’s a way of tuning out the noise and reconnecting with the essentials. With a needle in your hand and your focus on each stitch, you enter a state of calm that’s hard to reach any other way.
Plenty of studies say stitching reduces stress and improves concentration, but beyond that, there’s something deeply human about creating with your hands. It’s a way of being present, of feeling that what you’re doing has its own rhythm, purpose, and beauty.
Each stitch is a small gesture, yet when you finish you see how that gesture, repeated over and over, has built something lovely.
Frequently Asked Questions about pekinese stitch
Is the Pekinese stitch difficult?
Not at all. It’s a simple stitch that only needs practice. Once you catch the rhythm, it flows on its own.
Which thread should I use?
Stranded cotton floss is perfect. Use two strands for a delicate finish, or three if you want more body.
Can I use it on clothing?
Yes, though I’d suggest saving it for pieces you don’t wash often, like decorative handkerchiefs or small details on a blouse.
Can I work it in more than one color?
Of course. Using two different colors, one for the base and one for the lacing, gives a beautiful effect.
What do I do if my thread tangles?
Don’t pull. Work the tangle loose calmly and use a finer needle to help free the knot without breaking anything.
Work a row of backstitch
Bring the needle up on the right side of the fabric, take a stitch backward, and come up again a little further ahead. Repeat that motion along the line. Try to keep your stitches the same size so the lacing comes out even later.
Add the second pass
With the same thread or a different color, slide the needle under the second stitch without piercing the fabric. Then go over the first stitch, then under the third, and so on.
Finish off
When you reach the end, fasten off carefully on the back. Don’t pull too tight.
Tools:
- scissors
- needle
Materials: fabric thread
The Pekinese stitch has something special about it. It’s simple, elegant, and full of rhythm. Every time I work it, time seems to slow down and everything gets a little clearer. You don’t need to be an expert or own expensive materials. All it takes is a needle, some thread, and the desire to make something lovely with your own hands.
This stitch reminds me that beauty lives in small gestures, in patience, and in a love of detail. If you’ve never tried it, give it a shot. You’ll find it transforms your embroidery, and your quiet moments too.
Are you up for trying the Pekinese stitch? Tell me how it goes, or which project you’d like to use it in. I’d love to read your ideas and share this love of embroidery with you. If you enjoyed this guide, pass it along to someone who loves making things by hand. Sometimes one shared stitch inspires many more.