Here’s how to make a little Christmas tree out of fabric scraps. A complete step-by-step guide with creative ideas, storage tips, frequently asked questions, and advice for personalizing your handmade ornament.
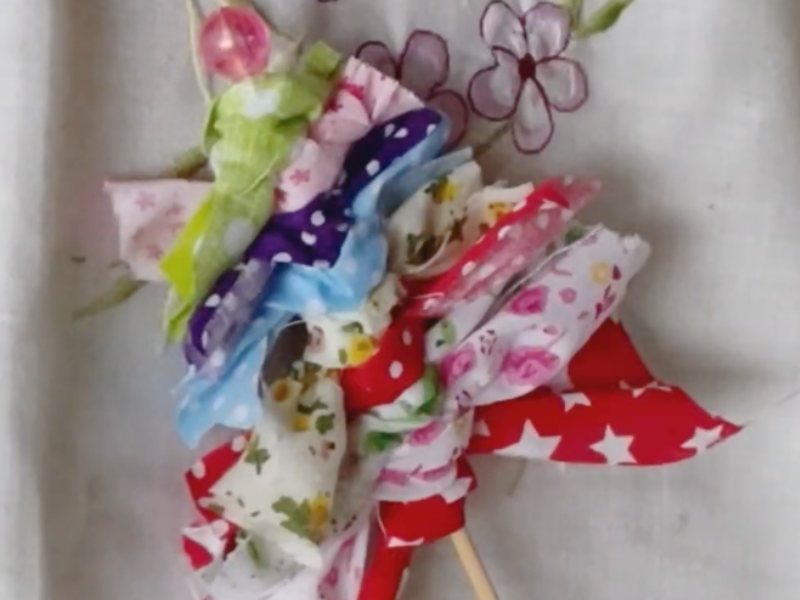
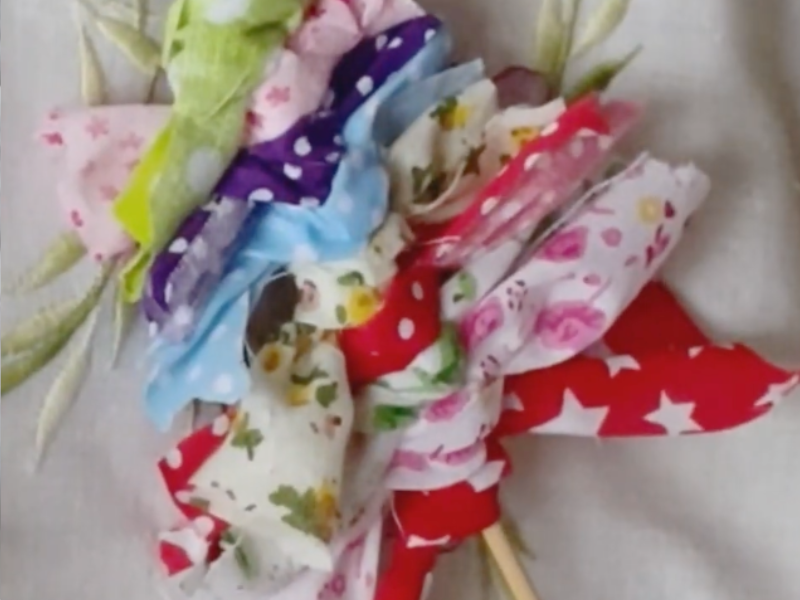
I don’t know if this happens to you too, but the moment Christmas rolls around I get that itch to decorate the house with things I’ve made myself. Nothing beats filling the living room with handmade touches that carry warmth, affection, and a little bit of nostalgia. Today I’m sharing one of my favorite projects: a little Christmas tree made from fabric scraps.
The best part is that it costs you nothing. All you need are those leftover scraps we all hang onto “just in case.” Turning them into something this pretty gives a second life to fabric that seemed destined to be forgotten.
Here’s a complete guide to making your own fabric Christmas tree, so you’ll end up with a one-of-a-kind ornament you can pull out every December. I’m betting it becomes one of your favorites.
Why Make a Christmas Tree from Fabric Scraps
- Sustainability: you’re giving new life to fabric you already own instead of throwing it out.
- Creativity: every tree is unique, because no two scrap piles are alike.
- Budget: nothing special to buy, since what you already have around the house is plenty.
- Tradition: it becomes an ornament you’ll store away and bring back year after year.
- Fun: it’s an easy, relaxing project, perfect for making as a family.
What You’ll Need
- Fabric scraps (cotton, felt, linen, velvet, whatever you have on hand).
- Sharp scissors.
- Craft glue or a hot glue gun.
- A wooden dowel, a pencil, or a dry twig for the trunk.
- A piece of cardboard.
- Optional: buttons, ribbon, sequins, jingle bells, beads.
How to Make a Fabric Christmas Tree Step by Step
1. Pick your scraps
Choose the scraps you love most. Go with a single color family (green, red, gold) or a mix of holiday prints. Whatever you have stashed around the house will work.
2. Draw and cut
Draw a triangle on the cardboard and cut it out. This is the template for your tree.
Cut your fabric scraps lengthwise into strips about half an inch wide.
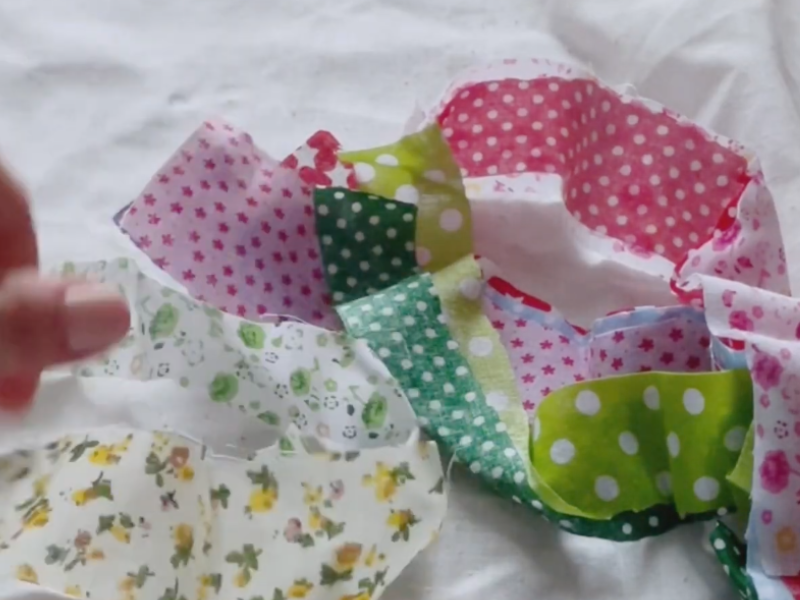
3. Tie on the strips
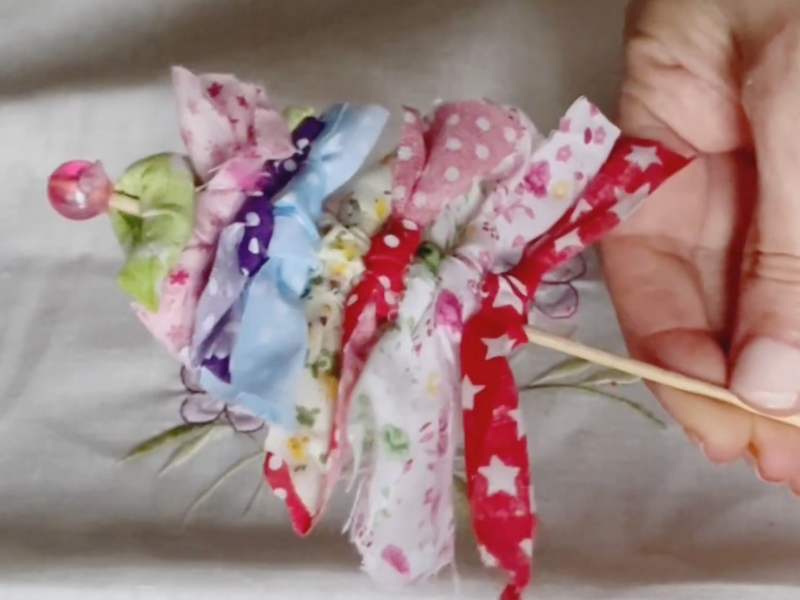
Tie the strips onto the wooden stick at their midpoint, one below the next. Don’t let them bunch up on top of each other.
A dab of hot glue or craft glue will hold them steady.
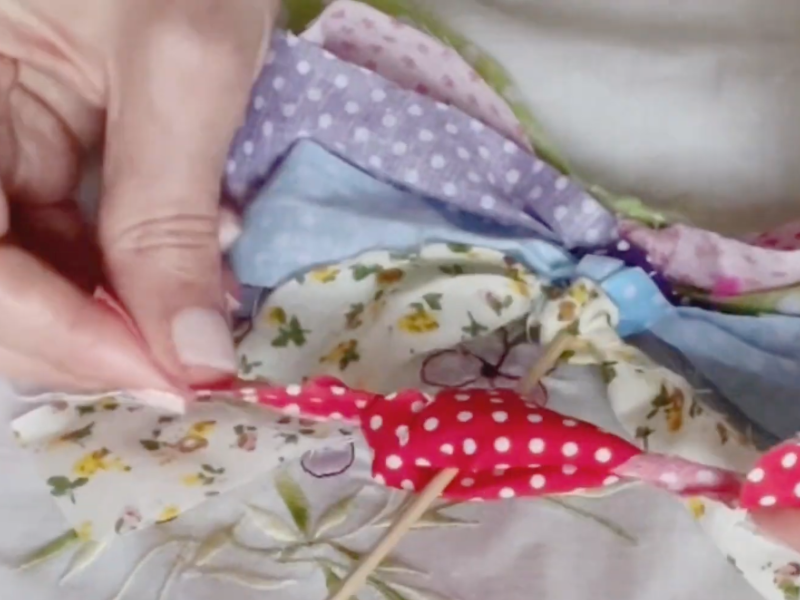
4. Shape the tree
Hold the cardboard template up against your tree.
Trim off any fabric that extends past the template, so the strips at the base end up longer than the ones at the top.
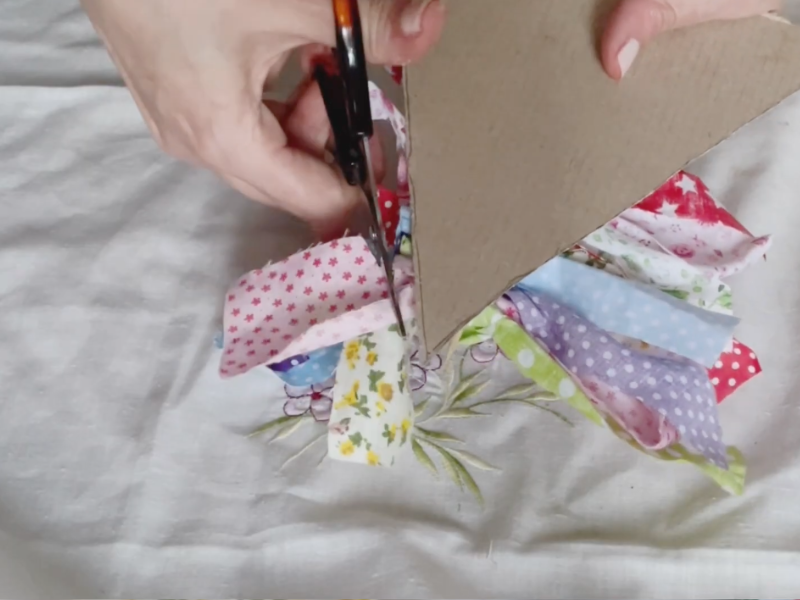
5. Decorate
If you’d like, add buttons as ornaments, a small bow at the top, a few jingle bells, or even a bit of embroidery on the fabric strips.
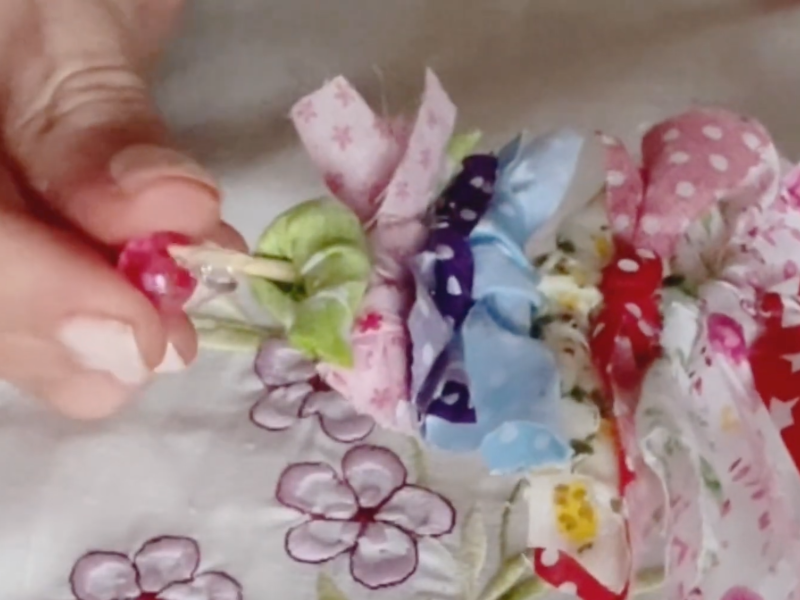
Watch the video tutorial:
Creative Variations on the Fabric Tree
- Patchwork tree: piece together lots of small scraps stitched to one another.
- Minimalist tree: whites and beiges only, finished with simple ribbon.
- Kids’ tree: bright colors and playful buttons.
Why Making Your Own Ornament Is Worth It
Every time I embroider, sew, or make something for the holidays, I feel like I’m creating more than just an object. I’m shaping a future memory. A little tree made with your own hands doesn’t only decorate a shelf. It reminds me of moments, connects me to my creative side, and fills me with a real sense of calm.
These projects also have a way of bringing people together. Make them with your kids, your nieces and nephews, or your friends, and the whole thing turns into a small tradition.
How to Keep Your Fabric Tree for Years to Come
- Store it in a cardboard or fabric box.
- Make sure it’s clean and dry before you put it away.
- Keep heavy objects off of it so it doesn’t get crushed.
- If it gets wrinkled, press it gently with a cloth over the top.
- If it has sewn-on decorations, check each year that they’re still secure.
Frequently Asked Questions
Which fabrics work best?
Firm ones like cotton, felt, or linen are the easiest to work with.
Can it be washed?
If it gets really dirty, hand wash it carefully, though wiping it with a damp cloth is the better option.
How long does one take to make?
It depends on the size, but you can finish your tree in a single afternoon.
Can I make it with kids?
Absolutely! It’s a perfect project to share with them, just keep an eye on the scissors and the hot glue.
how to use up fabric scraps by making a Christmas tree ornament
Total Time: 20 minutes
Prepare the scraps
Cut your scraps into strips
Make the template
Cut the cardboard into a triangle to use as your tree shape
Attach the strips
Tie and glue the strips onto the wooden stick, one below the next
Shape the tree
Use the cardboard template to trim the excess fabric and shape the tree
Decorate
Add beads or buttons to finish it off
Tools:
- glue
- scissors
Materials: fabric scraps beads wooden stick cardboard
My Own Experience
The first fabric tree I ever made came from the remains of a pair of pajamas and an old curtain. It looked nothing like the perfect version I had pictured in my head, but when I finished it and saw it sitting on a shelf, it made me so happy. Not only because it was pretty, but because it was mine, made from my scraps and my effort. Every Christmas, when I pull it out of the box, I smile at the memory.
Making a Christmas tree from fabric scraps is a lot more than a craft project. It’s an act of creativity, of sustainability, and of care. You don’t need to spend money on materials or have any experience at all. You just need the urge to sew, experiment, and enjoy the process. What you get is a one-of-a-kind ornament full of meaning that will bring something special to your home every single year.
Another way to use up your scraps is to make a pincushion for your needles and pins, which always comes in handy ^^
So tell me, are you up for making your own fabric tree this year? Which style would you go for: patchwork, minimalist, or full of color?
I’d love to read your ideas in the comments. If you enjoyed this guide, share it so more people can discover how easy and lovely it is to bring fabric scraps back to life at Christmas.