

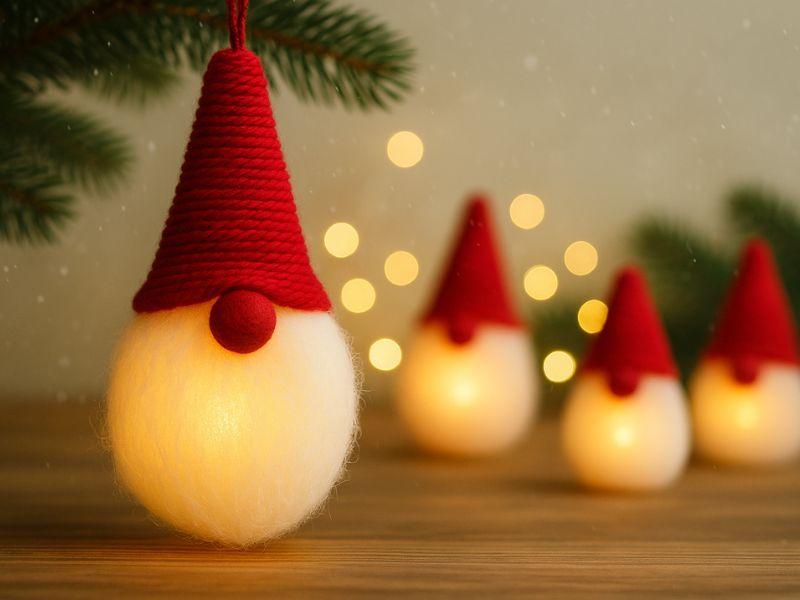
Learn how to upcycle cardboard tubes into adorable Santa figures with a yarn hat, a pom-pom, a cotton beard, and a light glowing inside. An easy, warm, creative Christmas craft you can make at home with simple materials.
Every year when Christmas comes around, I notice that I enjoy the small details far more than anything big and loud. Making something with my own hands fills me up in a way that buying finished decorations never does. It’s as though everything I make holds a little piece of me, something that hums at a warmer frequency.
Something else happens to me this time of year: I get an enormous urge to use up things I already have around the house. I’m not sure whether it’s nostalgia, anticipation, accumulated creativity, or some mix of all three. Whatever it is, I always find inspiration in objects that look completely insignificant at first glance. Cardboard tubes, for instance, that humble little cylinder we toss without a second thought, which turns out to hold so many possibilities. I think every time one empties out, it’s telling us in its own way: hey, I could still be something pretty.
The loveliest thing about this craft is how many things I love come together in it. Creativity, tenderness, warmth, upcycling, and that feeling that something simple can turn into something joyful. It’s also a beautiful way to slow down, unplug, spend time with yourself, or share a nice afternoon with someone.
Why This Craft Has Something Special
You know that feeling when you upcycle something and it suddenly turns into an object with a life of its own? I love it. It feels like giving a second chance to something that was headed for a trash bag. With this cardboard tube craft, though, there’s something more. You aren’t only turning them into Santa figures. You’re turning them into small characters that look like they stepped out of a storybook.
I think one of the reasons this idea works so well is that it has an emotional pull. Santa has always been a figure who stirs a particular tenderness, and seeing him in miniature, with a yarn hat that looks knitted by loving hands, that soft cotton beard, and a light inside that makes him seem almost alive, is like a spark catching.
What hooked me from the start was the feeling of making something that makes you smile the moment you see it. When a craft project does that, you know it’s worth repeating.
The other thing I adore about this craft is that it’s completely customizable. No two Santas come out alike. Every cardboard tube varies slightly in shape, every yarn hat sits a little differently, the beard is never identical. The expression on the face shifts with your hand, your mood, or even with whatever music you have playing.
You also barely need to spend a thing. You probably have yarn at home, along with cotton and scissors. If something’s missing, it’s easy to find. This is an accessible craft for anyone, which makes it ideal for creative afternoons, for making with kids or friends, or even on your own while you give yourself a quiet moment.
What You’ll Need to Make Your Cardboard Tube Santas
A cardboard tube, the soul of the project
I know it sounds obvious, but I want to pause here for a second, because the cardboard tube is more special than it looks. It’s light, easy to handle, and has exactly the structure that lets us play with its shape without complicating things. I like saving them all year round. Every time one empties out, I put it in a little box I keep just for this, and by the time the holidays roll around I have plenty to work with.
Yarn for a hat full of personality
Choose whichever color you like best. Yarn brings texture and visual warmth at the same time. Sometimes I use bulky yarn for a more rustic look, other times fine yarn for something more delicate. You can even combine the two for a different effect. The hat is one of the parts that draws the most attention, so let your creativity loose there.
Cotton for the beard
Use classic cotton batting or the makeup remover pads you have around the house. What matters is pulling it apart a little so it turns out fluffy, which makes the beard look more natural and sweet. You can also mix pieces of different densities for added depth.
A pom-pom or bead for the tip of the hat
A small pom-pom or a bead makes an enormous difference. It adds that finishing touch we all associate with Santa. You can buy pom-poms, or make your own from leftover yarn. A pearl or a bracelet bead works too, and gives you the chance to add a cord so you can hang your Santas up.
A small LED candle for the inside
Don’t use a real candle, since the cardboard wouldn’t survive it. An LED candle works perfectly. That warm flicker turns the figure into a mini Christmas lamp and creates a wonderfully cozy feel.
Felt, cardstock, beads, whatever you have for the nose
The expression is everything, so give your Santas a funny nose. If you want to add rosy cheeks, use paint, a marker, or even your own blush. Sometimes I dab a bit on with my fingers and it comes out beautifully.
Cord or a metal ring if you want a keychain
This one’s optional but recommended. Turning it into a keychain adds even more charm. Use a standard metal ring, or cotton cord if you want something more natural.
Glue, a hot glue gun, and scissors
The basic tools of any craft. Nothing else required.
How to Make Cardboard Tube Santas Step by Step
Here comes the good part.
1. Prepare the tube
First, check that the tube is clean. If there’s a scrap of paper stuck to it, peel it off. If it’s a little squashed, reshape it with your hands. Nothing more complicated than that. You can paint it if you want, though it isn’t required.
2. Make the yarn hat
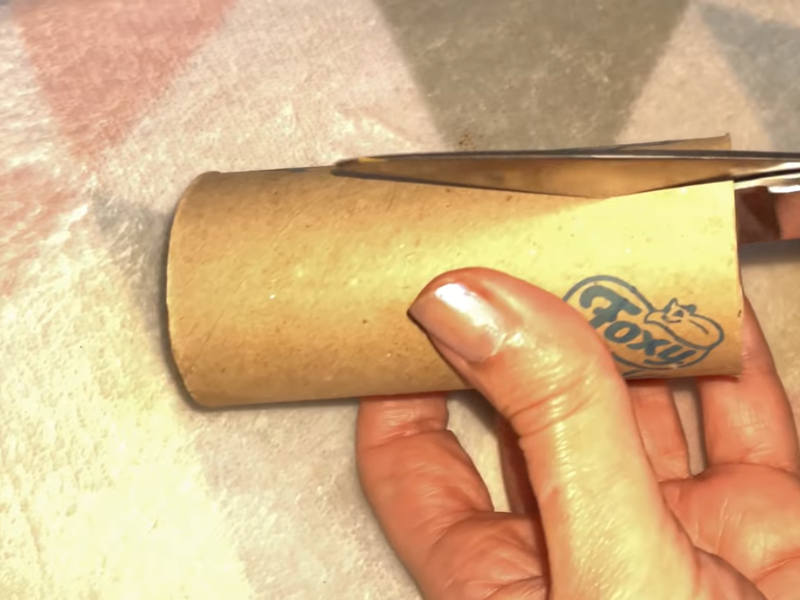
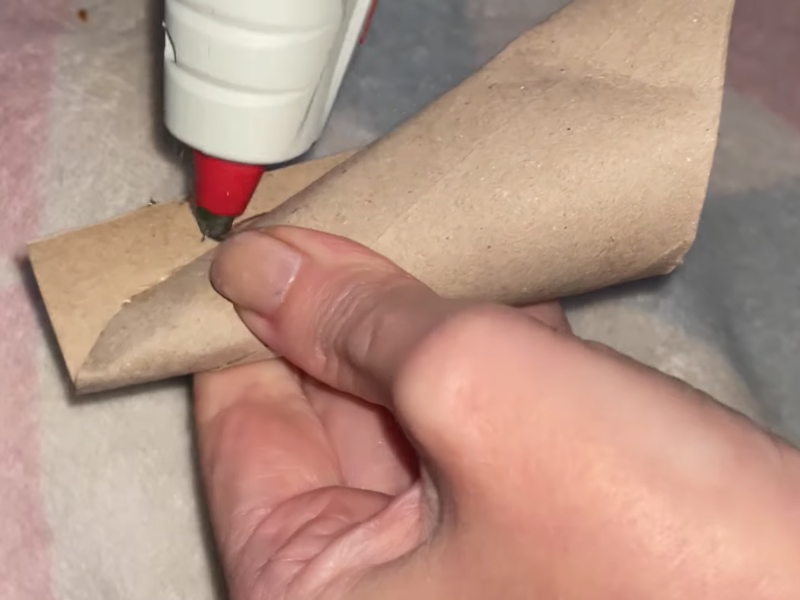
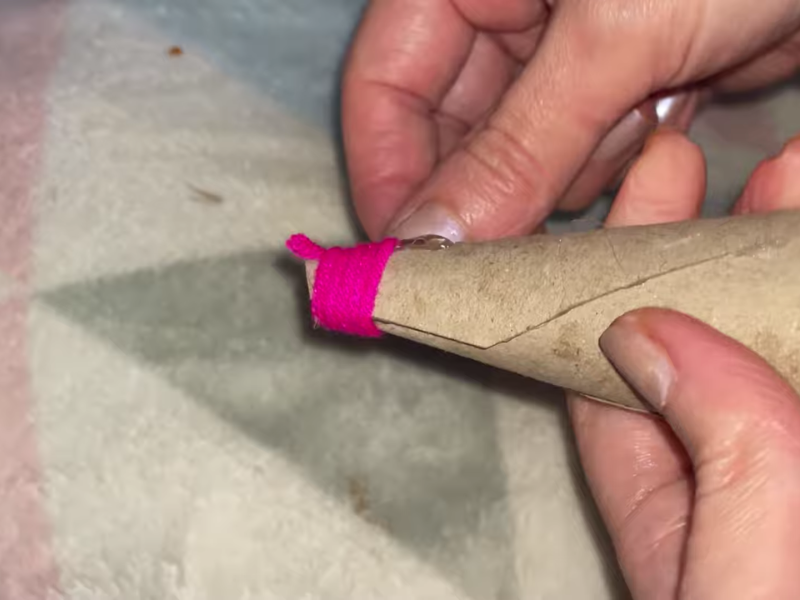
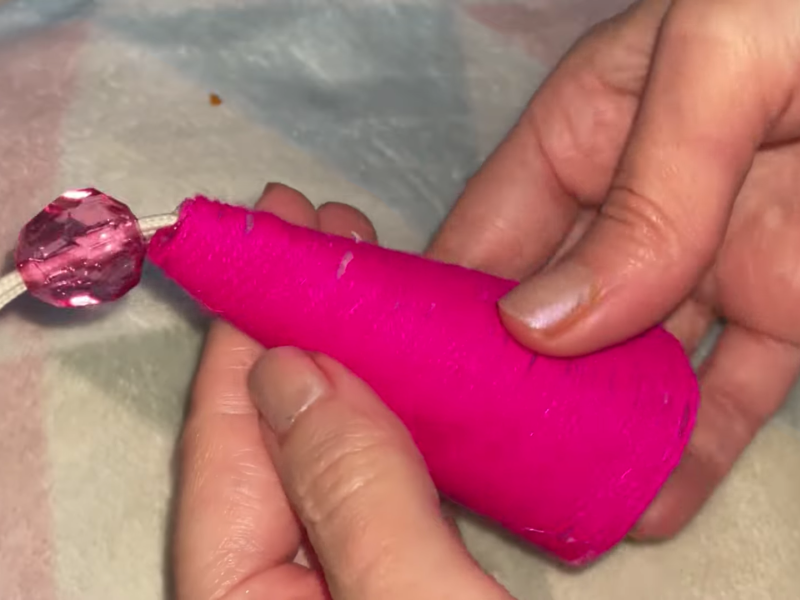
This is the most relaxing part for me. All you do is roll the cardboard tube into a cone and cover it with several wraps of yarn. I glue mine down with a hot glue gun, though regular craft glue works too. At the top, add a pom-pom or a bead on a cord, which turns your Santas into keychains or Christmas tree ornaments.
3. Add the cotton beard
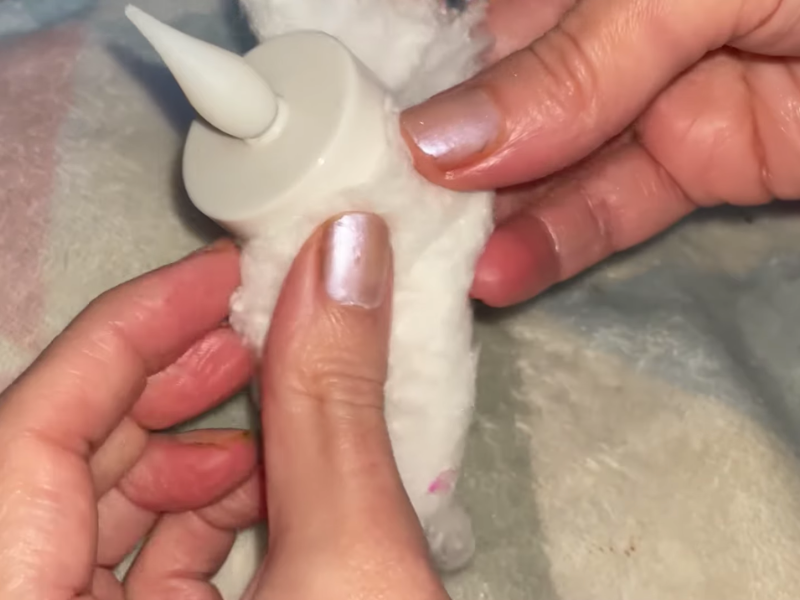
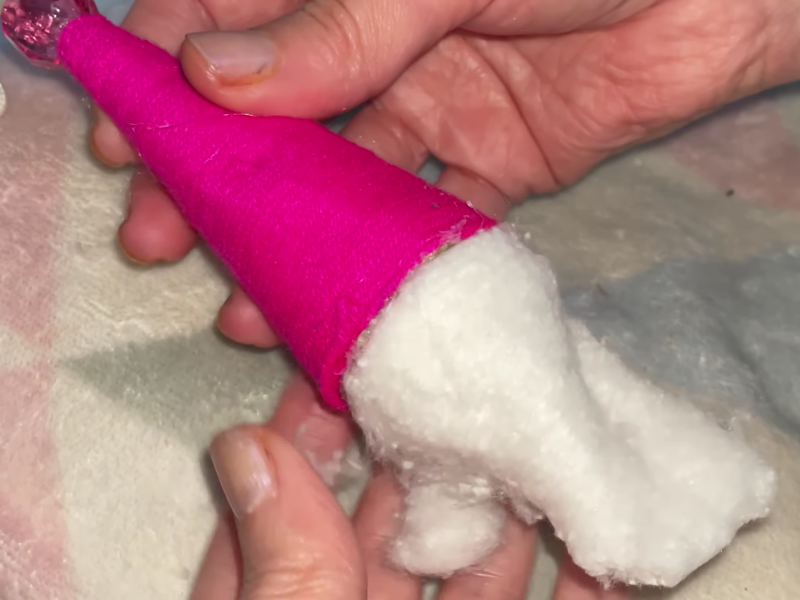
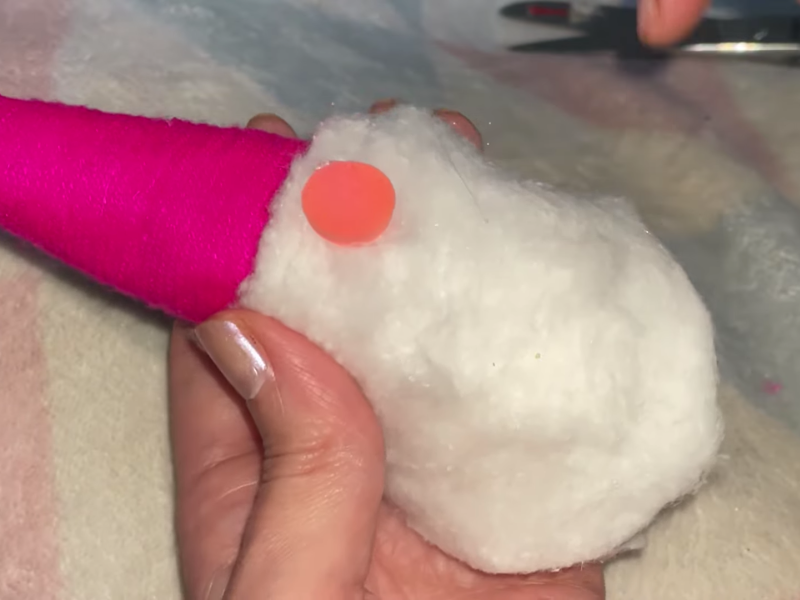
Take a bit of cotton, fluff it up with your fingers so it’s nice and full, and glue it to the LED candle. Shape it round, triangular, or long, depending on the look you’re after.
4. Put the LED candle inside
Simply slide it into the tube. Make sure it sits centered and that the light shows clearly from below. Switch it on and the figure looks like a small lit-up cottage, creating a beautiful atmosphere.
Creative Variations to Personalize Your Santas
This is where your imagination gets to run, with no limits. Here are a few ideas I’ve tried.
Scandinavian Santa
Use white yarn for the hat and a very long beard. An oversized pink nose looks fantastic.
Classic Santa
Red hat, white pom-pom, a full beard, and well-defined cheeks.
Modern Santa
Pastel colors, a mint green or pink hat, big eyes.
Vintage Santa
Beige tones, a cream-colored beard, weathered details.
Glowing Santa
Add a mini LED string around the hat. The effect is spectacular.
How to Work Them into Your Christmas Decor
You can put them anywhere. I’ve used mine to decorate shelves, to dress up gifts, to sit on the dining table, in special corners, as part of a centerpiece, and even inside a decorative tray with pine sprigs and candles.
They also look lovely hanging on the tree. Make several and you can string a beautiful garland from them.
Tips and Tricks After Making Plenty of Santas
Here’s what I’ve learned: the cotton works better if you open it up a bit with your fingers. Bulky yarn gives a very warm effect. If the tube feels too soft, reinforce it with a piece of cardboard inside. The bigger the pom-pom, the sweeter the figure. Simple faces tend to work better than elaborate ones. If you want it to last for years, store it in a rigid box so it doesn’t get crushed.
Frequently Asked Questions
Can I use paper towel tubes?
Yes, just cut them in half.
Is it safe to put an LED candle inside?
Completely. LED candles don’t give off real heat.
Can I make it without hot glue?
Yes, though it’ll take a little longer to dry.
Can I make it with kids?
Yes, it’s perfect as a family project.
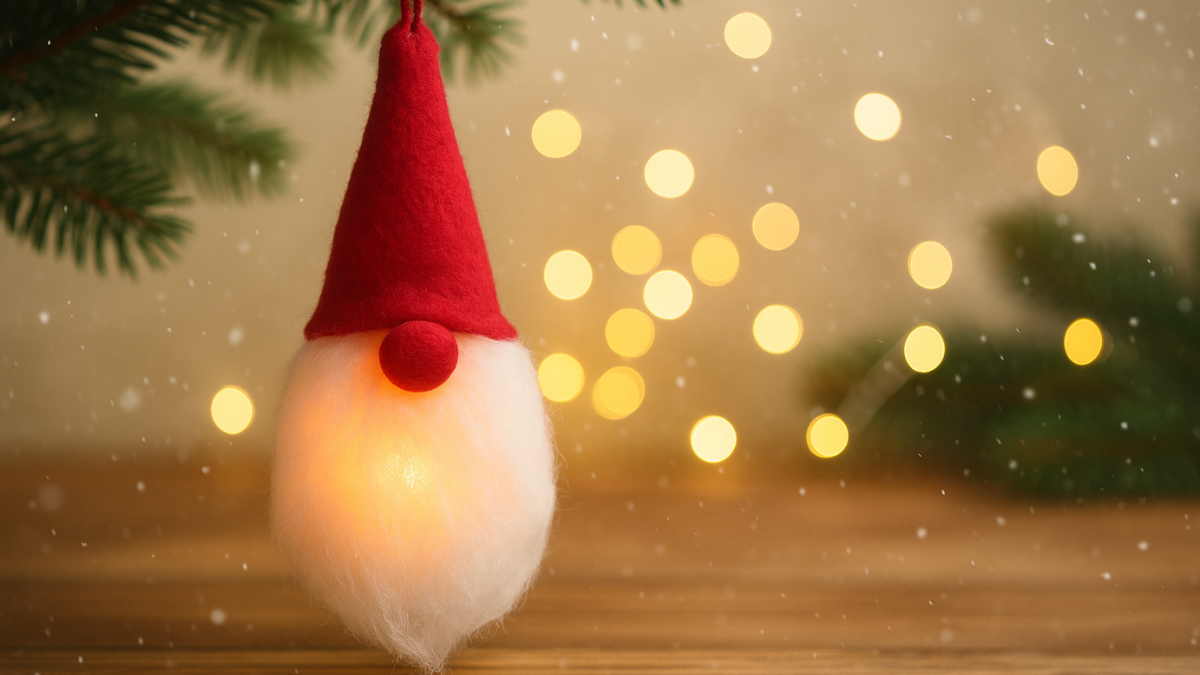
Upcycle your cardboard tubes with this lovely craft
Total Time: 30 minutes
Make the hat
Cut the cardboard tube lengthwise and roll it into a cone. Cover it with yarn.
Prepare the beard
Cover the candle with cotton and shape it into a beard.
Join the pieces
Glue the candle to the hat to form the figure.
Add a cord
If you like, add a cord at the top of the hat through a pom-pom or a bead.
Tools:
- Hot glue gun
- Scissors
- LED candle
Materials: Cardboard tube Yarn Cord Hot glue Beads Felt
Tell me what you think, I’d love to hear from you.
If you made it this far, I’m betting you already have your first cardboard tube in hand. I’d love to know whether you give it a try, which style you like best, whether you have an idea you’d like me to test, or even whether you’d like to see a reindeer or gnome version. I love hearing from you and swapping ideas, so leave me a comment and let’s talk ^^

