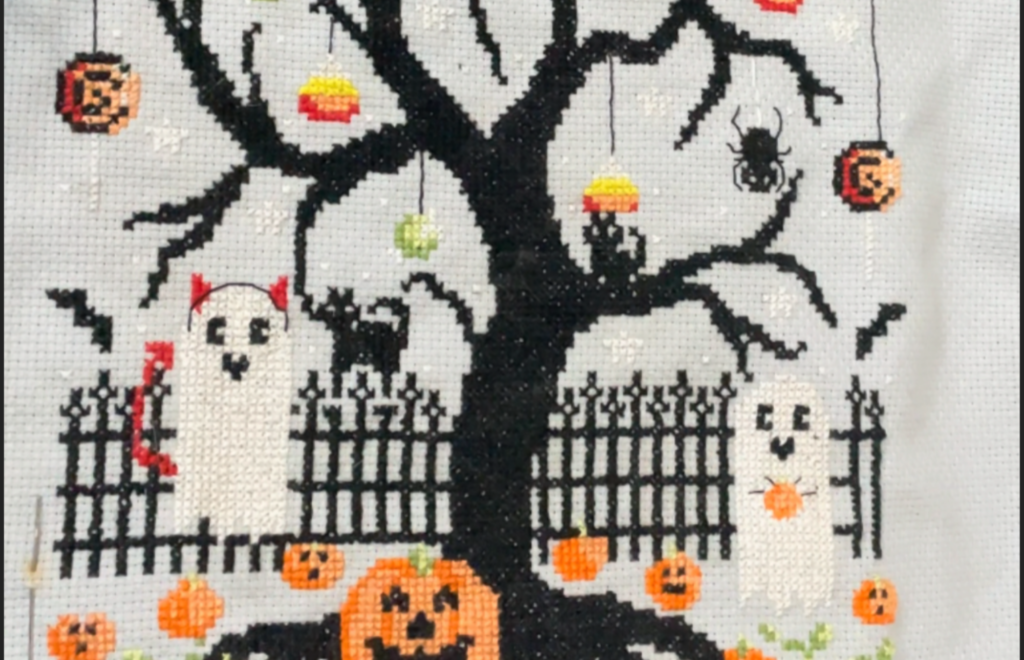
Learn how to make a Halloween cross-stitch piece with ghosts and black cats. I’ll walk you through the supplies, how to set up your project, the little details that matter, and how to turn it into a beautiful handmade Halloween decoration.
I don’t know about you, but as soon as fall starts creeping in, I get this huge urge to start working on Halloween cross-stitch projects.
I love the pumpkins, the little decorated houses, the friendly ghosts, and especially those black cats that show up in so many designs this time of year. They always make me smile. That’s exactly why this Halloween cross-stitch piece with ghosts and black cats caught my eye. It brings together so many of my favorite things in one design.
If you love stitching and you’re drawn to Halloween designs with a sweeter, cozier vibe, I think you’re really going to enjoy this project.
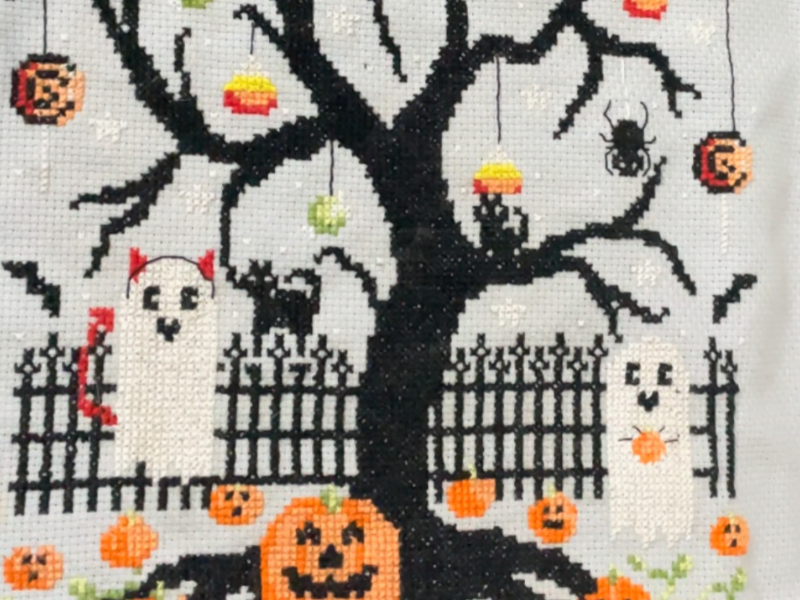
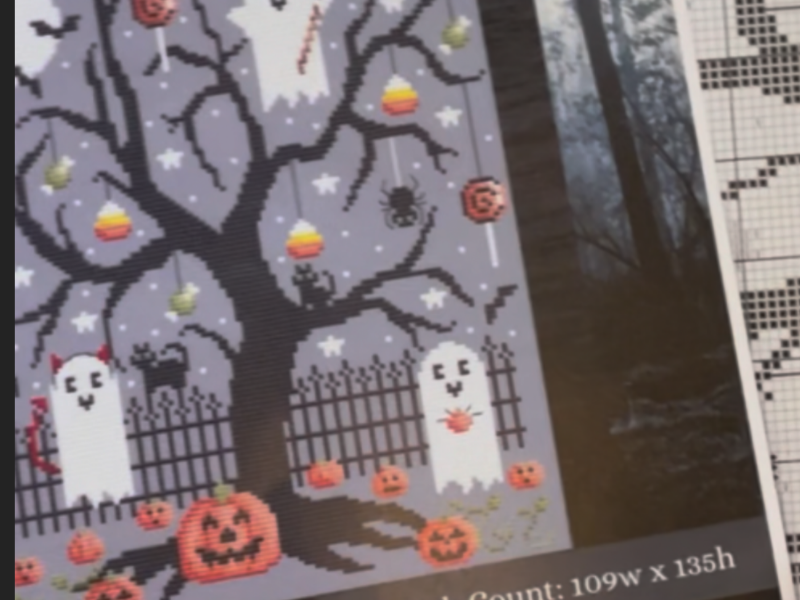
Photos of the stitched piece
This post contains affiliate links. See my full disclosure
Why I love Halloween cross-stitch so much
There’s something about Halloween stitching that really draws me in, and I think it has a lot to do with how many creative possibilities it opens up. Even though we all associate Halloween with pumpkins, witches, ghosts, and black cats, every design can have a completely different feel.
Some are more traditional, others have a vintage look, and then there are patterns full of cute little characters that look like they belong in a storybook.
I always go for those last ones, because I like my Halloween decor to feel warm and a little bit playful. The characters don’t need to be scary for the theme to come through.
I’m also a huge fan of the color palettes that come with this season’s designs. The oranges, blacks, creams, grays, and browns instantly remind me of fall, cozy afternoons at home, and those moments when all you want to do is sit down and work on a craft.
There’s also the satisfaction of finishing a decoration I’ll be able to use year after year. I love knowing that every new piece I stitch can become part of my seasonal collection, and that when October rolls around, I’ll have another little handmade treasure to put on display. Those are the kinds of details that make your decor feel really personal.
A Halloween piece with ghosts, black cats, and tons of little details
The first thing I loved about this project is the mix of characters. The ghosts and black cats work so well with the whole Halloween look, and they give you different things to enjoy as you stitch. Instead of working on one single figure, you’re building a scene where each character adds something to the finished piece.
I really enjoy pieces with multiple characters because the stitching keeps changing as I go. Some designs are all about completing one big figure, but pieces like this one let you uncover little parts of a scene as you work through it.
The ghosts, the sweetest part of this piece
If I had to pick my favorite thing to stitch for Halloween, ghosts would be right at the top. They’re such rewarding characters for cross-stitch because their shapes are easy to recognize, and you can get beautiful results without needing a ton of colors.
That said, stitching white ghosts does come with a few things to keep in mind. The first thing I’d think about is the fabric color, since a white ghost can lose definition on a background that’s too similar. That’s why I always check how the thread looks against the fabric before I start, and whether the pattern uses outlines or different shades to separate the figures from the background.
I’d also pay attention to the grays and light tones used in the shadow areas. Even if some colors look almost the same at first glance, those subtle differences help shape the ghost and keep it from looking like a flat white blob.
My favorite part of stitching these guys is getting to the faces. For most of the stitching you’ve just got a white shape that doesn’t say much, but once you add the eyes and the mouth, the little ghost starts coming to life. That’s one of those moments where I like to set my needle down, step back, and just enjoy how it’s all coming together.
Black cats, a Halloween classic I never get tired of
Black cats are another one of my favorites for this time of year, and even though they show up in so many designs, I always find a version I love. You’ll see them sitting, hiding behind a pumpkin, with their tail up, or staring straight at you. They all have that curious look that fits right in with the whole Halloween vibe.
In this piece, the black cats work especially well because they create such a nice contrast with the ghosts. The ghosts stand out with their light tones while the cats add dark areas that balance the whole design. Plus, the shapes of the cats let you add different kinds of details, which keeps the stitching interesting.
Now, stitching with black thread does take a little extra patience. If you’ve ever stitched a large area in one color, you know how easy it is to lose count, especially when you’ve got several similar rows.
Good lighting and checking the chart often make a huge difference for me. I’d much rather double-check a row than find out later that I’m off by a few stitches.
Supplies for this Halloween cross-stitch piece
One of my favorite things before starting a project is getting all my supplies together. It might not seem like a big deal, but having everything organized really helps me. Once I start stitching, I want to focus on the work without constantly hunting for my scissors, a missing skein, or the needle I set down somewhere.
Picking the right fabric
The first decision is picking your fabric. For a project like this, Aida is a great choice because it makes counting stitches easy and works well whether you’ve been stitching for years or you’re still learning.
14-count Aida is one of my go-to recommendations for anyone starting a new piece. It has about 14 stitches per inch, and the holes are easy to see, which I really appreciate when I’m working with dark colors or a pattern with lots of small details.
If you want a smaller finished piece, you could also go with 16 or 18-count Aida, just keep in mind that the stitches will be smaller and you’ll need good lighting.
For the fabric color, I went with a light blue so the ghosts would stand out. I wouldn’t go with a dark background without first checking how the black cats show up on it, because they could lose their definition. The key is finding a balance where all the characters are easy to see.
Getting your floss ready and organizing colors
Once you’ve picked your fabric, go over the thread list in the pattern. For cross-stitch I usually use cotton embroidery floss like DMC, though other brands work great too. What matters is sticking with the color numbers listed in the pattern, or carefully checking the conversion chart if you’re using a different brand.
One thing I try to avoid is mixing up similar shades without labeling them. A dark gray and black can be really easy to confuse when they’re side by side, and the same goes for some oranges and browns. That’s why I like to take a few minutes to sort everything out at the beginning, even if I’m only going to use a handful of colors each day.
Needles, hoops, and other handy extras
For stitching on Aida, I use blunt-tip tapestry needles. They’re designed to pass through the holes in the fabric without snagging the fibers. The needle size depends on your fabric, but a size 24 tapestry needle is a pretty standard pick for 14-count Aida.
I also like using an embroidery hoop because it keeps the fabric taut and helps me get more even stitches. It’s not a must. Some people prefer to hold the fabric in their hands, but I find it more comfortable, especially during longer stitching sessions.
Besides these basics, I always keep a pair of small scissors nearby, along with the pattern and something to mark off the sections I’ve finished. If I’m working from a printed chart, I like to lightly highlight the rows as I go.
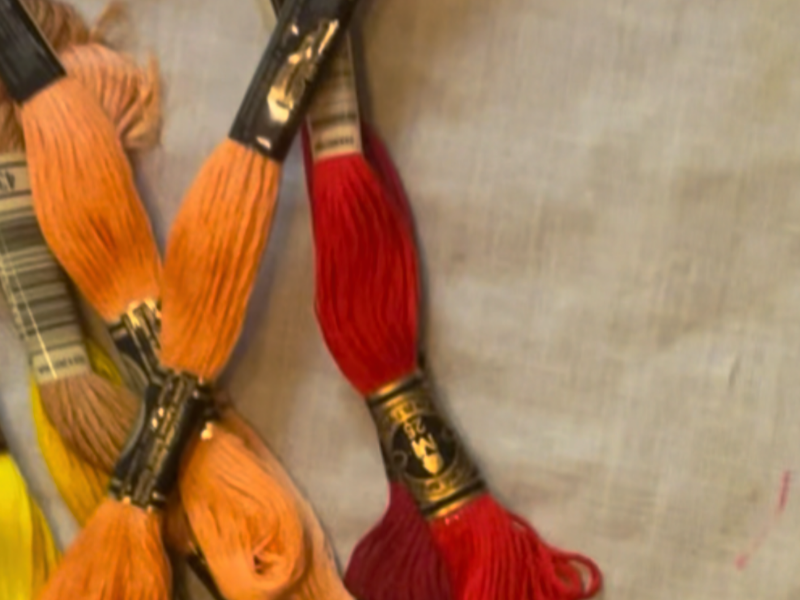
Floss colors used
How I prep the fabric and pattern before stitching
Once I have all my supplies, it’s time to prep. I’ll be the first to admit that when I find a design I love, I want to dive in right away. But over the years I’ve learned that spending a few minutes on this step is totally worth it.
A design that’s off-center or fabric cut too small can cause real headaches once you’re deep into the stitching.
The first thing I do is check the pattern dimensions in stitch count. This tells me how much space the design will actually take up on my chosen fabric. For example, a design that’s 140 stitches wide by 100 tall will measure roughly 10 by 7.1 inches on 14-count Aida.
I always add a generous margin around those measurements, both for holding the fabric while I stitch and for framing it later. I like to leave a few extra inches on each side. I’d rather have extra fabric and be able to take my time deciding how to mount the finished piece.
Finding the center of the design the easy way
Once my fabric is cut, I fold it gently in half horizontally and then vertically to find the center. It’s a simple method that shows me exactly where the middle of the chart should line up if I’m starting from the center.
Some people prefer starting from a corner, and that works perfectly fine as long as you’ve measured your margins correctly. I go one way or the other depending on how the design is laid out, because starting from the same spot doesn’t always work for every pattern.
Finishing the edges and setting up the hoop
Another thing I always take care of is finishing the edges of the fabric. Aida can fray with handling, especially on a longer project, so I like to protect the edges with a whip stitch or another method that works for the fabric.
Then I set up my hoop, making sure the fabric is taut but not overstretched. If I tighten it too much, I can warp the weave. If it’s too loose, keeping my stitches even gets a lot harder.
When I’m done stitching for the day, I also try not to leave the fabric clamped in the hoop for too long. This keeps it from getting deep hoop marks and helps the fabric stay in better shape until the piece is finished.
How to finish and frame your Halloween cross-stitch piece
After all the crosses and details are done, here comes one of my favorite parts, getting the piece ready to display. This is when I can see the whole thing finished and start picturing where it’s going to look best.
Before framing, I always take my time going over the stitching. I check for any missing stitches, make sure all the outlines are complete, and look for any loose threads that need to be secured. I also like to look at the whole thing from a few feet away, because it’s so much easier to spot things you might miss when you’re working up close.
Picking a frame that complements the design
For a Halloween piece with ghosts and black cats, I’m especially drawn to simple frames. I think a natural wood frame can bring a warm feel that goes perfectly with fall decor, while a black one can tie in with the cats and give the piece a bolder finish.
A white or light-colored frame is another beautiful option, especially if the stitching has enough dark colors to really pop.
I try to stay away from overly ornate frames, because I’d rather let the characters be the star of the show. When the stitching has a lot of detail, a simple frame usually helps everything stand out more.
When mounting the fabric, I make sure it’s centered properly and stretched evenly without pulling the stitches out of shape. I use a proper backing board and avoid gluing the fabric directly. If the frame has glass, I like to leave a small gap between it and the stitched surface to protect the threads.
A Halloween cross-stitch piece also makes a beautiful gift
I usually think of these projects as something for my own home, but they also make a wonderful gift. Especially when I know someone who loves Halloween, black cats, or handmade crafts.
The great thing about a stitched piece is how easy it is to customize for whoever you’re giving it to, both in the design and the presentation. If I know they like wood frames, I can pick one that goes with their decor. If they prefer smaller pieces, I can find a way to present the stitching that doesn’t take up too much space.
How to store your piece so it lasts for years
After putting so many hours into a project, it only makes sense to store it properly. Even though a Halloween piece is only on display for part of the year, it still needs some care the rest of the time to keep the fabric and threads in good shape.
If it’s framed, I store it somewhere dry, away from dust and direct sunlight. I also make sure nothing is pressing against it, especially if the frame has glass.
If it’s not framed yet, I prefer to keep the fabric flat or carefully rolled, avoiding any sharp creases. I use clean, textile-safe storage materials, especially if the piece is going to be put away for a while.
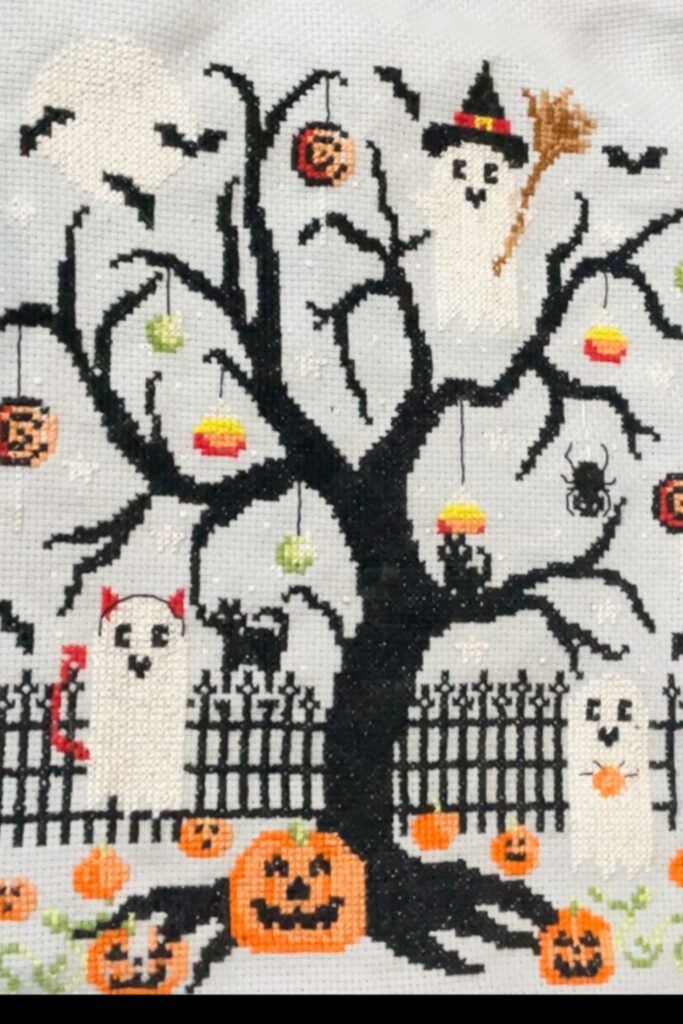
Finished Halloween cross-stitch piece
Frequently asked questions about this Halloween cross-stitch piece
What type of fabric should I use for this Halloween cross-stitch piece?
For a piece like this, I’d go with Aida fabric, especially if you want to stitch comfortably and see the holes clearly. 14-count Aida is a really practical choice because it makes following the chart easy and usually gives you a good size for decorative pieces. If you want a smaller finished result, you could use a higher count fabric, but check the final dimensions first and make sure you’re comfortable working with smaller stitches.
Can I change the colors from the original pattern?
Yes, as long as you keep the overall design in mind when making changes. I love experimenting with fabric color or small details, but I’d make sure the characters still stand out clearly and there’s enough contrast between the tones. In a piece with white ghosts and black cats, that difference between light and dark is especially important.
How can I figure out the finished size of my piece?
To figure it out, you need to know the stitch count (width and height) of the pattern and the fabric you’re going to use. With that info, you can calculate the approximate size of the stitched area. Then add a generous margin around it for comfortable stitching and framing. It’s important to do this math before cutting your fabric, especially if you already have a specific frame in mind.
The more cross-stitch projects I come across, the more I realize that my favorites don’t have to be the biggest or the most complex. More often than not, it’s the pieces with cute characters and little details that make me want to pick up my needle the most.
This Halloween piece with ghosts and black cats is exactly that kind of project for me. It has a theme I love, the cutest characters, and it could easily become a handmade decoration I pull out every fall.
I have to admit, lately I’ve been gravitating more toward designs with cute characters, especially when I can use them to decorate without the space feeling too busy. I’ve got a real soft spot for black cats. They look beautiful in everything, from small pieces to bigger designs with multiple characters.
I’m curious about how you handle your seasonal projects. Do you start stitching for Halloween months in advance, or are you the type who waits until October to pull out the orange, black, and purple floss? Do you like to finish one whole figure before moving on, or do you prefer working color by color until the whole design comes together?
Tell me in the comments! I love hearing how you all enjoy cross-stitch and what projects you’ve got going.