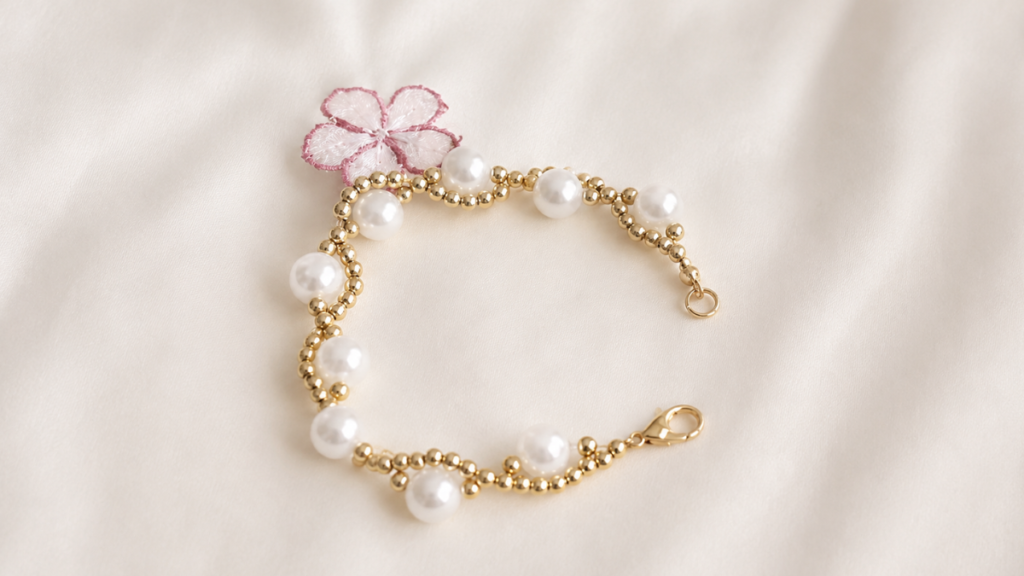
Learn how to make a stunning pearl and gold bead bracelet step by step in this easy, quick DIY jewelry tutorial with professional results, perfect for gifting or wearing proudly on any occasion.
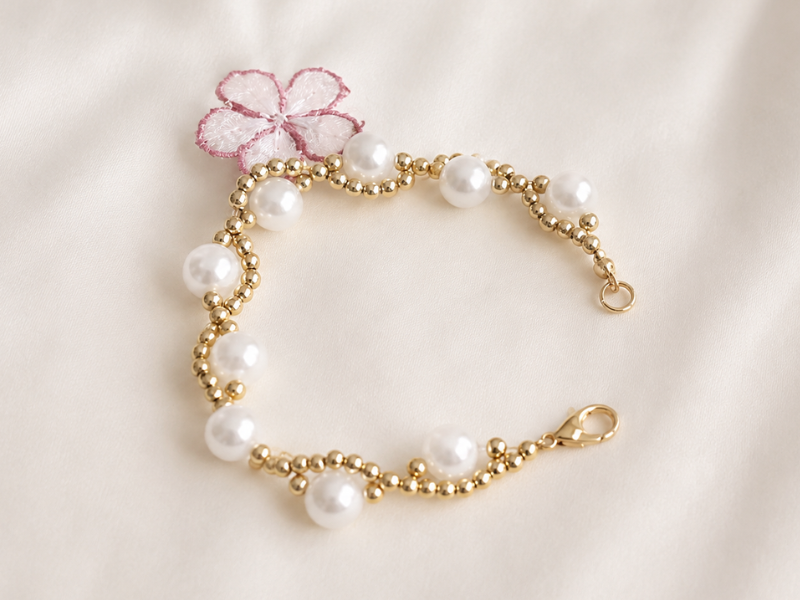
Today I want to share a little tutorial for making a pearl and gold bead bracelet that is not only ridiculously easy to put together, but also looks like a high end piece from that pricey boutique we all stop and stare at in the mall.
Carve out a little time for yourself, pour your favorite coffee or tea, put on some relaxing music, and come along with me on this creative journey. I promise that once you get your hands busy, you will feel an incredible rush of satisfaction when you see what you can pull off with a bit of patience and a lot of love.
This post contains affiliate links
There is something magical about stringing beads that goes far beyond a simple craft. It is not just about passing cord through tiny holes. It is an almost meditative process that lets you unplug from the daily noise, the screens, and the rush that eats up our routine.
In my case, whenever I come across a design that balances simplicity with a showstopping finish, I feel an urgent need to start working on it right away. It is like a force that pushes me to experiment, to pour all of my energy into something physical, then share the result with everyone.
Making your own handmade jewelry gives you a freedom no store can offer. You can adjust the exact length so it does not pinch your wrist or slide around, you can pick the shade of gold that flatters your skin tone, and you know for certain that nobody else will be wearing a piece identical to yours.
It is also the perfect solution when you have a birthday or a get together coming up and you want a gift that shows real affection. A handmade gift always says that you invested your most valuable resource in that person, which is your time, thinking about what they like and creating something exclusive straight from the heart.
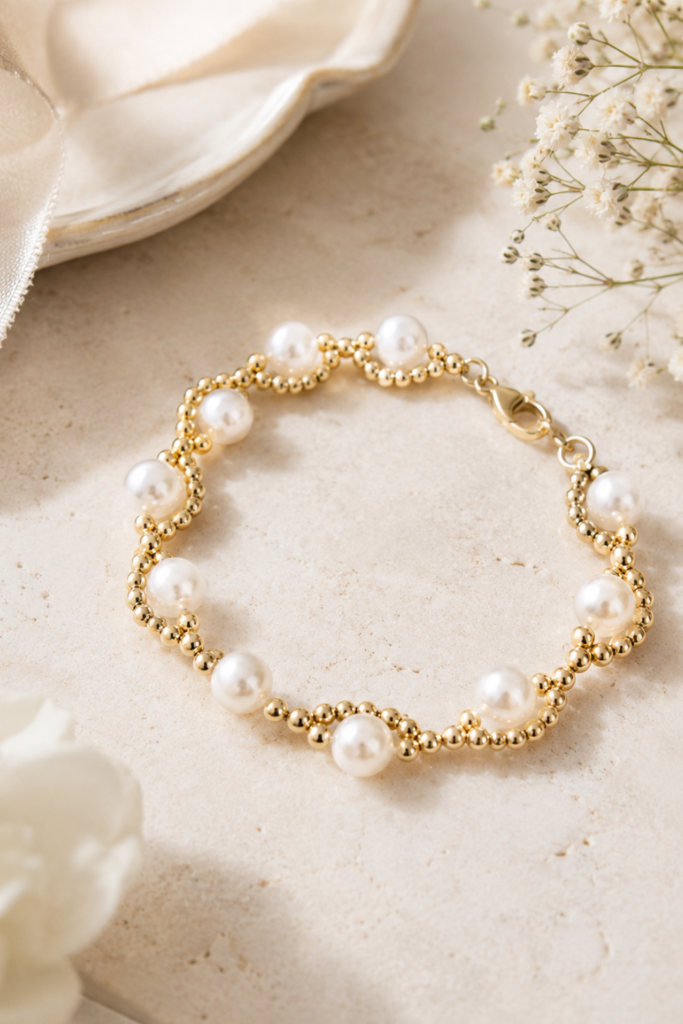
Essential materials for making a pearl bracelet
The best part about this project is that it uses very accessible materials you can find at any local bead shop or craft store. If not, you can always turn to online stores like Amazon, which never let you down.
The white pearls
For this design we are going to use medium sized white pearls. Ideally they should measure between 6 and 8 mm across, so they stand out without looking bulky on your wrist. You can go with freshwater pearls if you want a more organic, natural, irregular look, or glass imitation pearls if you prefer perfect symmetry and an even satin shine.
Pearls bring that classic sophistication that never goes out of style and lifts any basic outfit, from jeans with a white shirt to an evening dress for a special dinner.
The gold beads that bring the sparkle
Contrast is the real secret behind this bracelet and the reason it turns heads. We will need small beads, also known as seed beads, glass beads, or little gold rounds. Make sure they have good quality plating so they do not lose their shine from constant contact with skin or perfume.
These tiny beads work as spacers and create a wavy structure around the pearls that mimics the filigree work of traditional fine jewelry.
Elastic cord and closure options
Here comes one of the keys to how comfortable and durable the piece will be. We will use a 0.6 mm elastic cord. We want it thin enough to pass twice through some of the beads, yet strong enough to handle daily tugging without any risk of snapping.
To give it a professional, secure finish, we will also add a classic lobster clasp along with small crimp beads, or metal crimp covers, that lock the ends in place cleanly and neatly.
How to make a pearl bracelet step by step
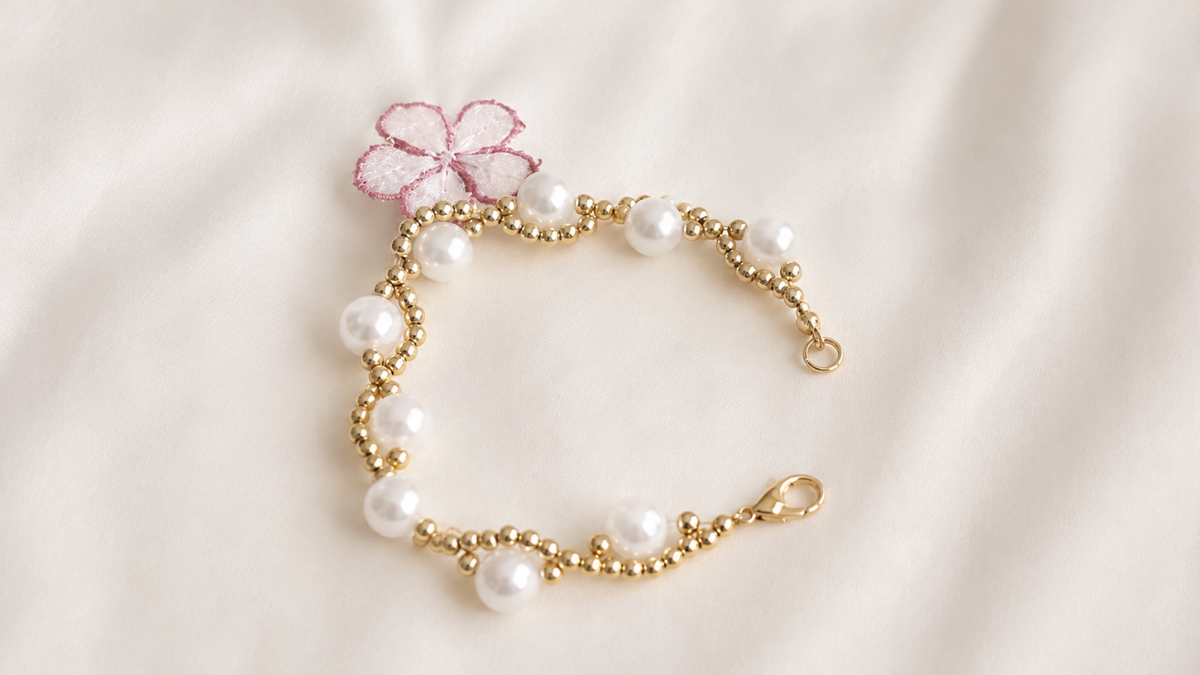
Learn how to make a pearl bracelet using simple stringing techniques that guarantee a professional, elegant finish. This project is perfect for getting started with handmade jewelry and creating a versatile accessory that will lift any of your everyday outfits.
Total Time: 30 minutes
Attaching the clasp and setting the base of the bracelet
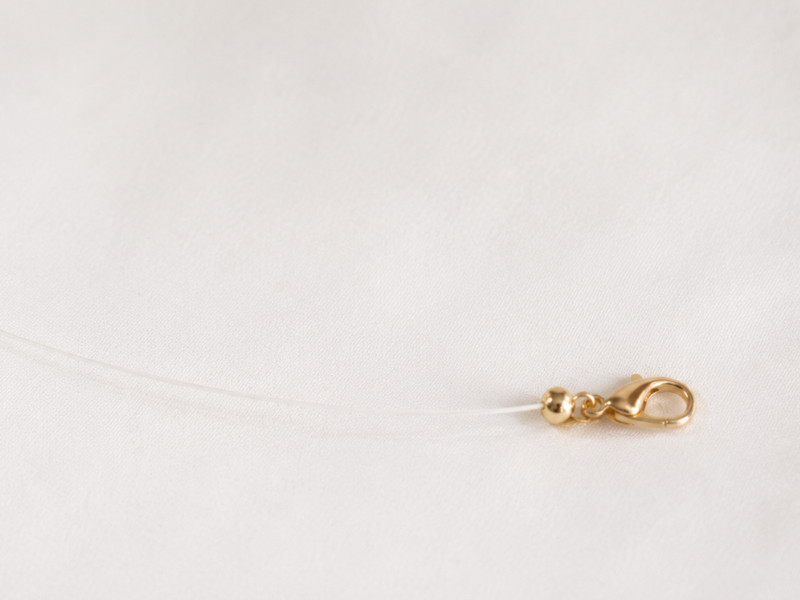
Cut a piece of elastic cord about 8 inches long so you have plenty of room to work. Pass one end of the cord through the ring on the lobster clasp and slide it along until the clasp sits exactly in the middle of the cord. Bring both ends of the cord together so they run parallel, then thread them at the same time through a single gold bead. Slide that bead down until it sits snugly against the metal clasp. This gives you a firm, centered, secure starting point for building the rest of the design.
Stringing the first section of asymmetrical waves
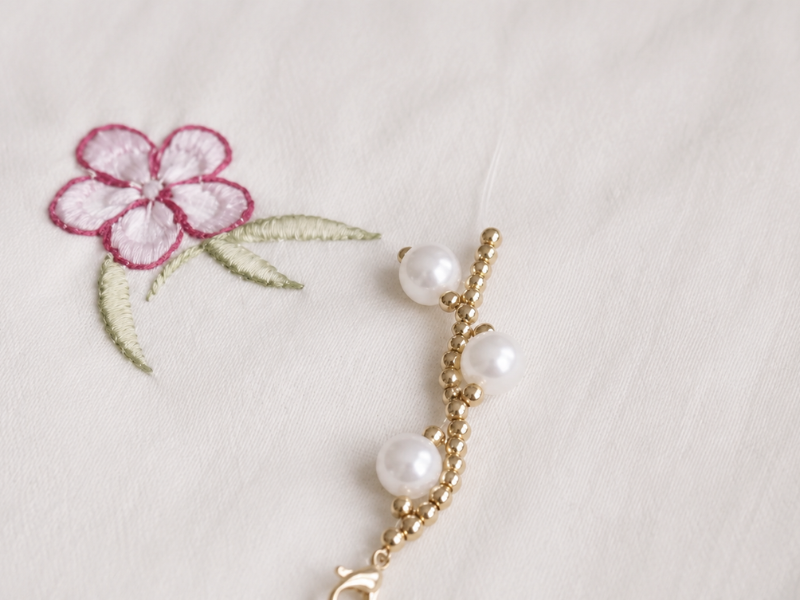
Separate the two ends of the elastic cord so you can work each side independently. On the strand to your left, string seven gold beads in a row and slide them down toward the base. On the strand to your right, alternate the components by adding one gold bead, then a white pearl, then another gold bead. Bring both ends of the cord back together and pass them through a new shared gold bead. As you slide that last bead into place, you will see the side with seven beads curve around and hug the pearl on the opposite side.
Reversing the pattern to create a continuous flowing effect
Gently separate the two strands again to repeat the process, this time switching the order of the materials. On the left strand you will place the pearl combination by adding one gold bead, one white pearl, and one more gold bead. On the right strand you will add only five gold beads this time. Bring the two ends of the cord together again and pass them through a shared gold bead. As you pull the cord snug, you will see the second wave form facing the opposite direction from the first one.
Repeating the weave and checking your wrist measurement
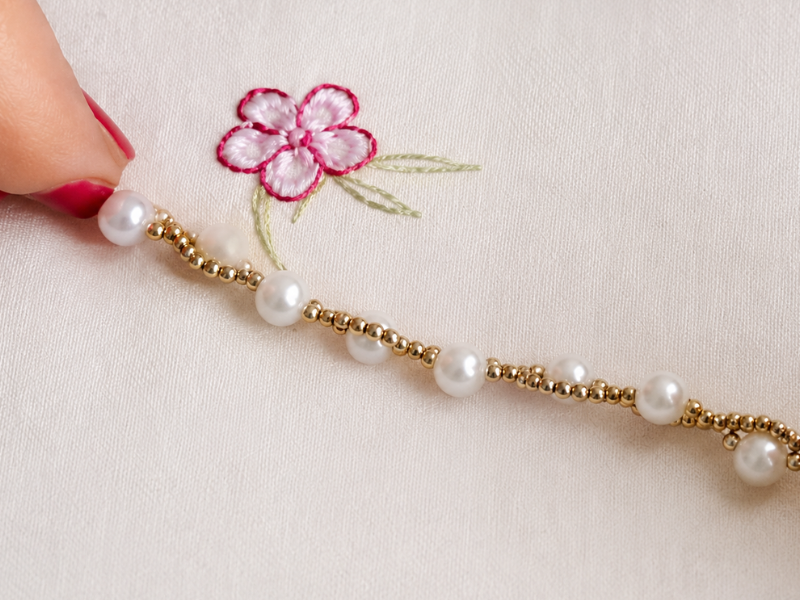
Keep alternating steps two and three so the bracelet grows in length. Wrapping the piece around your wrist every so often is essential for figuring out the exact size you need. Keep in mind that the finished clasp will add about half an inch to the total length. Try to keep even tension on the elastic cord so the beads do not sit too far apart and the structure does not feel too stiff when you move your arm.
Adding the crimp bead and finishing the piece
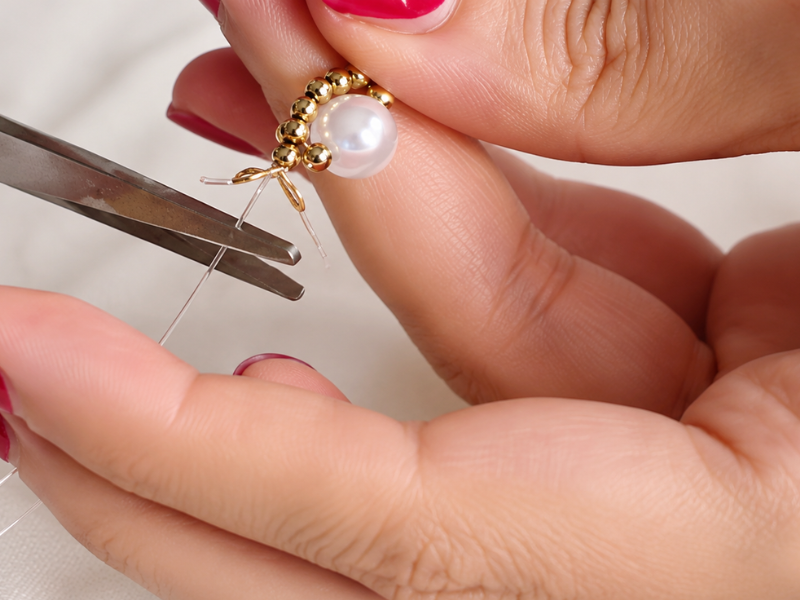
Finish the bracelet with a module that mirrors the first one so the piece stays visually balanced. Pass both strands together through the metal crimp bead right after the last shared bead. Run the ends through the receiving jump ring, then bring the cord back through the crimp bead in the opposite direction to create a firm loop. Use flat nose pliers to flatten the crimp bead until it bites into the elastic cord. Tie two simple security knots behind the crimp and trim the excess cord flush with the bead.
Tools:
- A sharp pair of scissors
- A pair of flat nose pliers
Materials: A piece of 0.6 mm elastic cord. A metal lobster clasp with its matching jump ring. A metal crimp bead or crimp cover to secure the closure. 8 mm white pearls with a center hole. Good quality small gold beads for the spacers.
If you prefer, you can watch the video tutorial on YouTube
Tips for getting the size right
As you repeat these alternating steps, you will notice the bracelet grows at a really satisfying pace. The process is so rewarding because within a few minutes you start to see the real structure of the finished piece.
How to measure your wrist
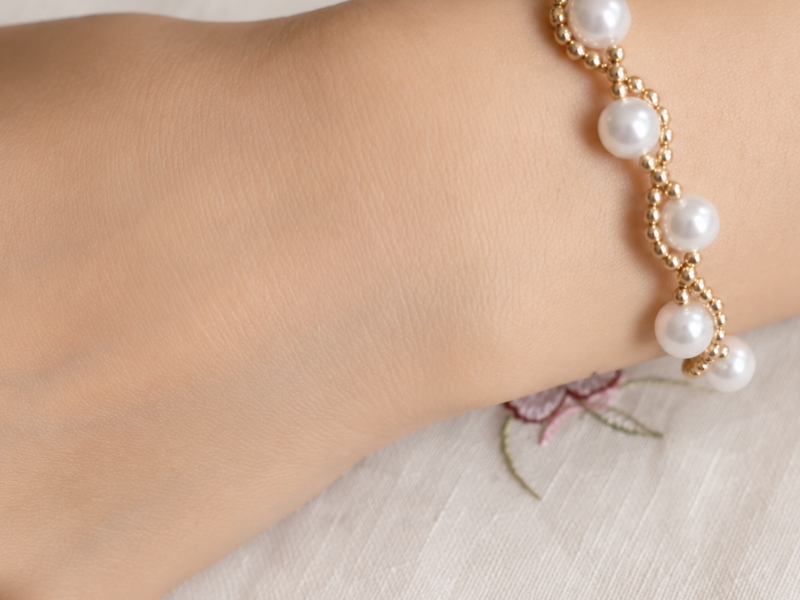
No two wrists are the same, and the fit of a bracelet is a very personal thing that comes down to what feels comfortable for each of us. Some people like it completely snug so it does not shift around while they type at the computer, while others prefer it to slide down over the hand for a more relaxed, casual look.
To avoid any mistakes, wrap the bracelet around your wrist every now and then as you build it. Keep in mind that the finished clasp will add roughly half an inch to the total length. A really useful trick is to lay the piece on the table next to a bracelet you already own that fits you like a glove.
Keeping the right tension on the cord
One of the most common mistakes when we are starting out with handmade jewelry is pulling the cord too tight or leaving it way too loose. If you pull too hard, the bracelet will lose its flexibility, twist on itself, and feel stiff, which makes it uncomfortable to wear and puts unnecessary strain on the cord that could break it down the road.
If you leave it too loose, gaps of elastic cord will show between the beads and take away all the elegance of the final design. The sweet spot is where the beads gently touch one another, letting the bracelet curve naturally around your wrist.
How to wear and style your pearl bracelet
One of the things that excites me most about this particular design is how versatile it is. This is not the kind of jewelry you lock away in a drawer waiting for a wedding or a fancy black tie party.
Pair it with dark jeans, a basic white cotton tee, and a textured black blazer, and the bracelet will break up the sobriety of the outfit with a flash of light at your wrist. It is perfect for those office days when you have dinner plans right after and no time to swing by home to change.
Stack it with other thin gold bracelets or flat bangles for a layered effect that is very on trend and makes your arm look longer. In summer, with a bit of a tan and linen dresses in earth, olive, or beige tones, the contrast of white pearl against gold shines in a spectacular way that instantly elevates your look.
Frequently asked questions about making a pearl bracelet
Can I use rigid nylon thread instead of elastic cord?
Yes, absolutely, you can use it with no trouble at all. If you decide to go with a non elastic nylon thread, the stringing process is exactly the same at every step. The only real difference will be how the bracelet behaves on your wrist, since elastic cord gives a lovely bit of extra flexibility that absorbs sudden movements, while rigid nylon keeps a slightly firmer, more fixed structure. If you use rigid thread, be sure to measure precisely so the bracelet is not too tight once you close the lobster clasp.
How do I clean the bracelet so the beads keep their gold shine?
Handmade jewelry deserves gentle care to make it last as long as possible and keep it looking brand new. My recommendation is to avoid any contact with perfume, hairspray, body lotion, or household cleaning products. Ideally you should get dressed and spritz your perfume first, let your skin absorb everything for a few minutes, then put the bracelet on right before you head out the door. To clean it after wearing, gently rub it with a dry, clean cotton cloth to remove any sweat residue, then store it on its own in a small fabric pouch.
What do I do if the holes in my pearls are too small for the cord?
Sometimes we buy natural pearls with very narrow drill holes because of the way they are made. If you find yourself in that situation and notice the 0.6 mm cord is a tight squeeze, you have two simple options. You can drop down to a thinner 0.4 mm cord, making sure to reinforce the finish at the closures, or you can use a special extra fine beading needle to guide the elastic cord through the tricky openings without fraying it.
Is this project suitable for young kids at home?
It is a fantastic activity to share on a rainy afternoon as a family, as long as the kids are old enough to have developed decent fine motor skills. Working on this kind of craft does wonders for helping younger ones build their focus, their patience, and their coordination. They love watching loose pieces come together into something they can actually use, and they will feel so proud wearing their own creation to school or giving it to a friend.
Now that you have all the information, all the tricks, and a detailed road map for creating this pearl bracelet, the decision is in your hands. Tell me in the comments below whether you are going to give it a try this weekend, what color variations come to mind, or whether you still have questions about the wave pattern. I love reading your messages, hearing about your creative experiences, and answering every one of your ideas so we can keep learning together in this little craft corner.