Working with carded wool has something special about it that’s hard to explain until you try it. At first, all you’re holding is loose, airy wool with almost no shape.
You start poking with the needle and, without noticing, you slip into a quiet rhythm where everything slows down and becomes more present. Little by little, that soft mass begins to compact and respond to your movements.
A shape appears, then a gesture, and finally a small character with a life of its own.
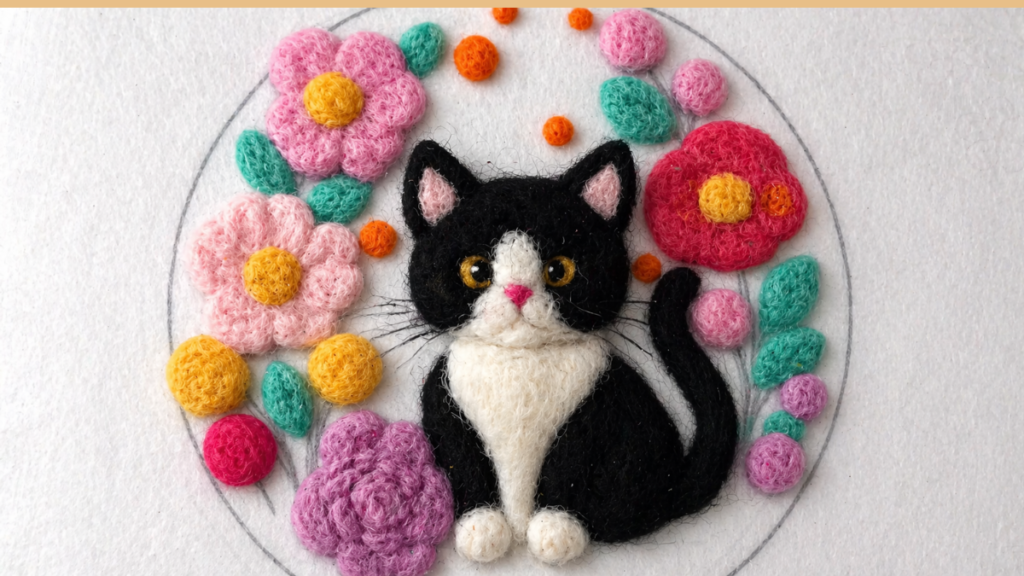
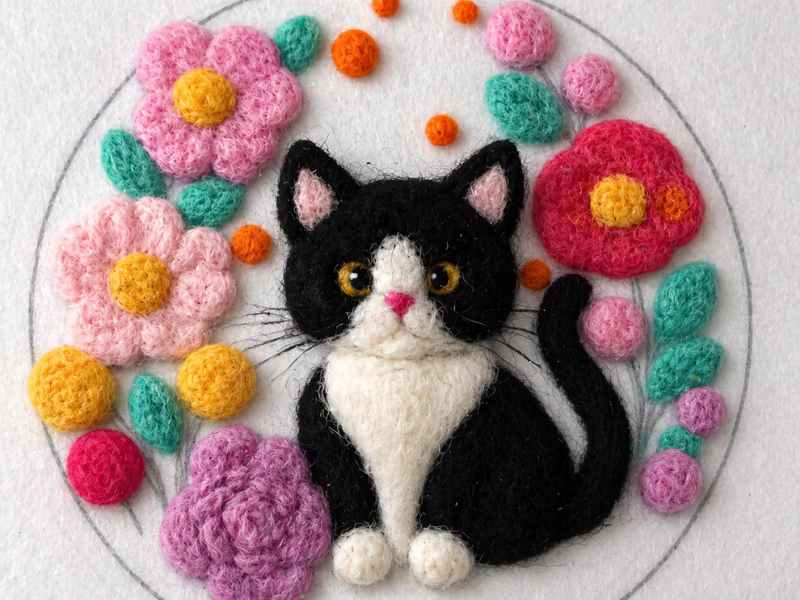
Making a picture of a kitten surrounded by flowers is the perfect excuse to enjoy that process. It’s a gentle project, full of detail, that lets you experiment without pressure and move at your own pace. The result is lovely, yes, but what really hooks you is everything that happens while you make it.
This post contains affiliate links. If you buy through them, you’re supporting my work (at no extra cost to you).
What is carded wool, and why is it so addictive?
Working carded wool with a needle, known as needle felting, is a craft technique where you shape wool roving with a special barbed needle. Every poke tangles the fibers together, compacting them gradually until they form a firm surface.
The process is gradual and very intuitive. All you need is time, a little patience, and a willingness to fall into the rhythm of working with your hands. That repetition of gestures has a relaxing effect that makes it easy to lose track of time.
Another reason it’s so addictive is that no two pieces come out the same. Every press of the needle, every layer of wool, every small adjustment changes the result. That gives each picture a personality of its own.
Materials you’ll need and how to choose them well
Choosing your materials well makes all the difference in the final result. You don’t have to spend much, but you do need to understand what each piece is for.
Carded wool is the foundation of the whole project. It has a soft, airy texture that’s easy to shape. It’s worth starting with basic colors for the kitten, like whites, grays, or creams, then adding brighter colors for the flowers. Working with a palette you love makes the creative process much easier.
Felting needles are your main tool. They come in different gauges. Thicker ones compact quickly and establish the shape at the start, while finer ones handle details and delicate finishing. Always poke straight down so the needle doesn’t snap.
Your work surface is usually a foam pad or a special brush mat. It protects your table and lets the needle pass through the wool without damage. Working on the right surface makes everything more comfortable and safer.
The frame or mount is where the finished picture will live. It can be stretched fabric or a rigid backing. Which one you choose depends on the finish you’re after, though both work well.
Don’t worry too much about materials, though, because they usually sell kits with everything you need, and fairly affordably.
How needle felting works step by step
The process isn’t about cutting or gluing, it’s about building up gradually from layers of wool. Everything rests on adding, compacting, and shaping.
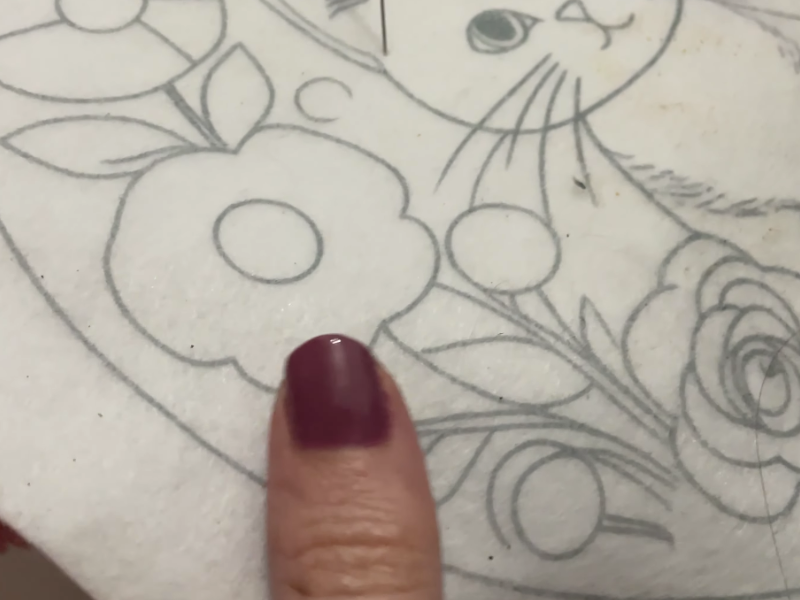
The first step is creating the background. You lay a sheet of wool over your base and start poking gently until it holds. That background acts as the canvas everything else is built on.
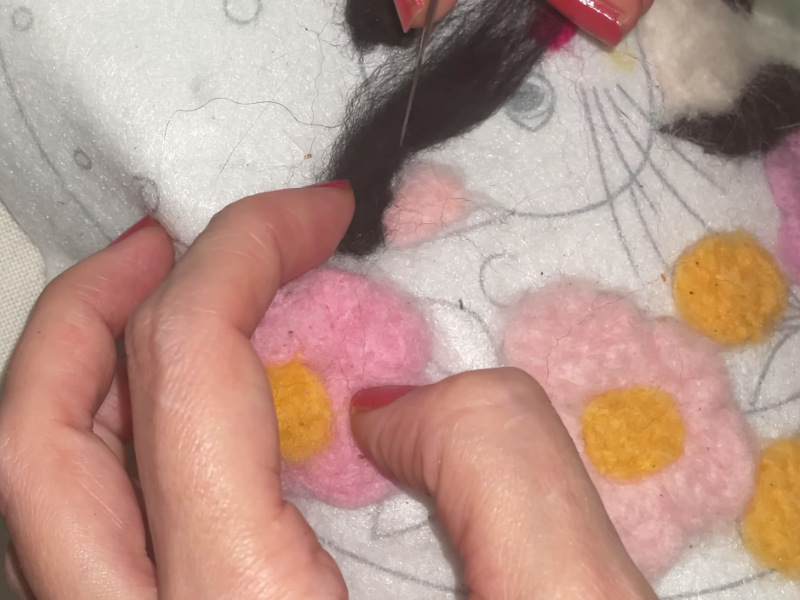
Next you block in the main shapes. For the kitten, take a small tuft of wool, shape it slightly with your hands, and set it where you want it. From there, poke repeatedly while turning the piece so it compacts evenly.
The next step is sculpting the volume. Add wool where you need more body and poke more in the areas you want to define. Playing with that pressure lets you create curves, raised areas, and soft transitions.
Finally come the details. With a finer needle you work the eyes, the nose, the shadows, and the outlines. This is the moment the piece starts to show expression.
How to make the kitten step by step
The head usually starts as a small ball of wool. Poke it until it holds its shape without getting too hard. Keeping some flexibility makes the detail work easier later on.
The ears are formed from two small triangles of wool attached directly to the head with the needle. Work them in gradually so they don’t look stuck on.
The muzzle is made by adding a small amount of lighter wool. Define it with gentle pokes to get a rounded, natural shape.
The eyes take precision. Use very little wool and work slowly to get them in exactly the right position.
The nose and the last small details are what finish giving the kitten its personality. It’s a delicate stage where it pays to take your time.
How to make needle felted flowers
The flowers bring color and balance to the whole piece. They’re also very satisfying to make with this technique.
For a basic flower, take a small tuft of wool, lay it on your base, and start poking from the center outward. That motion opens the petals up naturally.
You can layer different colors to create depth. Adding a second tone at the center or along the edges gives a richer, more visually interesting effect.
Leaves are formed from small amounts of wool in an elongated shape. Define the center vein with firmer pokes to suggest the leaf’s structure.
Here’s the video on YouTube
Composition: how to get a balanced result
Where you place things matters as much as the technique. Good visual balance makes the picture work far better.
Set the kitten as your main element and distribute the flowers around it without crowding the space. Leaving clearer areas helps the composition breathe and makes it more pleasant to look at.
Stepping back and looking at the whole thing from a distance helps you spot areas that are too busy or too empty. Adjusting small details at this stage improves the final result a lot.
Common mistakes and how to avoid them
Using too much wool at the start is common. Working with small amounts gives you better control over the shape and keeps things from getting bulky.
Another frequent mistake is not turning the piece as you work. Always poking from the same angle can distort the figure.
Poking at an angle instead of straight down raises the risk of snapping the needle. Keeping it upright helps you work safely.
Rushing usually works against you. Taking the time you need makes the process more enjoyable and the result more polished.
Caring for your finished picture
Needle felting is durable, but it’s worth caring for so it stays in good shape.
Keep it away from moisture and avoid pressing the surface so it doesn’t lose its form. To clean it, a soft brush or a puff of air is best for removing dust without damaging the fibers.
Hanging it somewhere protected from constant contact will help it last much longer.
Frequently asked questions about carded wool
Is needle felting hard to learn from scratch?
It isn’t hard, though it does take some patience at first. The technique is very intuitive, and once you understand how the wool reacts to the needle, everything starts to flow naturally. The important thing is not demanding perfect results from the start.
How long does a needle felted kitten and flowers picture take?
It depends on the size and the level of detail you want. It can take several hours spread across different sittings. This is the kind of project you enjoy most when there’s no rush and you work on it bit by bit.
Can I fix mistakes while I’m working on the piece?
Yes, and that’s one of the great advantages of this technique. You can add more wool, pull away some of what you’ve already placed, or redefine shapes you’re not happy with. There’s always room to adjust.
Is needle felting expensive to start?
Not particularly. A small amount of wool, a couple of needles, and a work surface are all you need to begin. There’s no big initial investment.
Is it normal to poke yourself with the needle?
Yes, especially at the beginning. It’s part of learning. Your precision improves over time and it happens less and less. If it worries you, you can use finger guards.
What happens during the process
As you go, there’s a moment when the piece seems like it will never come into focus. That feeling is part of the process. Keep working calmly and, soon after, the shape appears clearly.
That shift is one of the most satisfying moments, because it shows how something very simple can turn into a figure with character.
How to work with needle felting step by step
Prepare your materials and workspace
Before you start, lay out the carded wool in the colors you’ll use, your felting needles, and a suitable base like a foam pad or brush mat. It’s important to work on a surface that lets the needle pass through without breaking and that keeps you comfortable enough to stay relaxed.
Lay down the base wool
Take a small amount of wool and place it on the surface where you’ll be working. It doesn’t need a perfect shape at this point, just distribute it evenly to start building the foundation of your design.
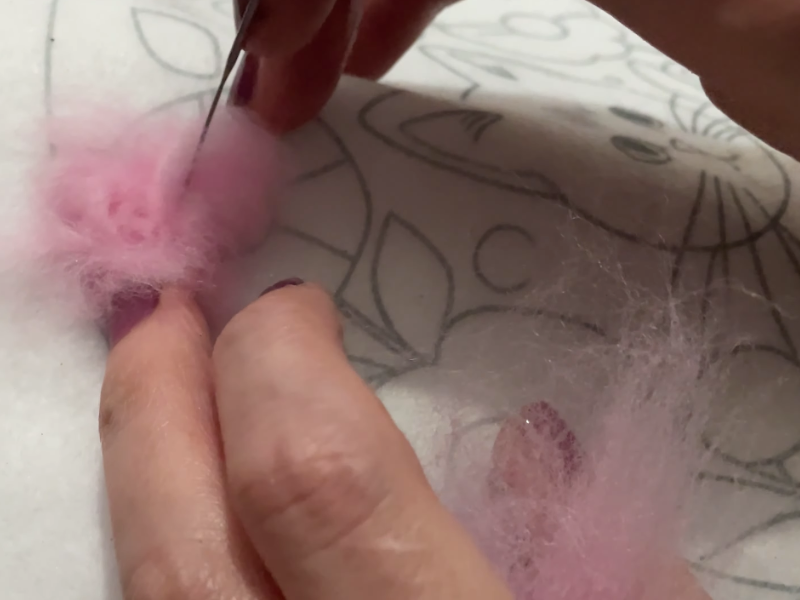
Start poking the wool
Take your felting needle and start poking straight down into the wool. That motion tangles the fibers and starts compacting them. Poke steadily and without rushing so the material responds well.
Shape it gradually
As the wool compacts, you can shape it with your hands and keep poking to hold it in place. If you need more volume, add small amounts of wool and work over them until they blend in.
Define volume and relief
At this stage the final shape starts to show. Poke more intensely in the areas you want defined and use lighter pressure where you want to keep things soft. That contrast is what creates depth in the work.
Add the details
Switch to a finer needle for smaller details. Add layers of color, subtle shading, or small shapes depending on the design you’re creating. This step takes more precision and patience.
Review and adjust
Look at the piece from different angles and correct anything you’re not happy with. You can add more wool, remove some, or redefine areas until you like the result.
Finish and tidy the piece
Once it’s done, go gently over the surface to make sure everything is well integrated. Carefully remove any fuzz or loose fibers for a cleaner finish.
Tools:
- Felting needles (coarse and fine)
- Foam pad or brush mat
- Frame (optional)
- Finger guard (optional)
Materials: Carded wool in assorted colors Fabric or felt backing (optional, for framing)
Why it’s worth trying
Making a needle felted picture of a kitten with flowers isn’t just a decorative result. It’s a complete creative experience that combines technique, patience, and personal expression.
The time you spend on it becomes a space of your own, quiet and focused. The final result matters, but what really stays with you is the feeling of having made something with your own hands.
If you decide to give it a try, it’ll be interesting to see how you interpret your own design and which details you choose to add ^^