Learn how to make your own earrings with simple materials and plenty of creativity. I’ll share my experience, tricks, ideas, and the whole process step by step. A complete, detailed guide to discovering how easy and how special it can be to create unique earrings made by you.
Here’s something you may already have suspected if you love crafting as much as I do. Making your own earrings is one of those activities that makes you feel special in a very simple way. It’s as though you could turn a quiet stretch of time into something you can carry with you afterward, something that becomes part of you. That, my friend, has a magic that really does hook you.
When I discovered I could make my own earrings, I felt that sensation you get when you find something you didn’t know you needed. It’s freeing, creative, and surprisingly easy. All it takes is affordable materials, a bit of imagination, and that personal touch you already have.
What matters most is enjoying the journey, feeling that every pair you create has its own story, and knowing that the story starts with you.
Why Making Your Own Earrings Is Such a Special Experience
I’ve always thought handmade things have a power that goes beyond what you can see. It isn’t only that they’re pretty or different, it’s that they carry a piece of the person who made them. That’s exactly what happens when you make your own earrings. Every shape, every color, every small decision you make gives the finished piece its personality.
There’s something deeply freeing about creating an accessory from scratch. You don’t depend on what the stores happen to stock, or on trends, or on prices. You decide the colors, the sizes, the materials, the shape, and the feeling you want it to convey. Draw inspiration from a pair you spotted on the street, from an outfit you love, from a photo you saved years ago, or even from how you’re feeling today.
It’s also an incredibly relaxing activity. When I sit down to make earrings, I slip into that state of mind where time slows down a little. You focus, you choose, you try things, you change your mind, you smile when something starts taking shape. It’s a lovely feeling, almost therapeutic, and I think we all need moments like that now and then.
The other thing I love is that making your own earrings gives you creative independence. You aren’t limited by what’s for sale. You can make earrings that are minimalist, bohemian, colorful, elegant, bold, or extremely simple. You can even make several pairs in the same style to match different outfits.
Something else that matters: you can reuse materials. That leftover bit of chain, that earring that broke but had one gorgeous component, those beads you’d forgotten about. All of it can become something new. I like to think that making your own earrings is also a way of recycling, transforming, and giving things a second life.
Finally, there’s something very sweet about giving away something you made. When someone receives a pair of earrings created by your hands, they see it differently. It isn’t a simple gift. There’s intention, time, and affection behind it, and that comes through.
What You’ll Need to Make Your Earrings
Before you start creating, it helps to have the basics on hand. You don’t need every supply in the world. A few simple components will let you make genuinely wonderful things. If you decide to experiment more down the line, you can always build up your collection little by little.
The main materials
The first thing you need is the earring base. These are usually small metal findings shaped like a hook, a hoop, or a post. Most craft or jewelry supply stores carry them, typically sold in packs. They come in several finishes: silver, gold, bronze, or black. Choose according to your style.
You’ll also need decorative components. Here’s where the fun begins. Use beads, pearls, wooden pieces, geometric shapes, small charms, stones, seed beads, or even bits of fabric or cord. Any detail that adds personality works.
Another essential is fine wire. Wire lets you join pieces, shape forms, close structures, and create small spiral or circular details. It’s easy to handle and, once you get the knack, it becomes a very useful tool.
Optional materials that make a difference
To take things up a level, add air-dry clay or polymer clay. With it you can shape your own forms: circles, teardrops, hearts, irregular tiles, flowers, or any design you feel like. It needs baking or drying time, but the result is beautiful.
Acrylic paint is worth having too, especially if you’re working with wood or clay. Clear varnish is ideal for sealing colors and giving a more professional finish. Small jump rings also come in handy for joining pieces without bending too much wire.
Tools that make the process much easier
Small scissors will handle thread and cord. Chain-nose pliers are practically essential if you’re working with wire, since they let you bend it without straining. Flat-nose pliers help you tighten connections, and if you’re working with clay, a small craft knife or sharp blade is very useful for cutting shapes precisely.
There’s no need to buy it all at once. Start with the basics and add things as you learn. What matters is having a small clean space to work in and the desire to experiment.
How to Make Your Own Earrings Step by Step
Here’s where the best part begins, and there’s no rush. Creativity keeps its own pace, and that’s part of the charm.
Start by shaping the idea
Before I touch any material, I like to picture what kind of earring I want to make. Something long and elegant? Something short and minimalist? Something bohemian in earth tones? Sometimes I close my eyes and visualize the whole design. Other times I look for ideas on Pinterest or in videos and let the inspiration arrive on its own.
Once you’re clear on it, choose the materials that fit the idea. Take as long as you like here. I usually spread several components out on the table and try combinations. Sometimes the most unexpected pairing turns out to be the winner.
Get your materials ready
Organizing your materials helps enormously. Having the beads sorted by color or size, the tools within reach, and the earring findings prepped makes the whole process easier. It’s like getting all your ingredients out before you cook. It simply makes everything more comfortable and natural.
Use a small tray, a soft cloth, or even a flat plate so the tiny pieces don’t get lost. I usually pick a light background so I can see things better. When I’m working with dark colors, I like to put a sheet of white paper underneath to make out every detail.
Build the basic structure
This step is like creating the skeleton of your design. If you’re using wire, now’s the time to bend it, shape it, cut it to the right length, and test how the structure looks before adding any decoration. Handled carefully, wire can take on beautiful forms, from an imperfect hoop to an asymmetrical triangle or an organic curve.
If you’re working with clay, this is where you shape the main pieces. Clay has a particular charm because you can create completely custom forms that nobody else will have. Use molds, cutters, or simply your hands. The good thing about clay is how well it takes small details like creases, textures, or stamped patterns. Once the pieces are made, all that’s left is letting them dry or baking them, depending on the type of clay.
If you’re using wood, sand it lightly, paint it, or leave it in its natural tone for a more rustic effect. If you’re using beads, put small combinations together before assembling them. Sometimes I like to string the beads onto a head pin first to see how they look together.
Add the details that define your style
Here’s the most fun and creative part of making your own earrings. This is the moment your earring goes from being something simple to having a personality of its own. Combine textures, mix colors, add a special bead or a component you adore.
Picture yourself painting a tiny canvas. Every bead is a dot of color, every piece of thread a brushstroke, every metal component an accent. As you play with it, combinations start emerging that surprise even you.
If the earring is boho, you might want wooden beads or cord. If it’s minimalist, you may prefer clean lines and neutral tones. If you’re after something elegant, small pearls or metal components look beautiful. If experimenting is your thing, mix shapes and colors fearlessly. Handmade jewelry has a way of welcoming the unexpected.
Secure the connections and refine the edges
Once your design is ready, it needs securing properly. If you’re using wire, check that there are no loose ends or spots that could catch. Sometimes bending a millimeter or squeezing gently with your pliers is enough to make the piece feel solid.
If you’re using glue, apply a moderate amount and let it dry without moving the piece. It may seem like a minor detail, but giving the glue time to do its job makes a big difference to durability.
If you’re working with clay, sand the edges smooth and apply a bit of clear varnish if you want a more polished finish. Some people prefer clay left natural, others want it glossy. Both are valid. What matters is that the earring is comfortable to wear and holds up.
Attach the ear wires or posts
This is the finishing touch, the moment your creation officially becomes an earring ready to wear. Add the hooks, the hoops, or the jump rings, making sure everything is closed securely. I like to try them on right when I finish to see whether they move well and hang the way I wanted.
When you finally put on a finished pair of your own earrings, something feels special. It’s that small mix of pride and surprise that shows up when you look at something you made and realize it came out better than you’d pictured.
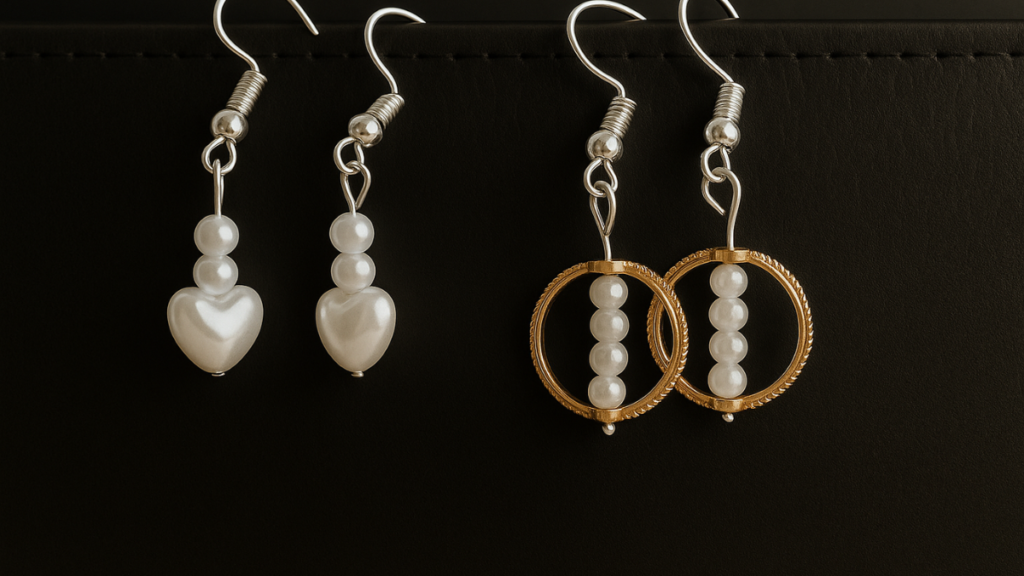
Here are a few pearl earring designs I’ve made (if you’ve visited the blog before, you’ll have noticed I’m quite fond of pearls, which never go out of style as far as I’m concerned ^^).
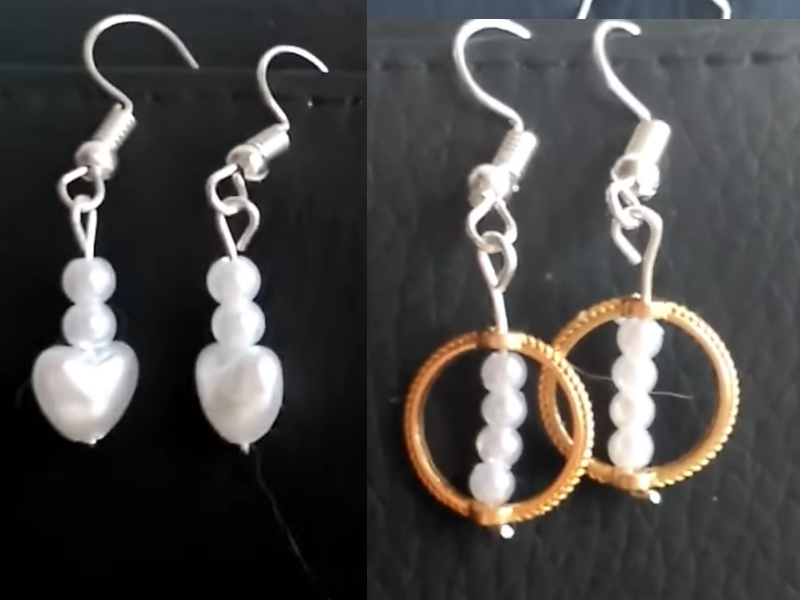
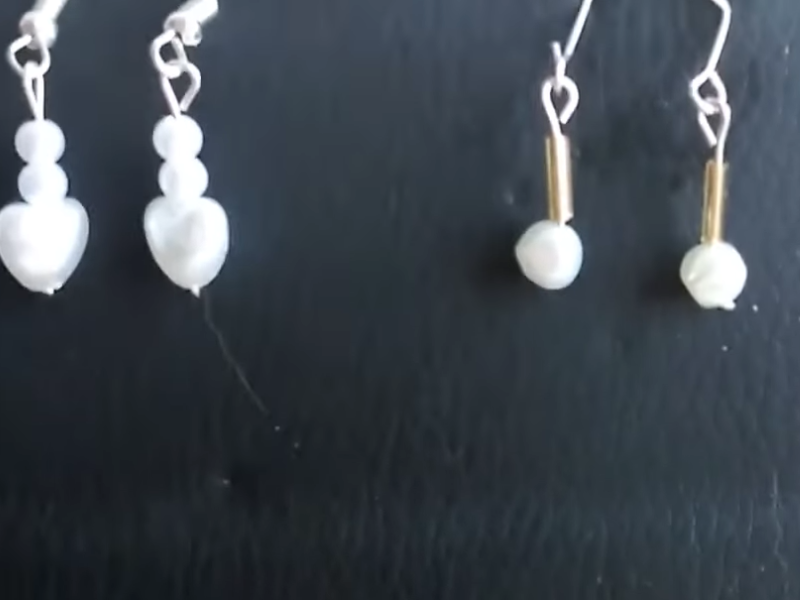
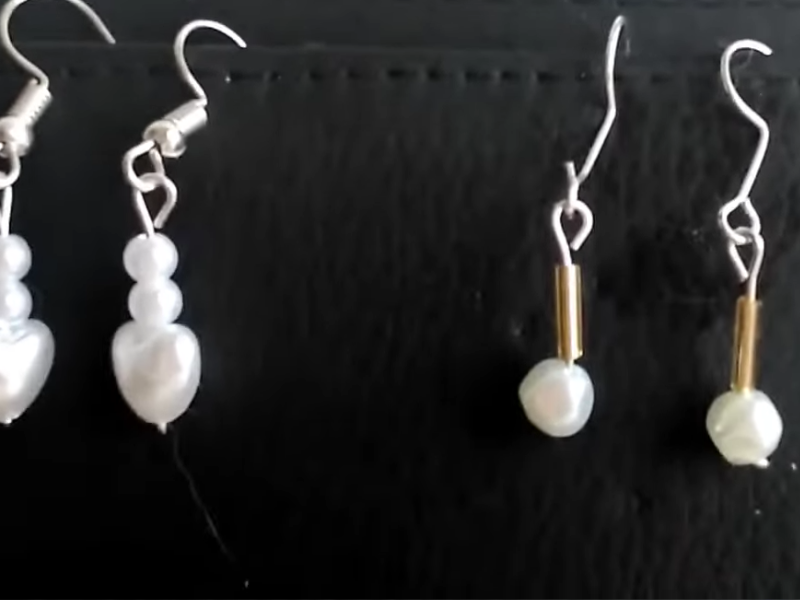
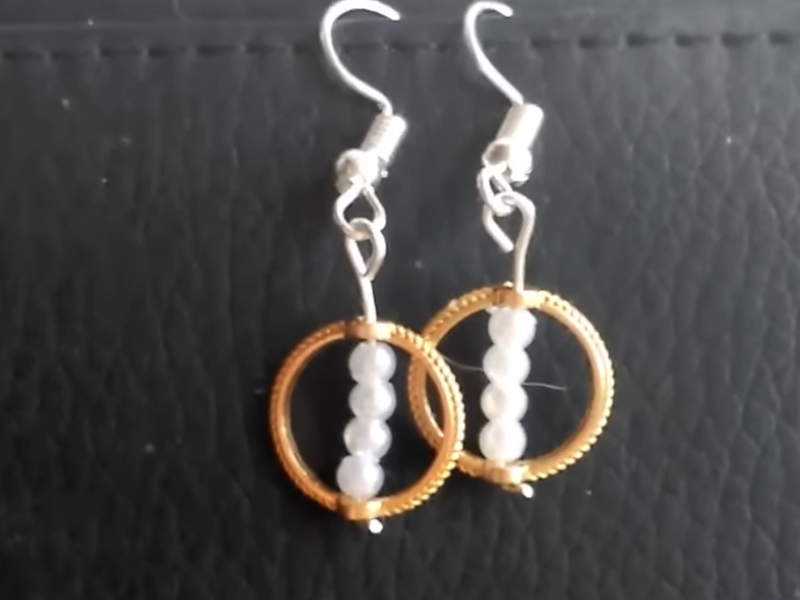
I show you how I made them in this video, and if you like it, feel free to subscribe to the channel (it’s free!).
Ideas and Variations to Make Your Earrings Truly Unique
Making your own earrings opens up an enormous world of possibilities. You aren’t limited by what you find in stores. You can mix styles, try unexpected combinations, and let your personality show in every detail.
Boho chic
I love this style because it’s relaxed, warm, and highly expressive. Combining wooden beads, aged metal, cotton cord, and earth tones creates a look with effortless personality. Sometimes I add a feather, a textured component, or an irregular bead, which gives it a beautiful artisan touch.
Boho chic has something freeing about it. It isn’t chasing perfection, it’s chasing a feeling, and that shows in the earrings.
Minimalist
Minimalism is perfect for those days when you want to keep things simple but elegant. This style leans on geometric shapes, clean lines, and neutral colors like white, black, silver, or soft gold.
A plain metal circle with one tiny pearl can make a spectacular earring. You can also play with subtle asymmetry, like one earring slightly longer than the other.
Colorful and summery
If anything lifts my mood, it’s putting on a pair of earrings full of color. Anything goes here: bright color combinations, cheerful components, large beads, fun shapes, colored thread.
It’s a perfect style for playing around and letting go. It looks great with breezy summer outfits, or even with neutral clothing for a vibrant pop.
Natural or rustic
Wood, natural thread, beads in beige or brown tones, and simple details create earrings that feel warm and welcoming. If you love natural things, this style will win you over.
Combine small wooden pieces with gold details for a more sophisticated touch, without losing that rustic essence.
Artistic
This style is for you if you like experimenting. Create pieces from polymer clay, hand-paint details, blend colors, add texture, or make earrings inspired by paintings or abstract forms.
Every piece becomes a miniature work of art. It’s a very free, very creative style, perfect for anyone who enjoys exploring.
Why This Hobby Is Perfect for You
Making your own earrings is one of those activities that gradually turns into a creative refuge, and the more you practice it, the more you understand why so many people get hooked. There’s something lovely about putting intention into something you’ll wear yourself. It’s almost like writing a small story in the shape of an accessory.
Making your own earrings also has what I call the ritual effect. It’s that moment when you sit down, breathe, lay out your materials, and let yourself go. The world fades into the background a little while you focus on making something with your hands. It relaxes you, helps you unplug, and even lifts your mood. There are afternoons when I make earrings purely for that small mental breather I so badly need.
Another lovely thing about this hobby is that it lets you discover a bit more about yourself. Without noticing, you choose colors that represent you, shapes that feel comfortable, or details that maybe remind you of something. When the earrings are done, you often realize they reflect your inner world in ways you never imagined when you started.
Then there’s that wonderful feeling of creative self-sufficiency. You don’t have to wait to find something you like in a store. You don’t depend on trends, on prices, or on fast fashion. If you want a particular style, you make it. It’s that simple, and it feels empowering, almost therapeutic.
I also love how well this hobby works as something to share. If you have friends or family you enjoy making things with, earrings are a wonderful option. Everyone picks their own style, materials, and ideas, and at the end you all share your designs. It’s a special moment that makes for lovely memories.
If you ever decide to take it a step further, you can sell them too. Plenty of people start making earrings as a hobby and end up building a small personal brand. That part is up to you. What matters is that this hobby adapts to any level, from someone who wants something simple and relaxing to someone who wants to explore their creativity more deeply.
What to Keep in Mind So Your Earrings Last and Feel Comfortable
Making your own earrings is a beautiful activity, though it’s also worth thinking about the practical side. A piece can be gorgeous, but it needs to be comfortable to wear and sturdy enough that you can enjoy it for a long time.
One key factor is weight. Sometimes we see designs that look spectacular on the table, then you put them on and feel them pulling too much. To avoid that, balance your choice of materials. Wood is light, clay varies depending on thickness, and metals can add weight quickly. I always check an earring’s balance before assembling it completely.
Another important point is how strong your connections are. When you use wire, bending it properly and tightening it enough that it won’t open with movement is essential. With jump rings, close them completely so no gap remains. If you’re working with glue, let it dry for the full time even if you’re impatient to see the result. A well-secured earring is worth the extra effort.
I’d also suggest paying attention to the ends of your wire. Any point left sticking out, however small, can snag your clothes or prick you a little. The good news is that bending it slightly inward or filing it down is enough to make the earring perfectly comfortable.
As for care, a few things make all the difference. Storing your earrings somewhere dry keeps the metals from deteriorating. If you’ve painted them, a little varnish at the end will protect the colors for longer.
Something I learned from experience is that clay earrings keep their beauty for years if you store them well. The same goes for anything with wooden components, which appreciate being kept away from humidity. I always say handmade earrings are small personal treasures, and like any jewelry, a little care keeps them looking perfect.
Frequently Asked Questions About Making Your Own Earrings
Do I need experience to start making my own earrings?
Not at all, and I say that with conviction. It’s a perfect activity for beginners, because you can start with simple designs and gradually try more complex ones. No prior knowledge required. Only the desire to do it and a bit of curiosity.
Can I use recycled materials to make earrings?
Of course, and it’s one of the things I love most about this hobby. You can rescue beads from old jewelry, charms from broken earrings, lengths of chain, pretty buttons, fabric left over from another project, and plenty more. Beyond being sustainable, it looks beautiful.
How long does a pair of earrings take?
It depends on the design. Some pairs you can finish in ten minutes, others you can happily spend a whole afternoon on. The good part is that the process is so pleasant the time flies by.
Are homemade earrings durable?
Yes, as long as you secure the connections well and use decent-quality basic materials. With care and attention you can create pieces that last a very long time. I have earrings I made years ago that are still perfect.
Can I sell the earrings I make?
Yes. Plenty of people start exactly that way. If they’re turning out well and the idea excites you, start by offering them to people you know or on small platforms. Remember to value your time, your materials, and your creativity.
Go ahead and make your own earrings, then tell me how it went
If you’ve made it this far, I’m guessing you already have that creative itch that shows up when an idea starts taking shape. I love thinking that while you read, you’re already imagining the colors, the shapes, and the materials of your first pair. If that’s the case, you’re halfway there already.
Making your own earrings gives you far more than a pretty accessory. It gives you moments of calm, connection with yourself, fun, discovery, and that lovely satisfaction of seeing something made by your own hands. When you wear them, you’ll feel that they express something genuine.
I’d love for you to tell me which style you want to try first, or whether you’ve made earrings before and want to improve. I’m happy to help and to share this small creative universe with you.
Tell me in the comments, I’d love to hear from you and keep creating together!