
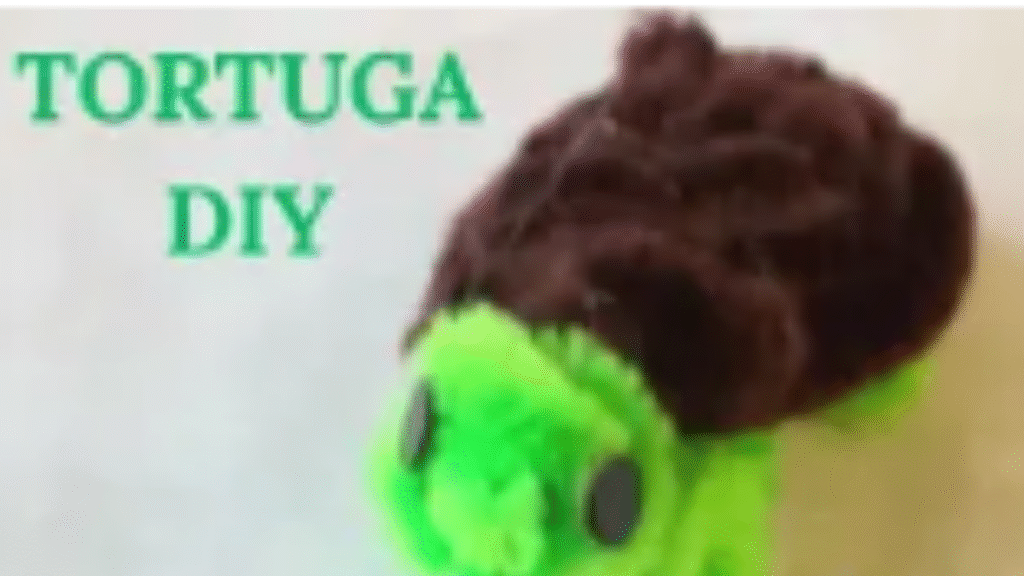
An Easy, Fun Craft Learn how to make a pipe cleaner turtle quickly and easily. A fun, inexpensive craft that’s perfect for kids, with creative ideas for personalizing it.
Feel like doing something simple, original, and quick? Today I want to show you how to make a pipe cleaner turtle, a project that’s perfect to do with kids, to decorate your desk, or just to spend a creative little while.
What are pipe cleaners and why are they so versatile?
Pipe cleaners, also called chenille stems, are flexible wires covered in soft fibers (a bit like velvet) that were originally made for cleaning the inside of smoking pipes. Over time they’ve become one of the favorite craft materials thanks to their flexibility, bright colors, and low price.
The great advantage of pipe cleaners is that you can bend them, coil them, and shape them however you like without any glue (though for some projects a bit of hot glue helps hold things in place). That makes them an ideal material for creating figures, flowers, animals, or Christmas ornaments.
They also come in a wide variety of thicknesses, textures, and colors: from classic solids to metallics, glitter, and even two-tone. That lets you personalize your projects in all sorts of creative ways.
Why use pipe cleaners for crafting?
- Easy to shape: You don’t need any special tools, just your hands.
- Great for kids: They’re safe and soft, and let you make figures with no scissors or glue (though it’s always best to supervise, because of the wire inside).
- Reusable: If you make a mistake, just undo the shape and start again.
- Cheap and easy to find: They come in big packs at a good price and you’ll find them in almost any craft store or dollar store.
- They combine well with other materials: Pom-poms, beads, cardstock, and felt all work beautifully alongside them.
Pipe cleaners for the turtle: tricks and tips
When you make a pipe cleaner turtle, the wire inside lets you easily form the body, the legs, and the shell without the figure losing its stability. The best approach is to use green pipe cleaners for the body and brown, yellow, or even gold for the shell, which gives you a more realistic look.
If you want your turtle to look plusher, you can wrap several layers of pipe cleaner around the same structure. You could also cover the shell with a large pom-pom or a ball of yarn for extra volume.
More pipe cleaner ideas
Besides the turtle, pipe cleaners can become:
- Animals like rabbits, cats, or butterflies.
- Christmas ornaments, like stars, candy canes, or mini wreaths.
- Flowers and small decorations for gift wrapping.
- 3D figures, combining pipe cleaners with foam balls or wooden beads.
This little turtle is a very inexpensive craft, since you only need a few materials. You can also personalize it however you like: with colorful shells, googly eyes, or even turn it into a keychain. Let’s get to it!
What you’ll need
To make this pipe cleaner turtle you’ll need:
- Green pipe cleaners (chenille stems) for the body
- Pipe cleaners in another color (brown or yellow) for the shell
- Stick-on googly eyes (optional)
- Hot glue or liquid craft glue
- Scissors
Tip: If you want a bigger turtle, use thicker pipe cleaners or join two together for each piece.
Step by step: how to make the turtle
1. Shape the legs and the body
-Start by folding a green pipe cleaner in half, then wrap another one around the folded end. That will be your turtle’s head.
-Use another pipe cleaner for the legs: lay it horizontally near the head and bend it on both sides to shape the front legs.
-Go back to the first pipe cleaner (the one you folded in half) and use the ends to make the back legs.
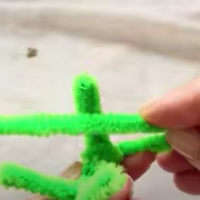
-Use another pipe cleaner to make the body fuller and rounder.
2. Make the shell
-Use pipe cleaners in a different color so it looks prettier. I go with brown for my green turtle.
-Cross three pipe cleaners, joining them at the center, so you end up with six loose ends.
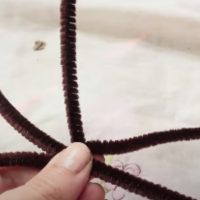
-Wind each end around the others, working in a circle until you’ve used them all. Always turn in the same direction.
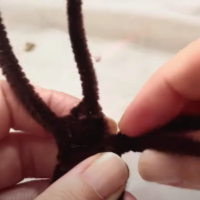
-If you have any ends left over, trim them with scissors.
3. Put your turtle together
-To finish, all you have to do is glue the shell onto the turtle’s body. Use hot glue or craft glue, whatever you have on hand.
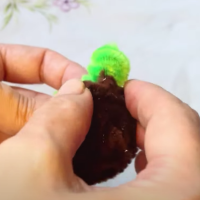
-Last of all, give your turtle a pair of eyes.
Watch the video on YouTube
Ideas for personalizing your turtle
- A colorful shell: mix two or more colors of pipe cleaner for a multicolor effect.
- Extra details: add small beads to the shell as decoration.
- Keychain: add a ring to the shell to turn your turtle into a charm for backpacks or keys.
- Mini terrarium: make several turtles in different colors and arrange them on a tray with little pebbles.
Why I love this craft
Because it’s one of those quick, creative activities that are perfect to do with kids. You don’t need any great skill or complicated supplies, and the result is an adorable turtle that’s a joy to look at.
It’s also an ideal way to use up the leftover pipe cleaners you have from other projects.
Final tips
- If you’re crafting with kids, swap the hot glue for liquid craft glue or school glue to avoid burns.
- Play with scale: you can make baby turtles from short pieces of pipe cleaner.
- Store your figures in a box so they don’t get squashed out of shape.
Did you enjoy this craft?
Tell me in the comments what other animals you’d like to see me make with pipe cleaners. Are you going to try the turtle?
We can also make little animals out of stones, like I show you in this other post. They look wonderful next to our chenille turtle!
If you love creative ideas and want to see more tutorials like this one, subscribe to the blog so you don’t miss anything.
Your thoughts inspire me, and together we can build a community full of creativity and beautiful handmade things!
Don’t go without taking a look around the blog and discovering other creative crafts!
If this article helped you and you’d like to say thanks, you can buy me a virtual coffee here.

