Learn Holbein stitch and darning stitch step by step. Discover techniques, tricks, and embroidery know-how that will make your projects shine.
I’ve always been fascinated by how a needle and thread can turn a simple piece of fabric into something unique and special. Am I the only one? Today I want to share two fundamental embroidery techniques with you: Holbein stitch and darning stitch. Two stitches that look simple at first glance but hide a whole world of detail, precision, and satisfaction.
Have you ever seen a piece of embroidery so perfect it looks like an illustration? That’s what these techniques give you when you work them with patience and love.
What Holbein stitch is and why it’s so special
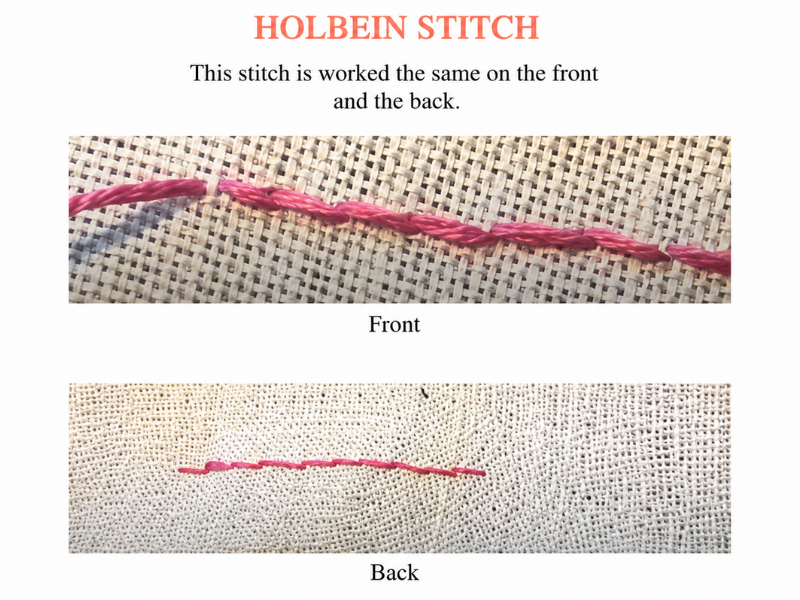
Holbein stitch, also known as double running stitch or reversible line stitch, is a technique that lets you create continuous lines that look perfectly symmetrical on both ,the front and the back of the fabric. That means your work looks flawless from either side, something few stitches can manage.
It’s a perfect stitch for lettering and geometric patterns, because it gives you an elegant, very professional finish.
The main characteristics of Holbein stitch
- It’s worked over a grid, either imagined or marked on the fabric.
- It’s done in two passes: first you stitch half the line in one direction, then you complete it coming back the other way.
- It produces reversible, symmetrical embroidery.
- Ideal for precise details and geometric motifs.
How to work Holbein stitch step by step
If you’re a beginner, don’t worry. I started out clumsy and full of doubts too.
What you’ll need
- Linen or cotton fabric
- A fine embroidery needle
- Stranded cotton or embroidery floss
- A hoop
- A water-soluble marker or fabric pencil (optional)
Step 1: Set up your fabric and hoop
Mount your fabric in the hoop so it’s nice and taut. If you like, lightly mark out the grid where you’ll be working your design, which helps keep everything symmetrical and balanced.
Step 2: Work the first pass
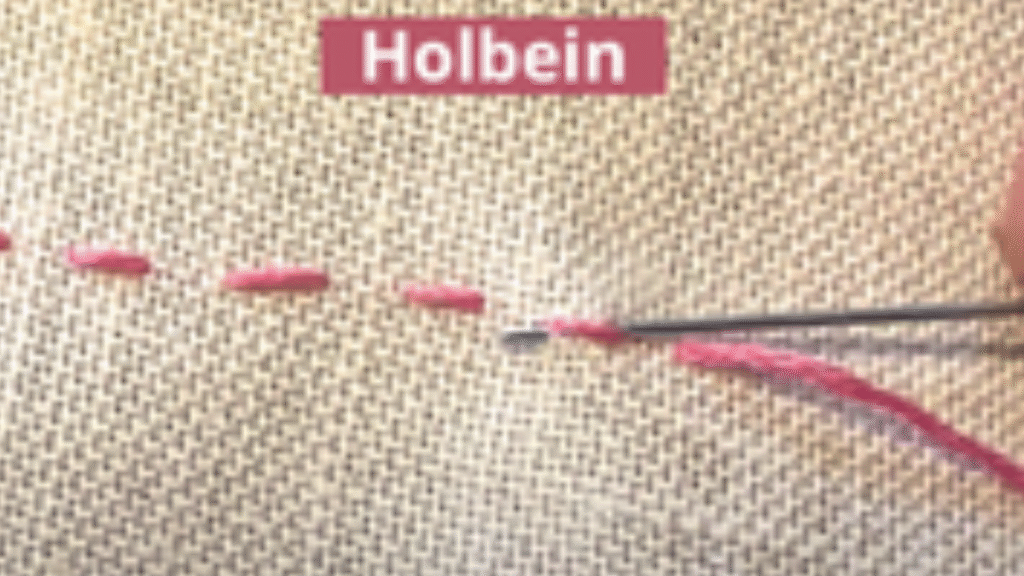
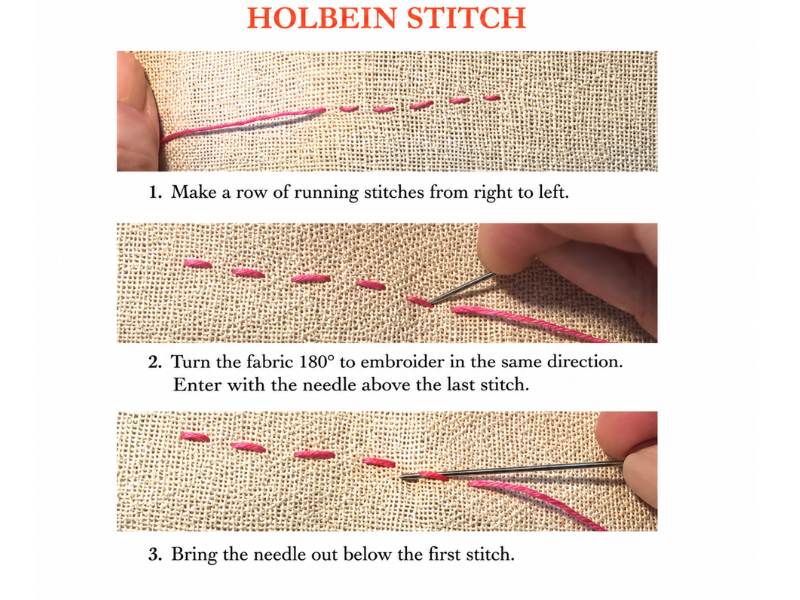
Bring the needle up from the back of the fabric at your first point. Work a row of running stitch, stitching from right to left.
Step 3: Complete the line coming back
Now turn the hoop 180 degrees and work back along the line, completing the stitch in the opposite direction. You’ll see how your line looks perfect from both sides.
Take the needle in just above the last running stitch of the first pass, and bring it out just below that stitch. Carry on stitching to fill in the gaps you left on the way out.
Step 4: Carry on with your design
Follow this pattern until your design is complete. The best thing about Holbein stitch is that every line feels like a dance of thread across the fabric.
Darning stitch: the technique that brings fabric back to life
If Holbein stitch is elegant and geometric, darning stitch is a genuine act of love toward fabric. This technique is used to repair textiles or create decorative effects, and it’s also fantastic for creative, artistic projects.
Darning means covering worn threads or holes in the fabric with new thread, either following the weave of the original cloth or creating your own designs. It’s a way of giving your clothes, or an old piece of embroidery, a second life.
How to work darning stitch step by step
What you’ll need
- Fabric
- Fine thread, matching the fabric or contrasting with it
- A fine embroidery needle
- A hoop, optional
Step 1: Prepare the area
If you’re repairing something, gently trim the broken threads and tidy up the area. If it’s decorative, mark out where you’re going to work.
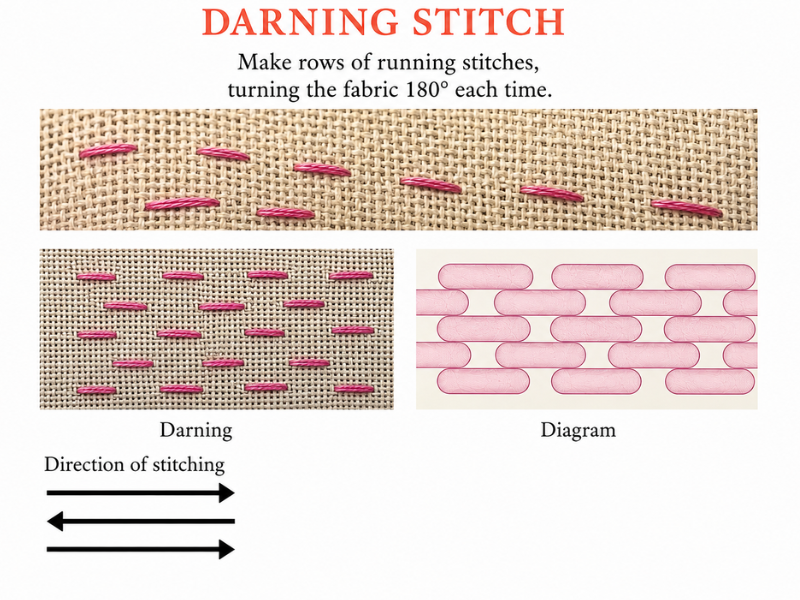
Step 2: Rows of running stitch
The easiest approach is to work rows of running stitch, always stitching from right to left and turning the hoop as you go. The stitch length will vary between the front and the back.
You can watch it on video if you’d like:
Tips that will change the way you stitch
- Always keep your thread tension consistent, especially with Holbein.
- Don’t get frustrated if a stitch looks crooked. Often a small adjustment fixes everything.
- Practice on scraps of fabric before taking on a big project.
- Experiment with colors and textures. Darning can become an incredible decorative element in its own right.
Frequently asked questions about Holbein and darning stitch
Is Holbein stitch only for traditional embroidery?
Not at all. You can use it on clothing, pillows, tablecloths, or even as a detail in modern framed pieces.
Do I need experience to try darning stitch?
No, only patience and care. The lovely part is watching the thread transform the fabric.
Which thread works best for each technique?
For Holbein, stranded cotton floss works perfectly. For darning, a fine, sturdy thread, ideally the same fiber as the fabric if you’re repairing it.
Can I combine the two techniques?
Of course! Plenty of stitchers use Holbein for outlines and darning for fills or creative details.
Stories and tricks that changed how I stitch
I remember the first time I worked Holbein stitch, on an old handkerchief of my grandmother’s. Every perfect line filled me with pride and emotion.
Later, with darning, I was able to repair a tablecloth I thought was lost for good. There’s nothing like the feeling of bringing a piece of fabric back to life, and it’s easier than it looks.
Now I want to hear from you. Have you tried either of these techniques? Do you have an embroidery story that has stayed with you?
Leave me a comment and share your photos or your memories. Stitching isn’t only a technique, it’s a quiet conversation between the thread, the fabric, and our hands ^^