Learn how to start your two-needle knitting work with this definitive beginner’s guide. Master casting on, choosing your materials, and handling both needles with foolproof tricks and plain language. Start your creative adventure today!
If you’re here, it’s because you felt the call. You saw gorgeous yarn in a shop, or someone knitting on the train with enviable calm, and you thought: “I want that.” I understand completely. Knitting has something magnetic about it. It’s that mix of rhythm, texture, and the incredible satisfaction of saying “I made this.”
Let’s be honest, though. At the start, staring at two metal sticks and a tangled ball of yarn can feel a little intimidating. Where do you begin? Which needle is the right one? Why does my knitting look like a colander? Relax. We’re going to work through all of it step by step.
This post may contain affiliate links. If you buy through them, you’re supporting my work (at no extra cost to you).
Materials for starting your first knitting project
When you’re starting out, the temptation to buy the entire aisle at the yarn shop is real. I know, I’ve been there too. To avoid frustration, though, what you need is quality, not quantity. You don’t have to take out a second mortgage, but choosing your materials well is the difference between enjoying the process and wanting to throw your needles out the window after ten minutes.
Needles: your new best friends
Not all needles are alike. They come in metal, bamboo, plastic, and wood. To start your first project, my recommendation is emphatic: go for bamboo or wood.
Why? Because metal is slippery. As a beginner, your stitches will constantly try to escape, and that’s stressful. Wood grips the yarn a little more, giving you the extra control you need while your fingers learn the movements.
As for size, look for something in the middle. Not toothpicks, not tree trunks. A US 8 (5 mm) or US 9 (5.5 mm) is the sweet spot. You can see the stitches clearly, you make progress quickly (vital for staying motivated), and your hands don’t tire out as fast.
Yarn: don’t be seduced by the pretty colors
I know that yarn with the fuzzy halo, the sequins, and the neon color changes is calling your name, but run! For now, at least. Your first project needs yarn that makes things easier on you.
The ideal choice is a wool blend (wool and acrylic) or a smooth, chunky cotton. Avoid dark colors (black, navy), because you won’t be able to see where to insert your needle. Go for light or vibrant shades where every V of every stitch is crystal clear. Make sure the yarn weight matches your needles (the ball band always has a little diagram with the recommendation).
The extra survival kit
Besides needles and yarn, keep these handy:
- Scissors that actually cut.
- A tapestry needle (like a sewing needle but thick and blunt) for weaving in your ends at the finish.
- Stitch markers (simple clips or scraps of yarn in another color work fine).
Setting the scene before you start knitting
Before you dive into casting on like there’s no tomorrow, there are a couple of things I’d like to tell you. Knitting is an exercise in patience and in connecting with the present moment. If you sit down carrying stress from work, don’t expect your first row to come out perfect.
Take a moment to feel the yarn in your hands. It smells like home, doesn’t it? Settle into a spot with good light (essential for not straining your eyes) and a comfortable back support. Your shoulders will thank you after an hour of click-clacking.
Understanding the ball band
That little paper wrapper around the skein isn’t trash. It’s the instruction manual. It tells you:
- The weight (grams or ounces) and the length (yards or meters).
- The fiber content (is it merino, cotton, synthetic?).
- The recommended needle size.
- The gauge, which is the set of numbers telling you how many stitches fit in a 4 by 4 inch square. Don’t obsess over this yet, just know it exists.
The first big step: how to cast on
Casting on is basically creating the base you’ll build your whole project on. It’s like laying a house’s foundation. If it’s crooked or too tight, everything above it suffers. Don’t panic, though, because there are tricks to make this flow.
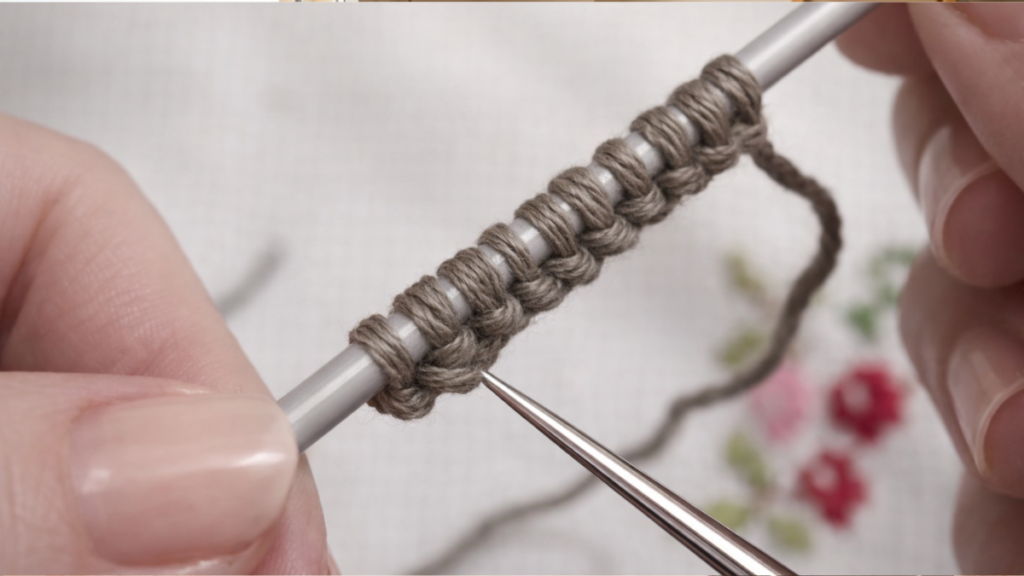
There are a thousand ways to cast on, but I’m going to teach you my favorite for its stretch and because it works for almost everything: the long tail cast-on.
Measuring your tail: the great yarn dilemma
First you need to leave a tail long enough to work with. A grandmother’s trick that never fails: wrap the yarn around the needle once for every stitch you plan to cast on, then add a hand’s width extra. That way you won’t run out with three stitches left to go, which is maddening, believe me.
The slip knot: your project’s anchor
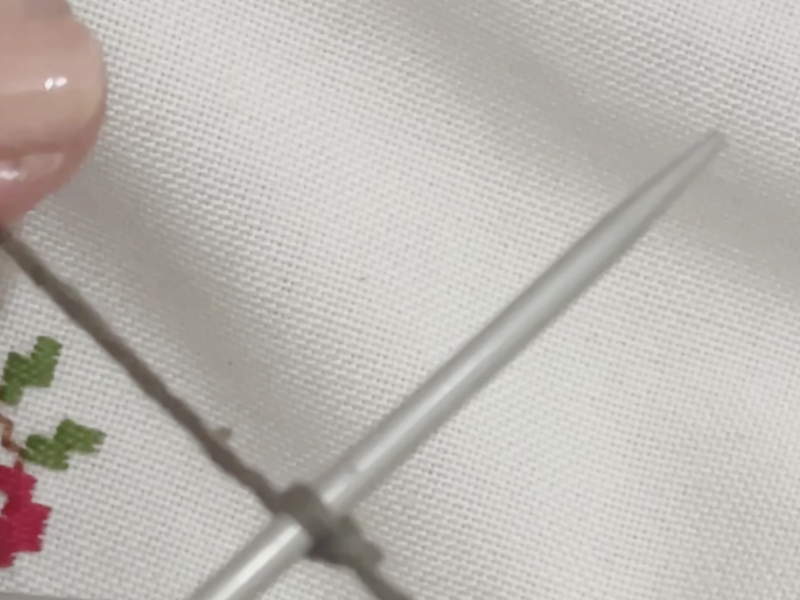
Make a loop with the yarn, put your fingers through the middle, and pull the long tail out. Ta-da! You have your first stitch. Slide it onto the needle and pull gently. Don’t tighten it like your life depends on it. The needle has to be able to glide through the stitch effortlessly.
The pinch or slingshot technique
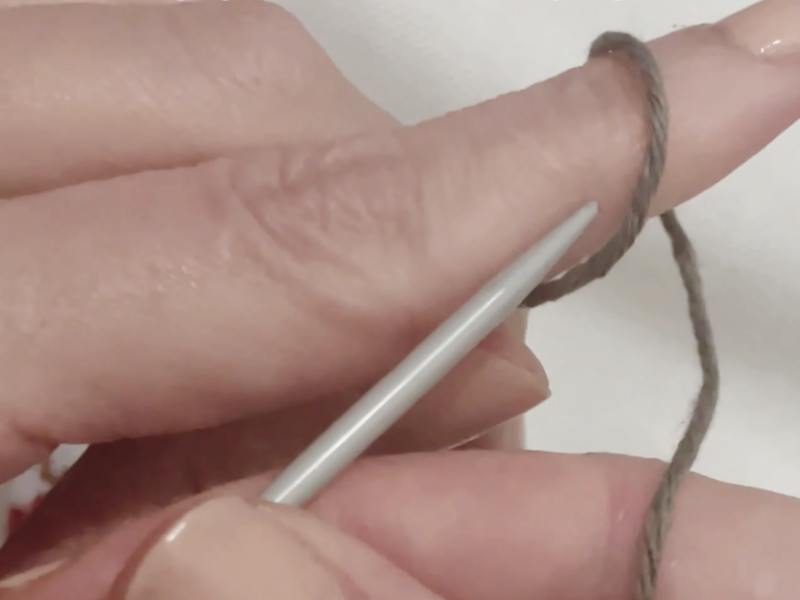
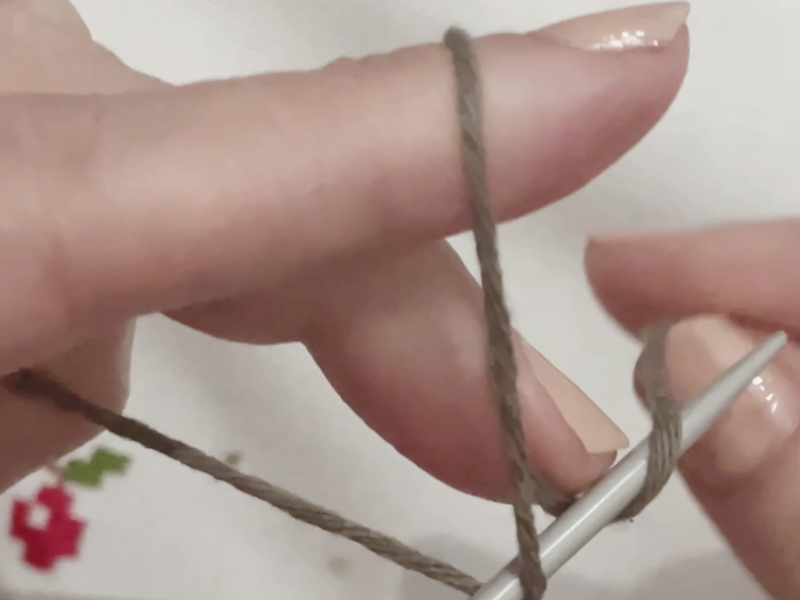
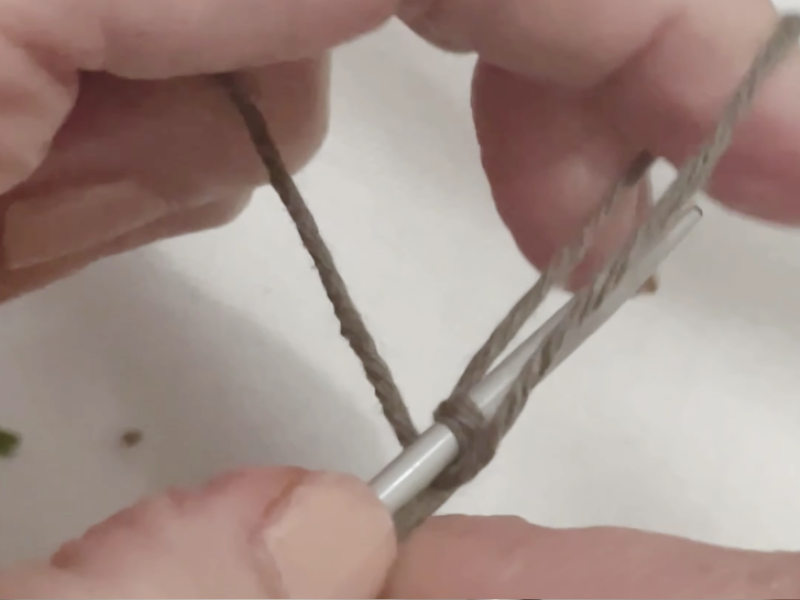
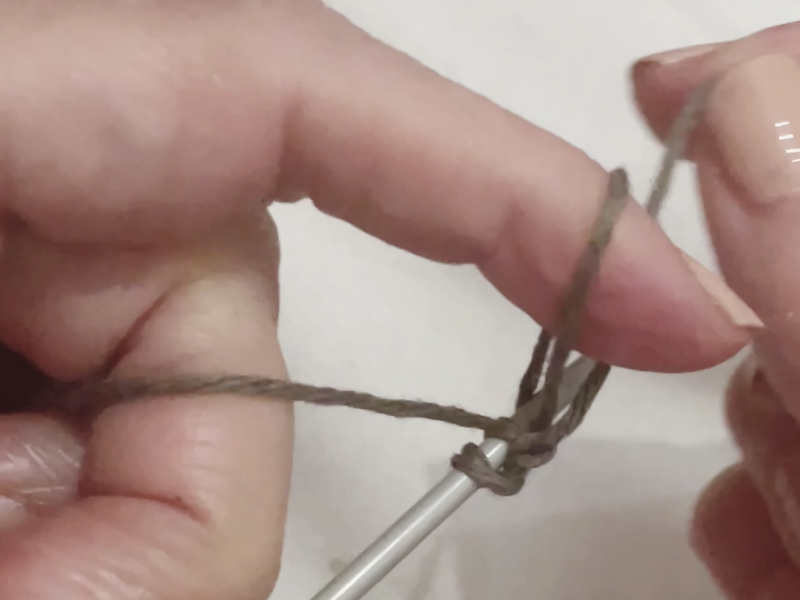
Hold both strands (the one going to the ball and the tail) with your pinky, ring, and middle fingers. Slide your index finger between the two strands and spread them apart. You’ll see a kind of slingshot form.
- Bring the needle down toward you.
- Pass it under the strand on your index finger (from the outside in).
- Hook the strand on your index finger.
- Pull it through the opening that formed.
- Release your thumb, tension again, and there’s another stitch!
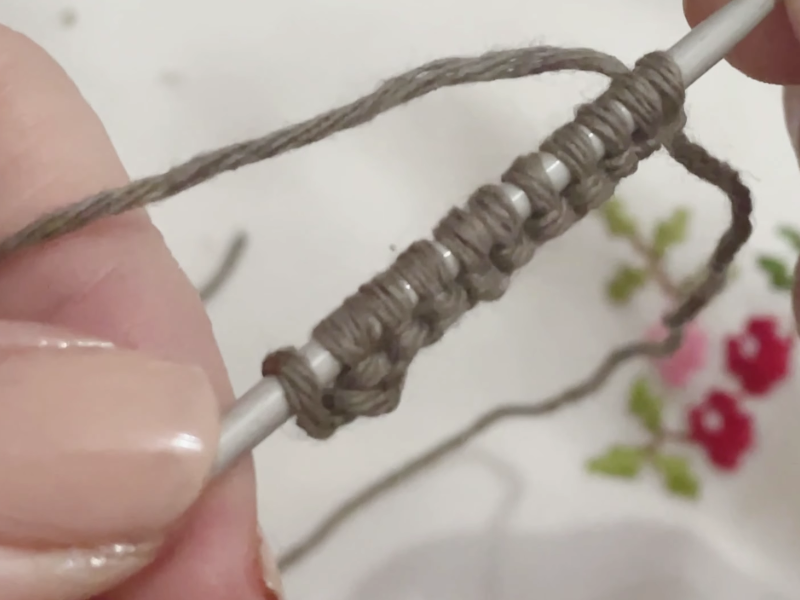
Repeat this until you have, say, 20 stitches. Keep a rhythm and don’t rush. If they’re coming out very tight, a pro trick is casting on over both needles held together and then sliding one out. That way your first row won’t be an ordeal to knit.
If you still have questions, watch the video on YouTube, since one image is worth a thousand words.
Your first master move: the knit stitch
If casting on is the foundation, the knit stitch is the main brick for starting your project. When we work every row this way, it’s called garter stitch. It’s the most forgiving stitch in the world because it creates a squishy, stretchy texture that hides every beginner mistake.
The dance of the needles
Hold the needle with the stitches in your left hand and the empty needle in your right.
- Insert: put the right needle into the first stitch on the left needle, from bottom to top and left to right. The right needle should end up behind the left one, forming an X.
- Wrap: take the strand coming from the ball and bring it over the right needle (from back to front).
- Pull through: very carefully, use the tip of the right needle to draw that strand through the old stitch. Now you have a new loop on the right needle.
- Drop: slide the old stitch off the left needle.
That’s it! You’ve knit your first stitch. Keep going to the end of the needle. When you finish, swap the needles between hands and start again. At first your fingers will feel like they’re made of wood, but I promise that after ten rows your hands will start moving on their own. It’s pure muscle memory.
The flip side: the purl stitch
To become a knitter with real range, you need to meet the knit stitch’s rebellious sibling: the purl. It’s the exact opposite and, though it seems a bit fussier at first, it’s essential for the famous ribbing (the cuffs on sweaters) and for stockinette (smooth on one side, little bumps on the other).
The key difference: yarn in front
To knit, the yarn always sits at the back. To purl, you have to bring the yarn forward, between the two needle tips.
- Insert: put the right needle into the stitch on the left needle, but this time from right to left and in front of the left needle.
- Wrap: bring the yarn over the right needle.
- Pull through: push the right needle backward so the yarn passes through the center of the stitch.
- Drop: let the old stitch fall off the left needle.
How to read your knitting: knit or purl?
This is essential for not losing your place. A knit stitch looks like a small V. A purl stitch looks like a horizontal bump, like a tiny scarf or a little knot.
Learning to tell them apart gives you superpowers. You’ll no longer need to count rows obsessively, you’ll just look at your work and it will tell you what comes next. See a V, knit. See a bump, purl. That’s how simple the secret language of yarn is.
Tension: that zen balance between tight and loose
One of the biggest challenges when you start knitting is tension. Beginners tend to have two modes: “boat mooring mode” (so tight a needle can’t get in) or “fishing net mode” (stitches so loose the fabric looks like a colander).
Listen to your hands. If they ache or your fingers turn white, you’re squeezing too hard. Relax your shoulders, breathe, and let the yarn run through your fingers naturally. The trick is for the stitch to hug the needle while still sliding along it without any force.
The guiding finger trick
To control the yarn coming from the ball, I like to run it over my index finger and then loop it once around my pinky. That creates a natural brake. You decide how much yarn you release. There’s no universal “correct” way, so find the hold that feels most fluid to you. If you’re a tight knitter, go up half a needle size from what the yarn calls for. If you knit loosely, go down half a size.
Ribbing: the classic start to any project
If you’re thinking about making a sweater or a hat, you won’t want the edge curling up on itself (which always happens if you only knit). To prevent it, we begin with ribbing.
It’s like a dance: one knit, one purl.
- Knit one stitch (yarn in back).
- Bring the yarn forward (between the needles).
- Purl one stitch.
- Bring the yarn back again.
Remembering to move the yarn front to back is a little confusing at first, but it’s what makes the edge stretchy and gives it that professional look. Skip the step of moving the yarn and you’ll create a hole (a yarn over), which is the number one rookie mistake.
How to fix the gremlins of your first few rows
When you’re starting out, it can seem like your knitting has a mind of its own, and strange things happen. Don’t panic, there’s nothing here that can’t be fixed.
Why do I have more stitches than I started with?
This is extremely common when you begin. It usually happens for two reasons:
- At the start of the row you pull the yarn upward and the first stitch looks like two. Careful! Make sure the yarn is pointing down before you insert your needle.
- You made an accidental yarn over while moving the yarn between positions. If you end up with extra stitches, no problem: knit two together on the next row and nothing ever happened. We’re learning here, so imperfection is allowed.
The mystery of dropped stitches
If you spot a loose loop unraveling its way down, stop! There’s no need to rip everything out. Grab a crochet hook or the tip of your other needle, catch that loop, and work it back up, hooking it through each horizontal strand until you reach the top. It’s like climbing a ladder.
Why the first row matters so much when you start knitting
The first row after casting on is the hardest. The stitches are a little rigid and it’s tough to get the needle in. Be patient. Once you clear that hurdle, the second row will be far easier.
One golden tip: don’t knit the first stitch of each row. Just slip it from the left needle to the right without working it. Why? Because that creates a clean, braided side edge (the selvage), which makes seaming pieces later a walk in the park, or keeps a scarf straight and pretty.
Frequently asked questions about starting your first knitting project
What do I do if I run out of yarn in the middle of a row?
Never tie a knot in the middle! Ideally you start the new ball at the beginning of a row. If you have no choice, join the strands with an invisible knot or simply leave both tails long and weave them in later with your tapestry needle.
Can I knit if my hands get tense or sore?
Take a break every 20 or 30 minutes. Stretch your wrists and open and close your hands. Knitting should be a pleasure, not punishment. If it really hurts, check your posture: you may be gripping the needles like they’re about to fly away.
How do I know how much yarn I’ll need?
It depends a lot on the stitch and the weight. Friendly advice: always buy one extra ball. Better to have some left over than to come up 30 feet short and find the shop is out of that dye lot (because yes, the color can vary subtly between lots).
Can I undo my work if I make a mistake?
Of course! In knitting we call it frogging, because you rip it, rip it. Don’t be afraid to unravel, it’s the best way to learn. Sometimes you have to take one step back to take two forward.
For a beginner, is natural or synthetic yarn better?
For your first practice swatches, a 50/50 blend is ideal. You get the warmth and stitch definition of wool with the durability and easy care of acrylic.
What do I do if my yarn splits while I’m casting on?
Sometimes, if we twist the yarn a lot while casting on, the plies separate. If that happens, let go of the yarn, let the ball dangle for a moment so it recovers its natural twist, and start again. Well-twisted yarn is easier to knit.
Is it normal for the first row to be so much harder than the rest?
Yes, completely. We tend to tighten up unconsciously while casting on. Don’t despair, by the third row you’ll notice the needle slides in on its own.
Can I start right away with whatever stitch I want?
You can, but it’s always better to begin with a few rows of ribbing or garter stitch (all knit) so the edge doesn’t curl up like a scroll. Give your project a solid frame.
How do I know if my yarn is too thin for my needles?
If you see more air than yarn between stitches, your needles are too big. The fabric should look dense but flexible, not like a fishing net.
What if I have extra stitches at the end of my first row?
You most likely worked into the leg of the previous stitch. It’s fine, carefully undo that row and start again. Better to fix it now than when you’re eight inches in.
The secret to a perfect edge: the slipped selvage stitch
When you start a project, the biggest fear is that the edges will come out chewed up or uneven. For your scarf, blanket, or sweater piece to rise as straight as a column, you have to master the selvage stitch.
The trick is as silly as it is effective: the first stitch of every row doesn’t get worked. You simply slip it from the left needle to the right as if you were going to knit it, but without wrapping the yarn. Doing this creates a chain of little spikes along the side that keeps the edge firm and stops it curling. It’s the difference between beginner work and work by someone who knows what they’re doing.
How to keep the start from gaping or going loose
Has the first stitch of your project ever looked like a giant hole? It’s a classic. To avoid it, give the yarn from the ball a slightly firmer pull as you work the second stitch of the row. That tightens the first stitch (the one you just slipped) and keeps the corner compact.
The leftover yarn dilemma: what do I do with the tail?
After casting on, you’ll have a piece of yarn hanging. Don’t cut it yet. That tail is your compass:
- It shows you which side is the right side of your work.
- It helps hold the fabric steady if the first stitch is wobbling too much.
- If a stitch at the base shifts out of place, you can use it to patch that start before weaving it in.
Why the first 5 rows matter: the settling in
Until you’re about 5 or 6 rows in, your knitting has no weight. That means the needles move around a lot and nothing seems to make sense. Don’t judge your work on row 2.
As you work through those first rows, the weight of the yarn pulling downward helps the tension stabilize. It’s like starting a run: the first few hundred feet feel strange, then you find your rhythm.
How do I know I’m on the right track?
Look at the base of your needles. If the stitches are lined up, there are no strange lumps, and the needle goes in with a pleasant little click, you’re doing great. If you notice the piece widening (because you added stitches by accident) or narrowing (because you lost some), stop, count your stitches, and make sure you have the same number you cast on.
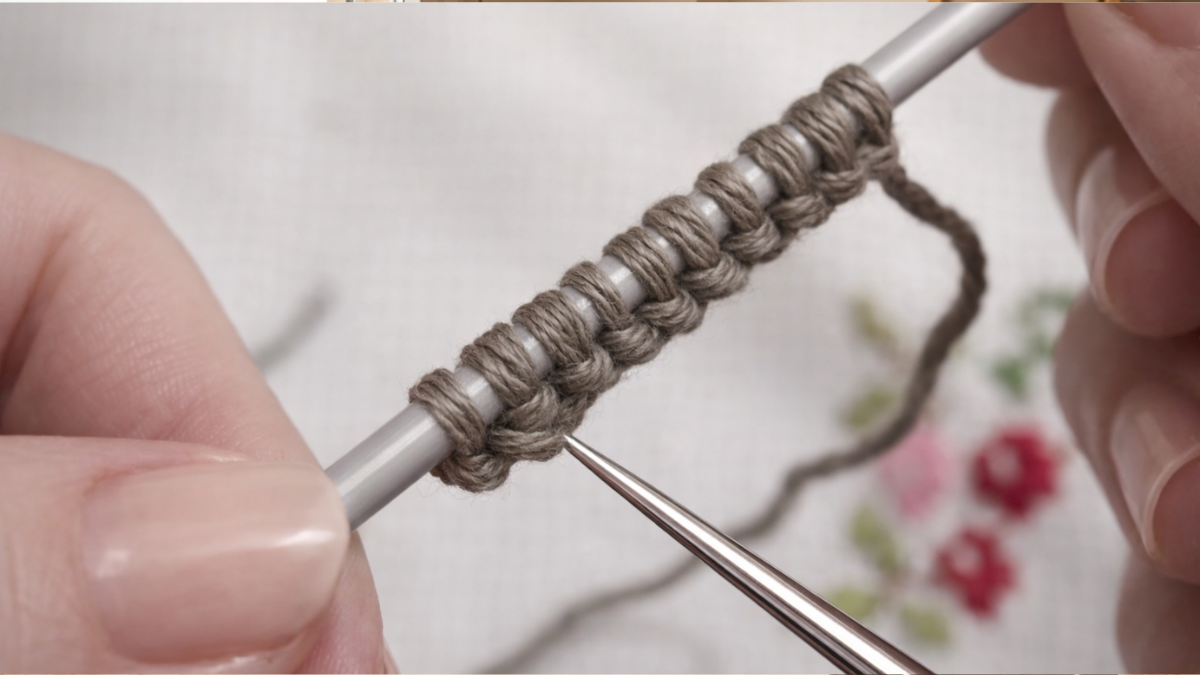
How to start your first knitting project on two needles
Total Time: 10 minutes
Set up your corner and materials
First things first, find a spot with natural light and a chair that’s kind to your back. Have your US 8 (5 mm) bamboo needles and a ball of soft, light-colored yarn ready. Remember that being comfortable is 50% of getting your tension right from minute one.
The slip knot (your first stitch)
Keep it simple. Make a loop with the yarn, put your fingers through the center, and pull the strand that goes to the ball. Slide this loop onto one of your needles. That’s your first stitch! Don’t tighten it too much, it should glide smoothly when you pull the needle.
Casting on
Using the pinch or slingshot technique (leaving a long tail of about 16 inches), cast stitches onto the left needle. Insert the needle, wrap the yarn, and draw the new loop through. Do this until you have about 20 stitches. That’s the base of your first practice swatch.
The first row (knit stitch)
Hold the needle with the stitches in your left hand. Insert the right needle into the first stitch from bottom to top, wrap the yarn over, and draw the new stitch through. Remember not to pull tight on this row, since it’s the hardest one because the stitches sit close to the base.
Settle the edge with a slipped selvage stitch
So your work doesn’t look like a scribble, starting on the second row, slip the first stitch from the left needle to the right without working it. This creates a lovely, professional chain along the side. Knit the rest of the stitches to the end of the row.
Tools:
- Knitting needles (wood or bamboo preferred),
- Scissors
Materials: One ball of medium weight yarn (DK or worsted).
Feel like picking up your needles and trying that selvage stitch I told you about? Tell me in the comments what you find hardest at the beginning. I’d be delighted to lend a hand and hear how you’re getting on!